If you’re still playing Destiny, chances are you’ve moved beyond beginners’ tips and into a whole new world of grinding, cheesing, and alt characters. It’s time you got a tips post that wasn’t written for babies.
We’ve already written some beginner’s tips, as well as an intro guide for getting your character past level 20. We’ve told you how to easily get a lot of glimmer, how to exploit severalparts of the new raid, and how to get that weird “Husk of the Pit” gun.
Now, it’s time for some pro-grade tips. If you’re serious about Destiny, if you want to get the coolest shit and play the hardest challenges, this is the place for you. Two caveats; first, these tips revolve around PvE and Vanguard stuff, since that’s what I and my Kotaku cohort spend the majority of our time on. There aren’t gonna be any major Crucible tips here, but if you have any to share, I hope you’ll share them below. Second thing: These tips assume you own the new add-on The Dark Below.
Everyone ready? Let’s go.
Make an Alt… OK, Make Two
Here’s the first big tip for high-level Destiny play: Make an alternate character. Hell, make two. If you’re extremely hardcore, you can make one or two alts in the same class, which will increase your chances of quickly getting full raid armour. But for maximum enjoyment, I’d suggest making one alt per class. That way, you’ll never get a piece of armour that someone can’t use, and you may well find that you prefer playing a different class from the one you started with. I’ll share some more advanced alt-ing tips in a bit.
Learn When Things Switch
Each day in Destiny resets at 1AM Pacific, 4AM eastern. At Tuesday’s reset, the new week also kicks over, meaning that your weekly mark cap resets, the weekly strike changes, and your raid progress and drops both reset. Xur turns up during the Friday reset and stays through the Sunday reset. (That means he’s not so much a “weekend vendor” as he is a “Friday-Saturday vendor.”)
Use the Public Event Tracker
Public events are still a great way to get faction marks, and to earn XP for new alts. While Bungie has changed up their timing a few times over the last several months, the Destiny public event tracker site is still pretty accurate. If you’re playing and find yourself doing patrol missions or idling in space, check the event tracker and you’ll probably find a public event on Earth or the Moon that you can go do. The Mothyards and Divide events remain the most consistent, the most well-populated with other players, and are easiest to access.
Find Groups With Destiny LFG
At the moment, the single best thing you can be doing is defeating Crota as many times as possible per week. That’s where the best weapons drop, the things that will be helpful when hard mode comes out in a week or two. To do that, you’ll need to have your alts leveled up to at least level 30, preferably at least 31, and you’ll need a group to play with.
If you don’t have a regular raid group, or your regular group members don’t all have alts, that’s where Destiny LFG sites come in. It’s usually a cinch to get a sub or two to fill in and help you beat Crota multiple times, and both DestinyLFG.com and DestinyLFG.net are thriving sites. Visit them, start inviting people to your party, and you’ll have a full group in no time. We’ve just begun to experiment with other services like The 100, but at the moment, LFG sites are the easiest and most reliable way to get warm bodies into your fireteam.
Use the Official Destiny App
Bungie’s Destiny app is surprisingly useful. Obviously, it’s a good way to keep track of your in-game stats for when you want to impress a first date with the exact number of hours you’ve spent playing this game. It’s also a good way to see what bounties are on offer on a given day, which can let you know whether it’s worth taking the time to fly in and pick up the good ones.
Keep These Two Checkpoints Handy
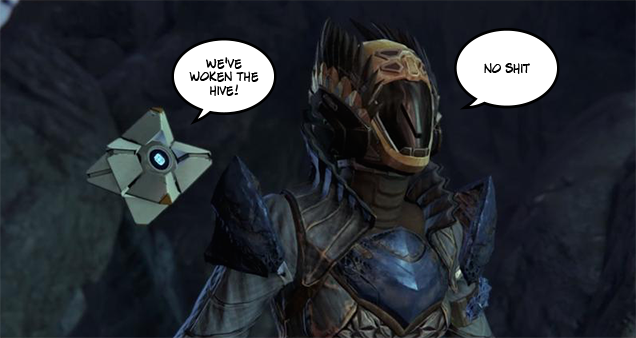
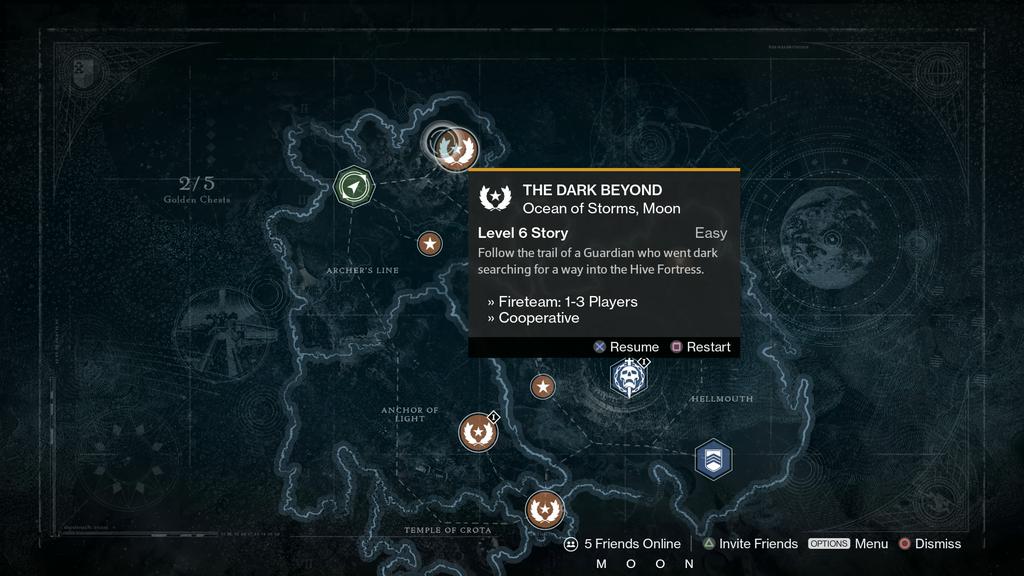
There are two mid-mission checkpoints that you’ll want to keep in order to make your life a lot easier. On “The Dark Beyond” Moon mission, maintain a level 6 checkpoint where you find the dead guardian, just before the door opens. (That’s the “We’ve woken the hive!” one.) In this post from here on out, I’ll call this “The Moon Door Checkpoint.”
On “The Exclusion Zone” mission on Mars, maintain a level 18 (the lowest heroic level) checkpoint right where you hack their orbital grid and Ghost accidentally alerts the Cabal to your presence. (That’s the “I guess that’s their fail-safe” one.)
The Moon Door Checkpoint is extremely useful for quickly grinding out a ton of different bounties, and the Cabal fail-safe checkpoint is helpful for grinding glimmer. It’s difficult to lose the moon checkpoint — if you hear Ghost talking about how he detects the light of a ghost, warp out to space and start over. However, if you mess up and kill too many of the Cabal, you might have to do the entire Exclusion Zone mission to get the checkpoint back — for some reason, I can’t get the mission to restart. The nice thing is, the checkpoints will carry over from week to week, and as far as I can tell, they never reset. Every time any of my characters loads up The Dark Beyond, they start right at the Moon Door. One dumb cutscene later, it’s time to clear some bounties.
Start Doing the Nightfall
I spent a while being intimidated by the weekly Nightfall strike. If your team wipes, you get booted out to orbit? And have to start the whole thing over again??? No thanks.
Then, I started doing them, and realised there’s nothing to be afraid of. Almost every Nightfall mission has an elemental “burn” associated with it, and at this point, advanced players likely have a whole arsenal of arc, solar, and void weapons. Team up with two friends sporting similar weaponry and you should tear through the Nightfall in no time. In fact, the Nightfall is usually easier than the vanilla level-30 weekly strike. Just remember to play conservatively, especially if you’re all on unfamiliar alts — one screw-up and even a good team can get wiped out.
The Nightfall gives you a (hopefully) pretty good drop at the end, but the real reason to do it is the 20% XP boost you get, which lasts until the weekly reset. Not only will your armour and guns level up faster, but you’ll get 20% more faction rep for every bounty you turn in. That means that Tuesday is the best day to do the Nightfall, since the XP boost will be in effect for the maximum amount of time.
Pick Exotic Bounties Wisely
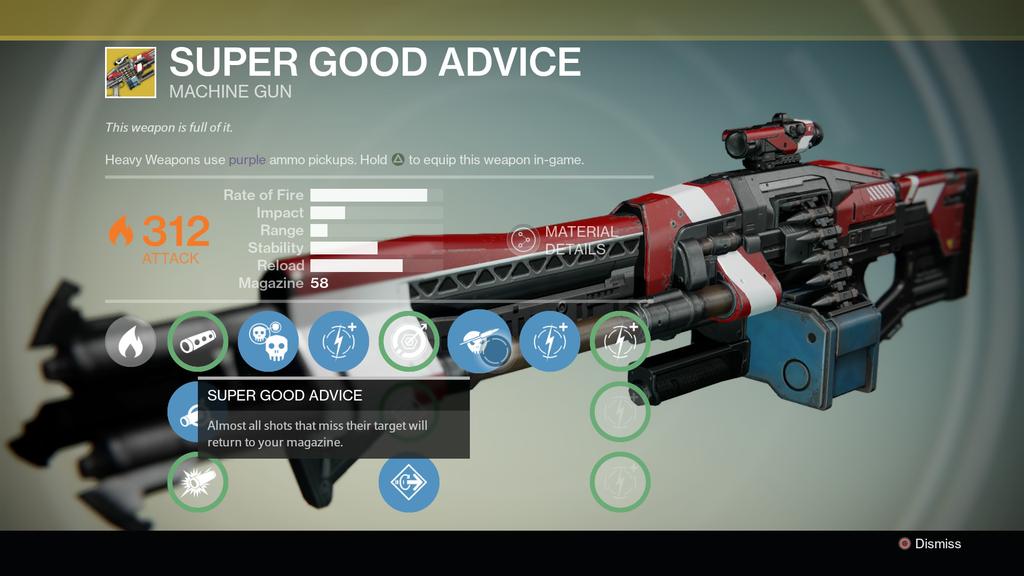
If you’re doing heavy trade in bounties, you’ll probably unlock exotic bounties pretty regularly. Choose them wisely, and make sure you check out what you’ll have to do before hand. There’s a list of all bounties at the Destiny wiki. These days, I generally stick with “A Voice in the Wilderness,” because I rarely play Crucible matches and it’s PvE only. I already have a leveled Super Good Advice, so I think of the bounty as a free exotic shard. “Shattered Memory Fragment” is the other non-Crucible bounty, but that one requires a lot of glimmer and this helpful site, which tells you whether the gunsmith is selling blue fusion rifles. But unless you’ve been stockpiling rare fusion rifles, the exotic shard you get from that bounty will feel less “free.”
Wait Until the Last Minute to Buy Anything
Sure, you’ve saved up enough marks to buy an exotic helmet for your hunter alt. Before you make the plunge, ask yourself… do I really need it right now? Last weekend, I was on the fence about the titan exotic helmet that Xur had. I held off for a day, and got it as a drop at the end of the Nightfall, saving myself a handful of strange coins and that feeling of stymied frustration that Destiny players know so well. Moral of the story: The longer you wait to buy something, the greater the chance that you’ll get what you need from a drop, or that you’ll realise that you actually want to buy something else. Wait until the last possible minute to buy anything, and it will save you time and trouble more than once. Of course, when you do buy something, you’ll probably get it in a drop anyway. Because Destiny.
Study Up on What Xur is Selling
Sometimes it can be hard to decide whether it’s worth spending strange coins on the armour and weapons Xur is selling each weekend. It’s usually a good idea to read through some message boards to see what seasoned players are saying about the gear on offer — I recommend the Xur Megathread that’s pinned to the top of the Destiny subreddit every weekend. In that thread, you’ll find a bunch of people who already own the gear in question explaining whether it’s worth buying, and what sort of player it complements.
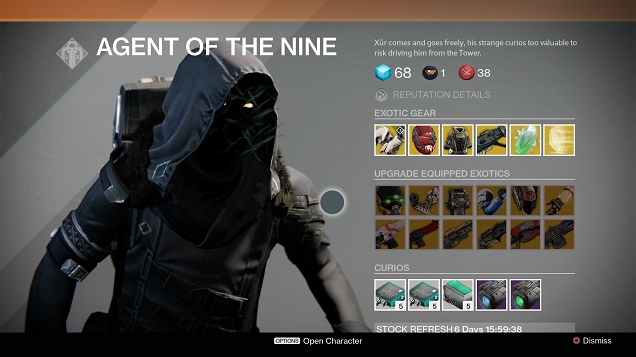
Buy Heavy Ammo and Telemetries From Xur
The more you play Destiny, the more Xur will disappoint you. That’s because he only carries exotic weapons, and the more exotics you have, the more likely it will be that he’s selling stuff you don’t need. These days, two of the best things Xur can sell are heavy ammo five-packs and weapon telemetries. Those things at the bottom that you used to gloss over while perusing his exotic wares are actually a great way to spend all the strange coins you’re getting from cheesing the Weekly with your alts. Heavy Weapon ammo synths are useful for obvious reasons, and telemetries stack their XP boost on top of the Nightfall bonus, meaning that you can level up a new weapon in a day or two across all three characters. Even if you don’t have an immediate need for a given telemetry, it’s worth stocking up on a few if you use the type of gun a lot.
Hang Onto Your Motes of Light
This one’s just a theory, but: We can’t shake the feeling that motes of light are about to become more useful. Time was, the only non-cosmetic thing you could spend motes on were the exotic engrams Xur sold on weekends, but lately, he’s gone a few weeks without any engrams at all. Meanwhile, more and more players are getting more and more motes, and Eris Morn is giving out 3 to every character that can kill ultras in the Nightfall each week. I’ve got more than 100 of the things, and it’s hard not to wonder if they’re going to become more useful in the near future. We have no inside information and could be way off on this, and if you see a cool-looking engram this weekend, go for it. Still, maybe don’t spend ’em all.
Listen to Music While You Do Your Daily Routine
If you’ve played more than 100 hours of Destiny, chances are you’ve seen and heard just about everything the game has to offer. If you’re grinding out the daily mission or bounties, try turning down the TV and listening to some nice music while you play. I’ve been listening to lots of old records while I play, and the combination of 1950s pop records and silent, T-rated video game violence is surprisingly soothing.
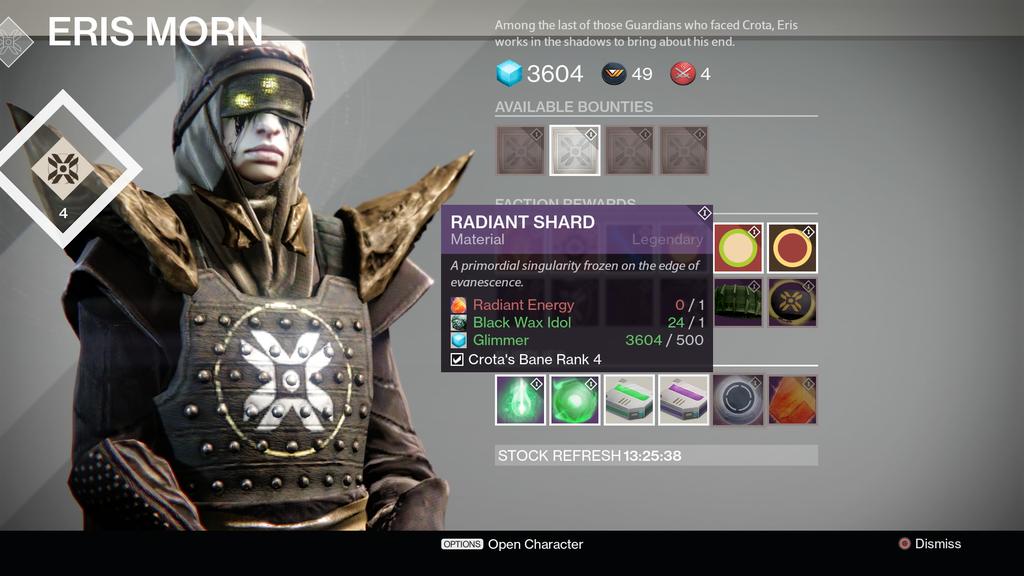
Eris Morn Rep Matters, and There’s a Trick to It
Before we get into high-level bounty theory, one other thing: Eris Morn rep matters. You should be clearing all of her bounties every day you can until you reach level 4. That’s because at level four, you’ll be able to convert radiant shards into radiant energy, and vice versa. If you’ve been doing the raid several times per week, you’ll know that that’s a big deal, and it’s the key to hitting level 32 and getting the most out of your raid loot.
The good news is that most of Eris Morn’s bounties are a cinch to pull off. Most of them can be completed at the glorious Moon Door Checkpoint, and the two Blade-related ones can be completed at the start of the “Fist of Crota” mission.
There’s also a trick to getting more bounties done in a day, though it’s easier for some time zones than other. To do it, you’ll want your character to be in the Tower at the moment the new day kicks over (That’s at 1AM Pacific, 4AM Eastern). When the new hour hits, go to Eris Morn and get all the bounties she’s offering. Go do them, turn them in, and log out. When you log back in, she’ll have a fresh set of bounties for you. I did this trick every night for a week and that, combined with the Nightfall rep bonus, made it pretty painless to get from level 3 to level 4.
Be Smart About Bounties
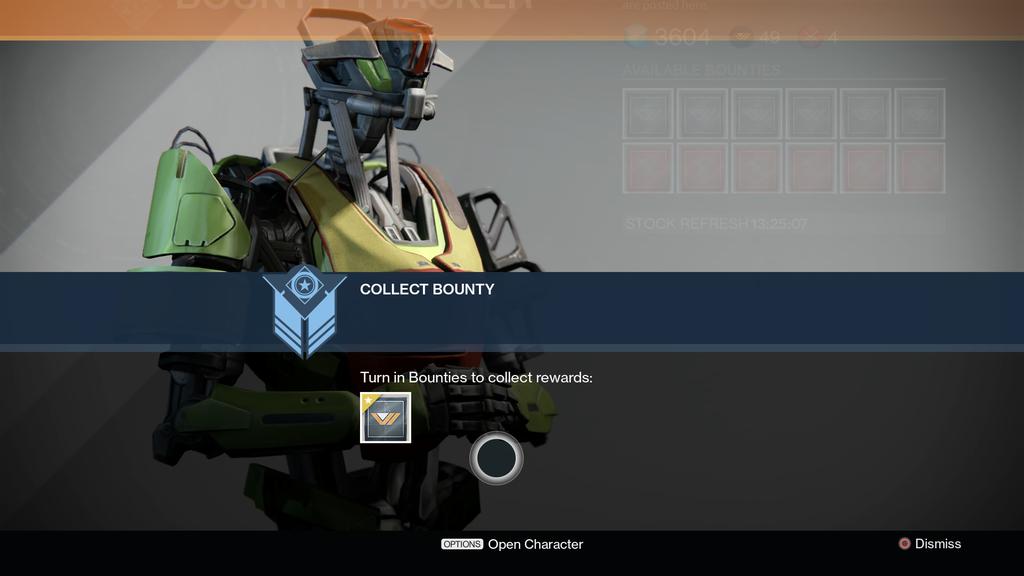
Bounties are everything in Destiny. You should almost never be doing something that isn’t somehow tied to a bounty, particularly given that you now have 10 bounty slots. If you don’t have time to play in a day, it can still be worth taking five minutes to run your characters into the tower and grab the best/easiest bounties to clear for later, when you do have time to play.
Of course, all bounties are not created equal. If you’re trying to grind out faction rep or level up a gun, focus on the easiest bounties first, and do them across all three of your characters. Here are the bounties that you’ll want to grab any time you see them.
Bounties to Take:
- Complete 6 Patrol Missions: Grab these, but only if they line up with other bounties like relic harvests or public events. Otherwise, they’re too time-consuming. Cosmodrome and Moon are the fastest two, followed closely by Mars. I almost always skip Venus, because Venus patrol missions take forever. The only time I’ll take the Venus bounty is if it’s alongside the “Kill 10 Vex Majors/Ultras” or a relic harvest bounty, and I can complete two for the price of one.
- The “Kill Stuff” bounties – Kill 100 enemies without dying, get 100 headshots, melee-kill 30 enemies, kill 20 enemies without taking damage. Grab these immediately for all your characters. They’re a cinch and you’ll do them without even trying. (OK, the headshots one takes a little focus, but you can always just go use the Moon Door to do it.)
- Fusion rifle multi-kills – I used to drive myself nuts trying to do this out in the open world, but the secret, as with so many bounties, is to just go to the Moon Door Checkpoint and unleash fusiony Hell for a couple of reps. Bada bing, bada boom, bada five thousand XP.
- Relic Harvests – These are a cinch. Take ’em, you’ll fill them one way or another without even trying. The fastest way to do these is by doing heroic missions or strikes on the planet with the bounty, and remember that you get 20 relics per major/ultra, so if you can double up one of these bounties with a majors/ultras bounty, you’re golden.
- Kill Majors/Ultras – Always, always take these. They’re high-yield and easy. You can kill Hive majors in the downstairs area directly to the left of where you land on Earth. Vex majors can be found over to the left two areas from where you drop in. Cabal majors can be found at the “Exclusion Zone” checkpoint you hopefully already have saved. Fallen majors don’t really congregate, but will turn up at any warsat-defence or extraction crew public events, and there’s a yellow vandal who deploys regularly from a dropship in the Divide.
- Target: Banuk, Ur Prince and Target: Simiks-3 – These two story bounties are really easy to clear, since they’re both for the first ultras who turn up on their respective missions. Kill the target and bail out; no need to finish the rest of the mission.
- The Nightfall Bounty – If it’s anywhere near Tuesday, take the “The Bigger They Are” bounty for completing the Nightfall strike. It’s worth 5,000 XP and you’re gonna do the Nightfall anyway. Plus, if you turn it in after finishing, you’ll get the Nightfall XP bonus on top.
- 3 Public Events – This one’s worth doing as well. You should probably be doing public events regardless, and you’ll earn a gold rating on nine out of ten public events you start. (The only real challenge is if you wind up soloing an “eliminate the target” event with the wrong gear equipped.) It’s a big payout for something you’d probably be doing anyway, which is the best type of Destiny bounty there is.
- Eris Morn’s Nightfall Bounty – Every Tuesday, Eris Morn gets a bounty for killing 10 majors or ultras during the Nightfall strike. It’s worth a healthy amount of XP and gives you three motes of light, and even if you forget to get it during your actual Nightfall run, you can usually go in and get the 10 kills solo.
- Most other Eris Morn Bounties – The majority of Eris Morn’s other bounties are easy to complete. As I mentioned before, for the two tied to the Blades of Crota, load up “The Fist of Crota” mission, fly your sparrow straight into the building behind Omnigul, and kill the sword-bearer there. If you need to kill hive with the sword, run back out to where you just were and, if you’re careful of cursed thralls, you should be able to get 15 kills. For every other Eris Morn bounty, go to the Moon Door Checkpoint. Skip her bounties that are tied to killing wizards, and her story mission/strike bounties, unless you’re trying to get your Eris Morn rep to level 4, in which case, Godspeed.
Bounties to Skip:
- Story bounties – These days, I skip just about every story mission and strike bounty, unless it happens to be tied to the weekly strike or the daily story mission. Sure, most of them pay double the XP of the easier bounties, but they take so much longer that I can usually bang out at least two shorter bounties in the same amount of time.
- Get 9000 XP without dying – This one’s fine, if you have room for it, I just find that it takes longer than I’d like and it can be annoying avoiding difficult missions while trying to finish it. Plus, it’s only worth 2,500 XP. I generally skip it.
- Complete a strike without dying – By all means, take this one if you’re going to be doing a bunch of strikes and you have room, but as with most “don’t die” bounties, it’s kind of annoying.
Cash in Your Bounties Wisely
Once you’ve got all your bounties set, deploy them wisely. Remember, bounty xp goes into whatever you have equipped. If you’re trying to level up a gun, save up as many bounties as you can, then activate a telemetry for the gun and cash them in all at once. With the time you have remaining, go do the daily story mission. If you’re trying to get more crafting materials for an alt (more on that in a second), cash in bounties to level up your extra armour before breaking it down. Always think about what you have equipped when you’re cashing in bounties; if it’s at all possible, equip un-leveled guns while cashing in bounties, even if you don’t plan to actually upgrade the gun in question. Squeeze as much utility out of every bounty as you can.
Raid Smart!
Here are a few tips for getting the most out of Destiny‘s new Crota’s End raid.
- Get a regular raid group. This one seems obvious, but it’s worth underlining — if there’s any possible way you can get in with a regular group, do it. A core group develops an easy camaraderie while completing the raid each week, and it can be a ton of fun to come up with nicknames, both for one another and for the various enemies you’ll fight. Raid buddies will likely also turn into Nightfall and Weekly Strike buddies, and it’s good to have an ever-growing roster of people to play with. Destiny requires you to go outside of the game to build up a good group of friends, but it’s worth taking the time to do so.
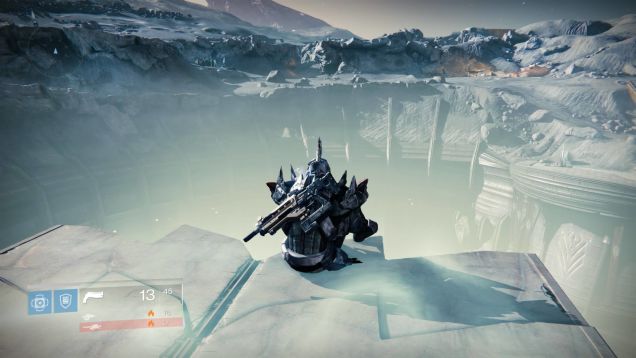
- You can easily get through the first two drops solo, and get the second one on the bridge with just one or two cheese-buddies. The first shard/energy chest can be found to the left as you walk into the raid, as demonstrated here. As of this writing, the first drop can also be easily cleared by jumping up to the ledge above the second lantern. (Bungie might still patch this at some point.)
- Pillage the second chest with your alts. When your group gets the chest at the end of the timed hallway, take the opportunity to have everyone cycle in all of their alts and grab that chest. Just make sure someone volunteers to be the fireteam leader and sticks around to revive everyone as they warp in. This can be done pretty quickly and is a really easy way to get that chest for all your characters.
Get the Most Out of Your Alts
If you don’t yet have two alts, here are some tips to get fresh characters up to snuff quickly.
- Focus on bounties, not story missions. Play story missions until you’ve unlocked the Moon, Venus, and Earth, then mostly focus on Bounties. Come back to your alt each day and do whatever bounties you can — don’t power them through the story. If you take your time, the cumulative time spent getting your alt from 1 to 20 will (counterintuitively) be much less than if you try to do it in a day or two.
- Do at least one public event per day. When you’re levelling up a new alt, do at least one public event per day, even though you won’t get marks for it. That’s because you’ll get a letter at the postmaster in the Tower each time you do your first daily public event, and picking up that letter will get you a solid chunk of XP.
- Only do big-circle story missions, leave the small missions for when there are bounties. The big-circle missions are the only ones you “need” to do to unlock all four planets.
- Save blue armour engrams for your alts. Whenever you get a blue armour engram with your main, throw it into the vault and decode it with your alt. That will give you more armour to break down, which will give you more precious crafting materials.
- Aim to get your alts to level 27. That way, you can at least enter Crota’s End (heh) and the weekly Nightfall strike. Once you’re 27, one good strategy can be to get to the very end of the Nightfall, get the boss to a sliver of health, then swap in your level 27 character and have one of your teammates kill the boss. With a little teamwork, you can cheese your level 27 character through the first two drops in Crota’s end, which in a couple of weeks should net you some raid armour, which in turn will help you get to level 30 and 31 without too much trouble. Then, you can start to actually contribute!
- You can get free legendary gauntlets from Eris Morn, so plan to buy different armour. Of course, the mission that you have to do to get the gauntlets is kind of a time-sink, but it’s not too bad if you’ve got some friends to help out. If you’re trying to get up to level 30 quickly, free 33-light gauntlets can significantly speed you along.
- Buy an exotic helmet first, since that’s the hardest 36-light helm to get. You’ll probably get gloves, boots and a chestpiece from the raid pretty easily, but the helmet is the rarest raid armour drop. If you have a chance to buy an exotic helmet from Xur, take it, unless the helmet is awful.
- Dump XP into your extra armour. If you’ve got alts, you’ve probably got a shortage of the class-specific crafting material you’ll need to upgrade your armour. In order to get more, equip blue and green armour when you cash in bounties, then break it down once you’ve unlocked all of that armour’s upgrades. (You don’t have to actually buy the upgrades, just unlock them.) You’ll get three or four pieces of material instead of one, and that adds up quickly.
- Transfer all of your stuff at once. The most annoying thing about having an alt is that you’ll have to make multiple trips to the Tower to drop off your gear, then pick it up. No matter how smart you are about multi-tasking, you’ll always wind up in situations where you forgot to transfer one gun that you need, necessitating a depressing series of Tower visits to get it where it needs to be. While it may seem annoying, my personal preference is to get in the habit of transferring all of your vital gear (crafting materials included) every time I switch characters. That way, you’ll never wind up in a situation of, say, needing Patience and Time and not remembering who has it, and you’ll always know exactly how many radiant materials you have. The one exception to this is ammo packs: If you’ve been smart and picked up a bunch of heavy ammo synths from Xur, you can probably give all three of your characters a full loadout of ammo packs without needing to transfer them at the Tower.
Last tip: Play the Damn Game
Here’s a wild notion: If you’re playing the game… play the game. Don’t do strike playlists and leave your character idling at the start while the other two players beat the boss. Don’t camp out for public events and then leave yourself hidden while others earn marks for you. Don’t go AFK. Destiny is a lot of fun, so if you’re playing, play.

Those are our advanced tips for Destiny, accumulated over hundreds of collective hours with the game. If you have any additional tips, I hope you’ll offer them below. Now if you’ll excuse me, I’m gonna go do the Nightfall, because it takes like fifteen minutes this week.
To contact the author of this post, write to kirk@kotaku.com or find him on Twitter @kirkhamilton.
Comments
16 responses to “Advanced Tips For Playing Destiny”
“When your group gets the chest at the end of the timed hallway, take the opportunity to have everyone cycle in all of their alts and grab that chest.”
Please don’t do this. The raid itself is laughably easy and quick to get through with a half competent team, just get it on your alt. runs. Wasting everyone else’s time to log in and out and in again however many times isn’t cool, especially with pick-up LFG groups, unless of course everyone in your fireteam is up for it.
Now that the raid has been patched, you are right in saying that you may as well run the raid in it’s entirety on your alts and not worry about this trick (unless they are <30). Funnily enough, our fastest raid clear time was actually post patch and no cheese was involved.
I’ve had a similar experience, I no longer have a group of buddies to play with so rely soley on the LFG sites, once manged to land in a team of randoms and finished Crota’s End in about 35 minutes with no cheese prior to the patch. Then we all split up and never played together again.
On the other side of the coin I got into a group last night that was on the bridge section for over an hour, so many players with nice gear from cheesing, then lying about having experience with legit, it’s awful.
“To do it, you’ll want your character to be in the Tower at the moment the new day kicks over (That’s at 1AM Pacific, 4AM Eastern)” You want to be on your character but you do not want to be in the Tower, that will result in less bounties.
@jackunit13 If I had a dollar for everytime I’ve woken The Hive….
Poor Hive, they just wanna good sleep. :'(
I am beginning to get the feeling… That the Kotaku staff really like “Destiny”… Or no other games have come out since.
AFKs in Destiny pop up now and again. So scummy.
I’ve been playing Destiny again the past week. Great way to get through my Netflix queue 😉
If it’s during a strike and you have a sparrow that can do the bumper strafe move it’s possible to knock them into walls with this move and kill them. Won’t stop them from AFK’ing but it will stop them getting the complete a strike without dying bounty they typically seem to be after.
To restart a partially completed mission hit ‘X’ instead of ‘A’ when selecting the mission and again when selecting the difficulty. It won’t show the restart prompt when selecting the difficulty but it will ask to confirm if you want to restart when you hit launch mission.
I generally play Destiny with my wife and our TVs are only a few feet apart so I generally play with the volume down to keep the room from getting too noisy – we use the time to re-listen to old rooster teeth podcasts (though I’m considering getting into some new ones). If i’m playing alone I pop a movie or TV show on the PC.
Some people think if I can watch TV/listen to music/podcasts while playing the game then the game isn’t engaging. That’s not true. the game is great fun to play and I don’t mind how light the story is – I’ve really gotten into reading the grimoires via the Destiny app while commuting, and piecing together the world’s little mysteries. The fact is even if the story was dense I’ve run those missions and strikes a dozen times over. They’re still fun, but I just don’t need to hear the Exo Stranger tell me she doesn’t have time to explain why she doesn’t have time to explain, or the Queen’s brother ooze the words “exclusion zone” from his stupid punchable face.
I’ve been playing pretty steady since december, I’m at lvl 29 (one armour upgrade away from 30) and do at least 3 bounties every time I jump on and still haven’t seen an exotic bounty 🙁
yeah like most things it’s all down to RNG. I’ve probably killed a few hundred blades of crota since the DLC came out and still haven’t got Husk of the Pit.
Yea same, although I read that guide this article links to about the Blades at the start of the Fist Of Crota mission so I might give that a go. I’ve only actually seen one other person running around with a Husk in game.
Same – No Husk drop yet although I havent been farming for it – I have finished all the new quests and doing quests on earth and moon and that required killing a lot of the Blades of Crota.
But on the flip side I have had about 7 Exotic bounties completed (3 from this year) yet I dont play all that much.
I’m in the same boat with Husk of the Pit, but I did get very lucky with the Vault of Glass early on and had the gear to get to 30 after a couple of runs. I think Bungie’s over-reliance on RNG to attempt to disguise a lack of content is one of Destiny’s biggest issues, IMHO.
Try doing 6 bounties then.
Last last tip: Dont bitch about a lack of story / rng loot / lack of content etc…. the developers have heard it since day one and arent listening. They have a 10 year plan in place and they cant ruin it by listening th players so they choose to ignore you and do what they want.