Over the last year, the Nintendo Switch has built up an impressive collection of 2D side-scrollers and classic arcade games. Unfortunately, those games rely heavily the D-Pad, and the D-Pad on the Switch Pro Controller can be frustratingly unreliable. Last weekend I fixed mine, and you can, too.
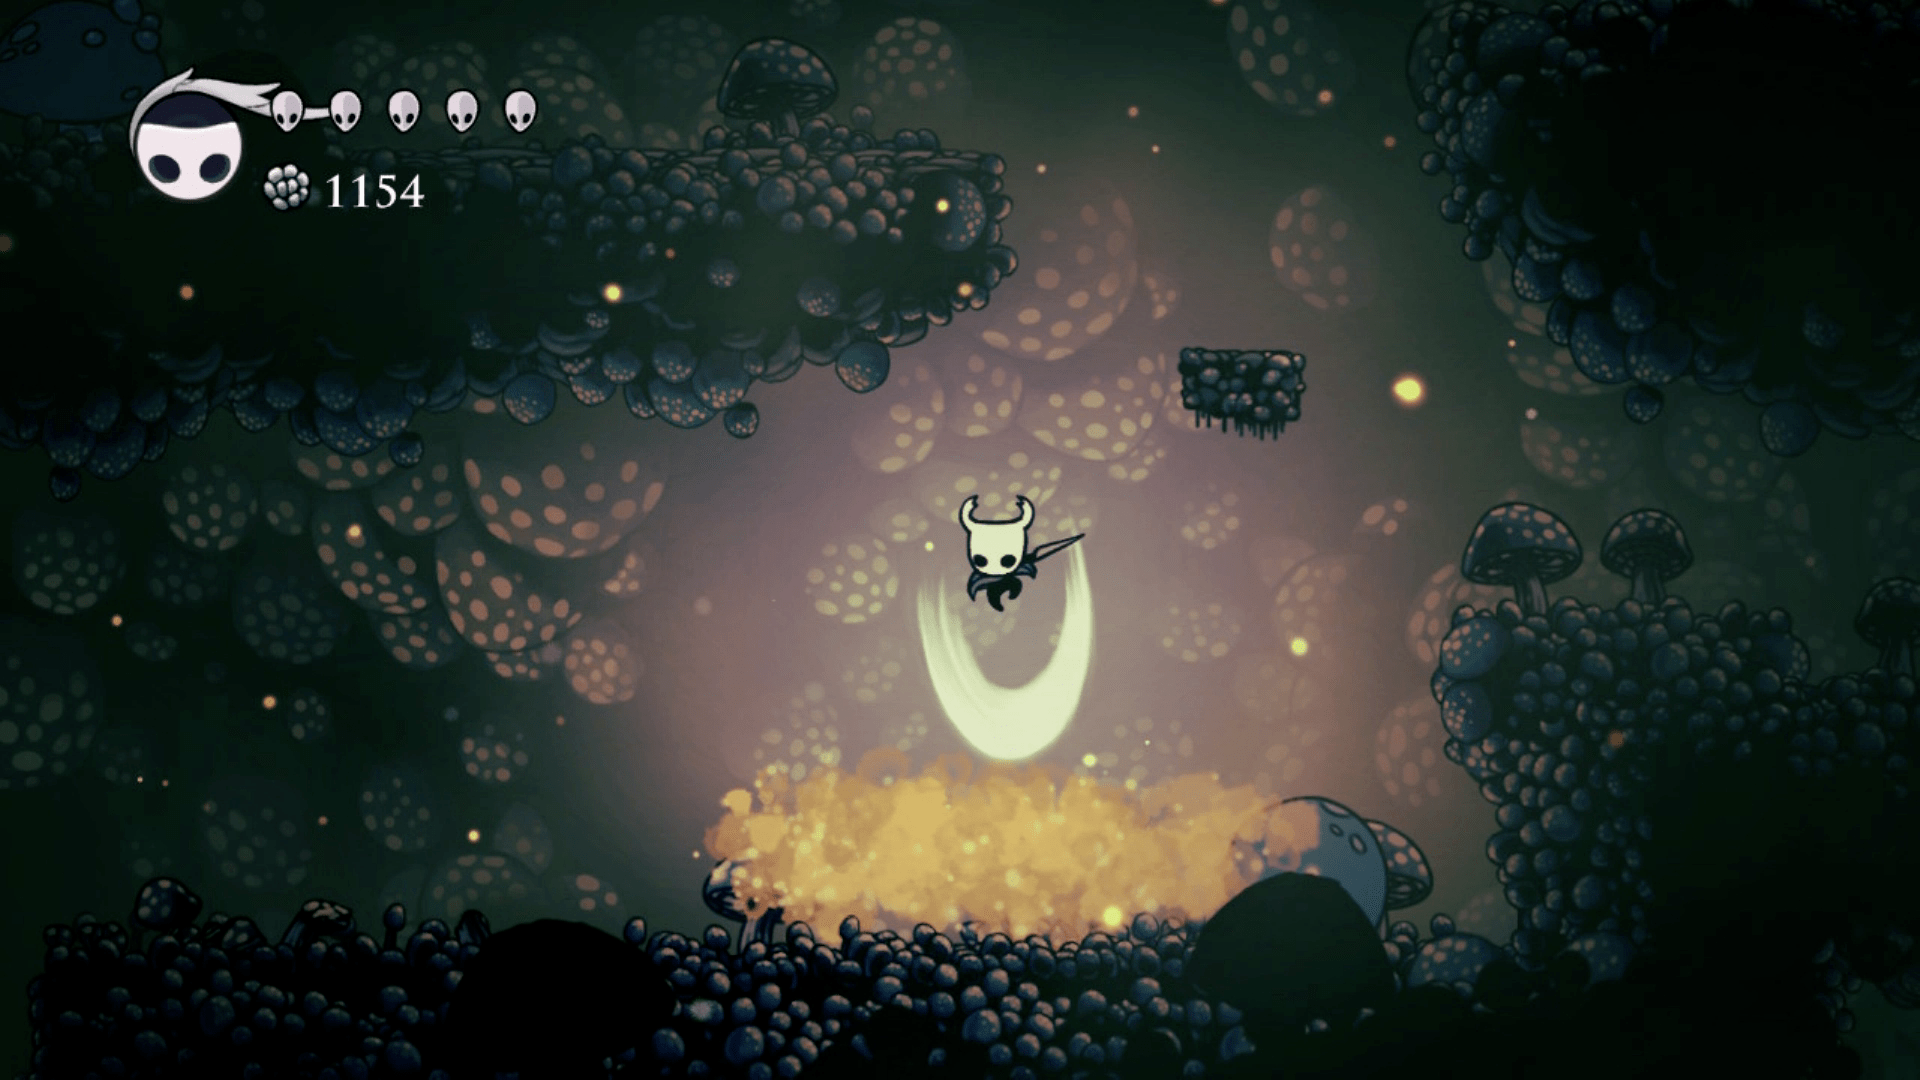
I’ve been obsessively playing Hollow Knight over the last few weeks. It’s a difficult 2D side-scrolling game with fine-tuned controls that require precise controller inputs.
Each hit against an enemy boss is crucial, and each blow you suffer can be catastrophic. I started out playing the game while travelling, which meant using the Joy-Con instead of my Pro Controller. I got used to the Joy-Con’s button-based D-Pad and was doing fine. When I got home and plugged in my Pro Controller, I expected I’d do even better, thanks to the fact that the Pro Controller has an actual cross-shaped D-Pad and not four individual buttons.
Instead, I found I was doing worse.
In Hollow Knight, the Knight can attack in one of the four primary directions, depending on which way you’re pressing. You can’t do diagonal attacks, which makes the game particularly well-suited to playing with the D-Pad instead of a thumbstick.
However, once I plugged in the Pro Controller, I noticed during tricky boss fights that sometimes the Knight would swing up instead of right, despite the fact that I was sure I had pressed right. I was dozens of hours into the game and was attuned to the controls, which made it easier to notice that they weren’t doing what I wanted. Again it happened, and again.
Eventually I was sure: my D-Pad was acting up.
I did a little Googling and immediately discovered that not only is this a known problem, it’s widespread. People in almost every thread about the Pro Controller talked about how when you press left and right on the D-Pad, it occasionally registers an “up” press.
It’s less clear whether newer Pro Controllers have the same problem, and equally unclear whether sending it in to Nintendo for repairs actually yields a good result. I asked Nintendo if it could clarify whether the issue had been resolved on newer Pro Controllers, but the company was unable to get me a response in time for publication.
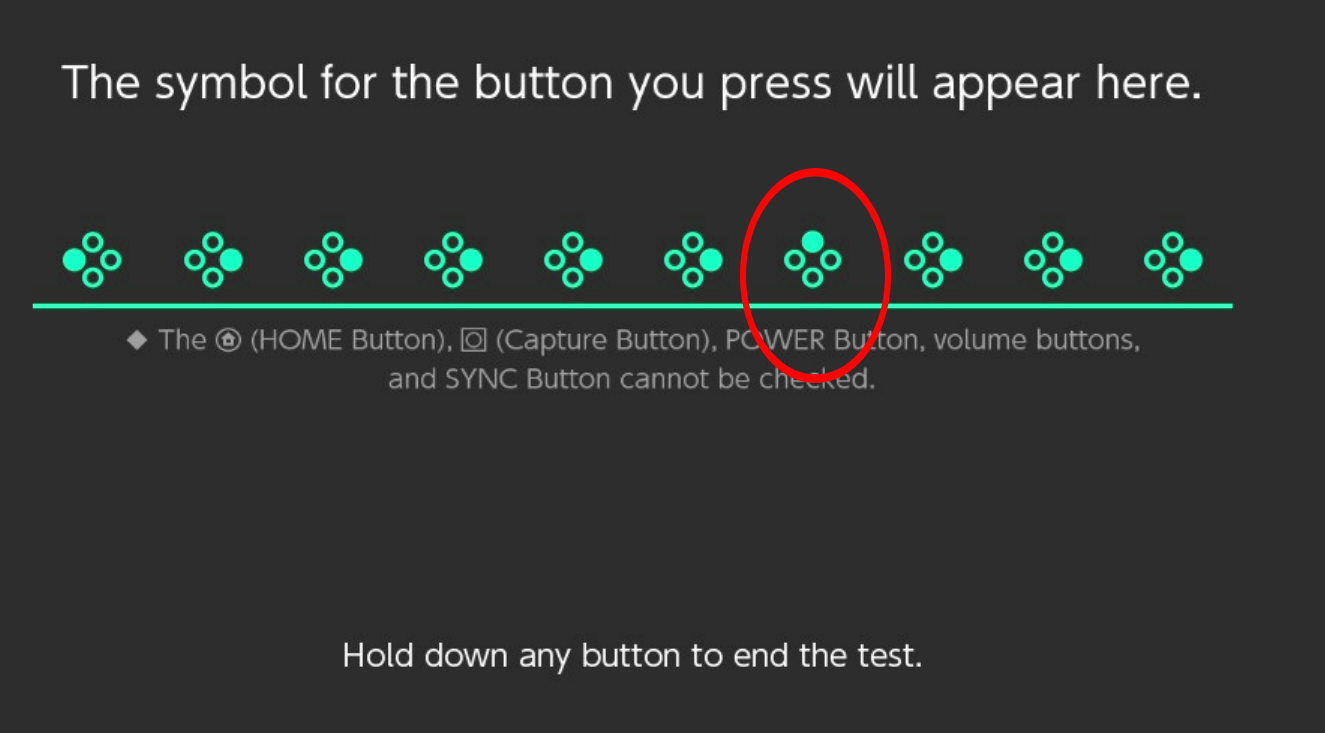
What is clear is that a lot of Pro Controllers, like mine, have inconsistent D-Pads. I headed into the Switch’s “Test Input Devices” utility and pressed left and right a bunch on my Pro Controller D-Pad. Here’s what I got:
OK, so it’s a problem. Is there a way to fix it? After looking around, I found a number of people mentioning a fix that requires dismantling the controller and applying plain old clear tape to the contacts on the board.
Then I watched the below video from P-Switch on YouTube, which helpfully goes through every step of dismantling the controller and making the modifications.
I had never opened up a game controller before, and while I’m comfortable enough working on my gaming PC, have always shied away from cracking open pre-built consumer electronics.
I decided that in the interest of testing the fix, and because Nintendo had sent me this Pro Controller for free back when I reviewed the Switch, that I would give it a shot. An important disclaimer: If you don’t feel comfortable doing this, don’t do it!
I didn’t think it was all that difficult, but it would definitely be possible to permanently screw up your expensive controller and be shit out of luck. As always I encourage bravery, but only if you’re willing to take on the risk.

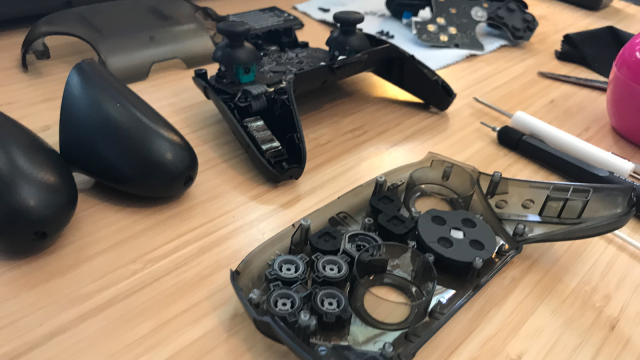
I laid out my tools — a couple of small Phillips head screwdrivers, a pair of scissors, a pair of needle-nose pliers, and a good bright light — and got to work. The Switch came apart pretty easily, for the most part. Here are the steps I followed, as detailed in the P-Switch video:
-
Remove the grips. (2 screws)
-
Unscrew the translucent plastic on the underside. (4 silver screws)
-
Remove the battery.
-
Unscrew the two halves of the controller. (5 screws)
-
Unclip the ribbon cable from the bottom half.
-
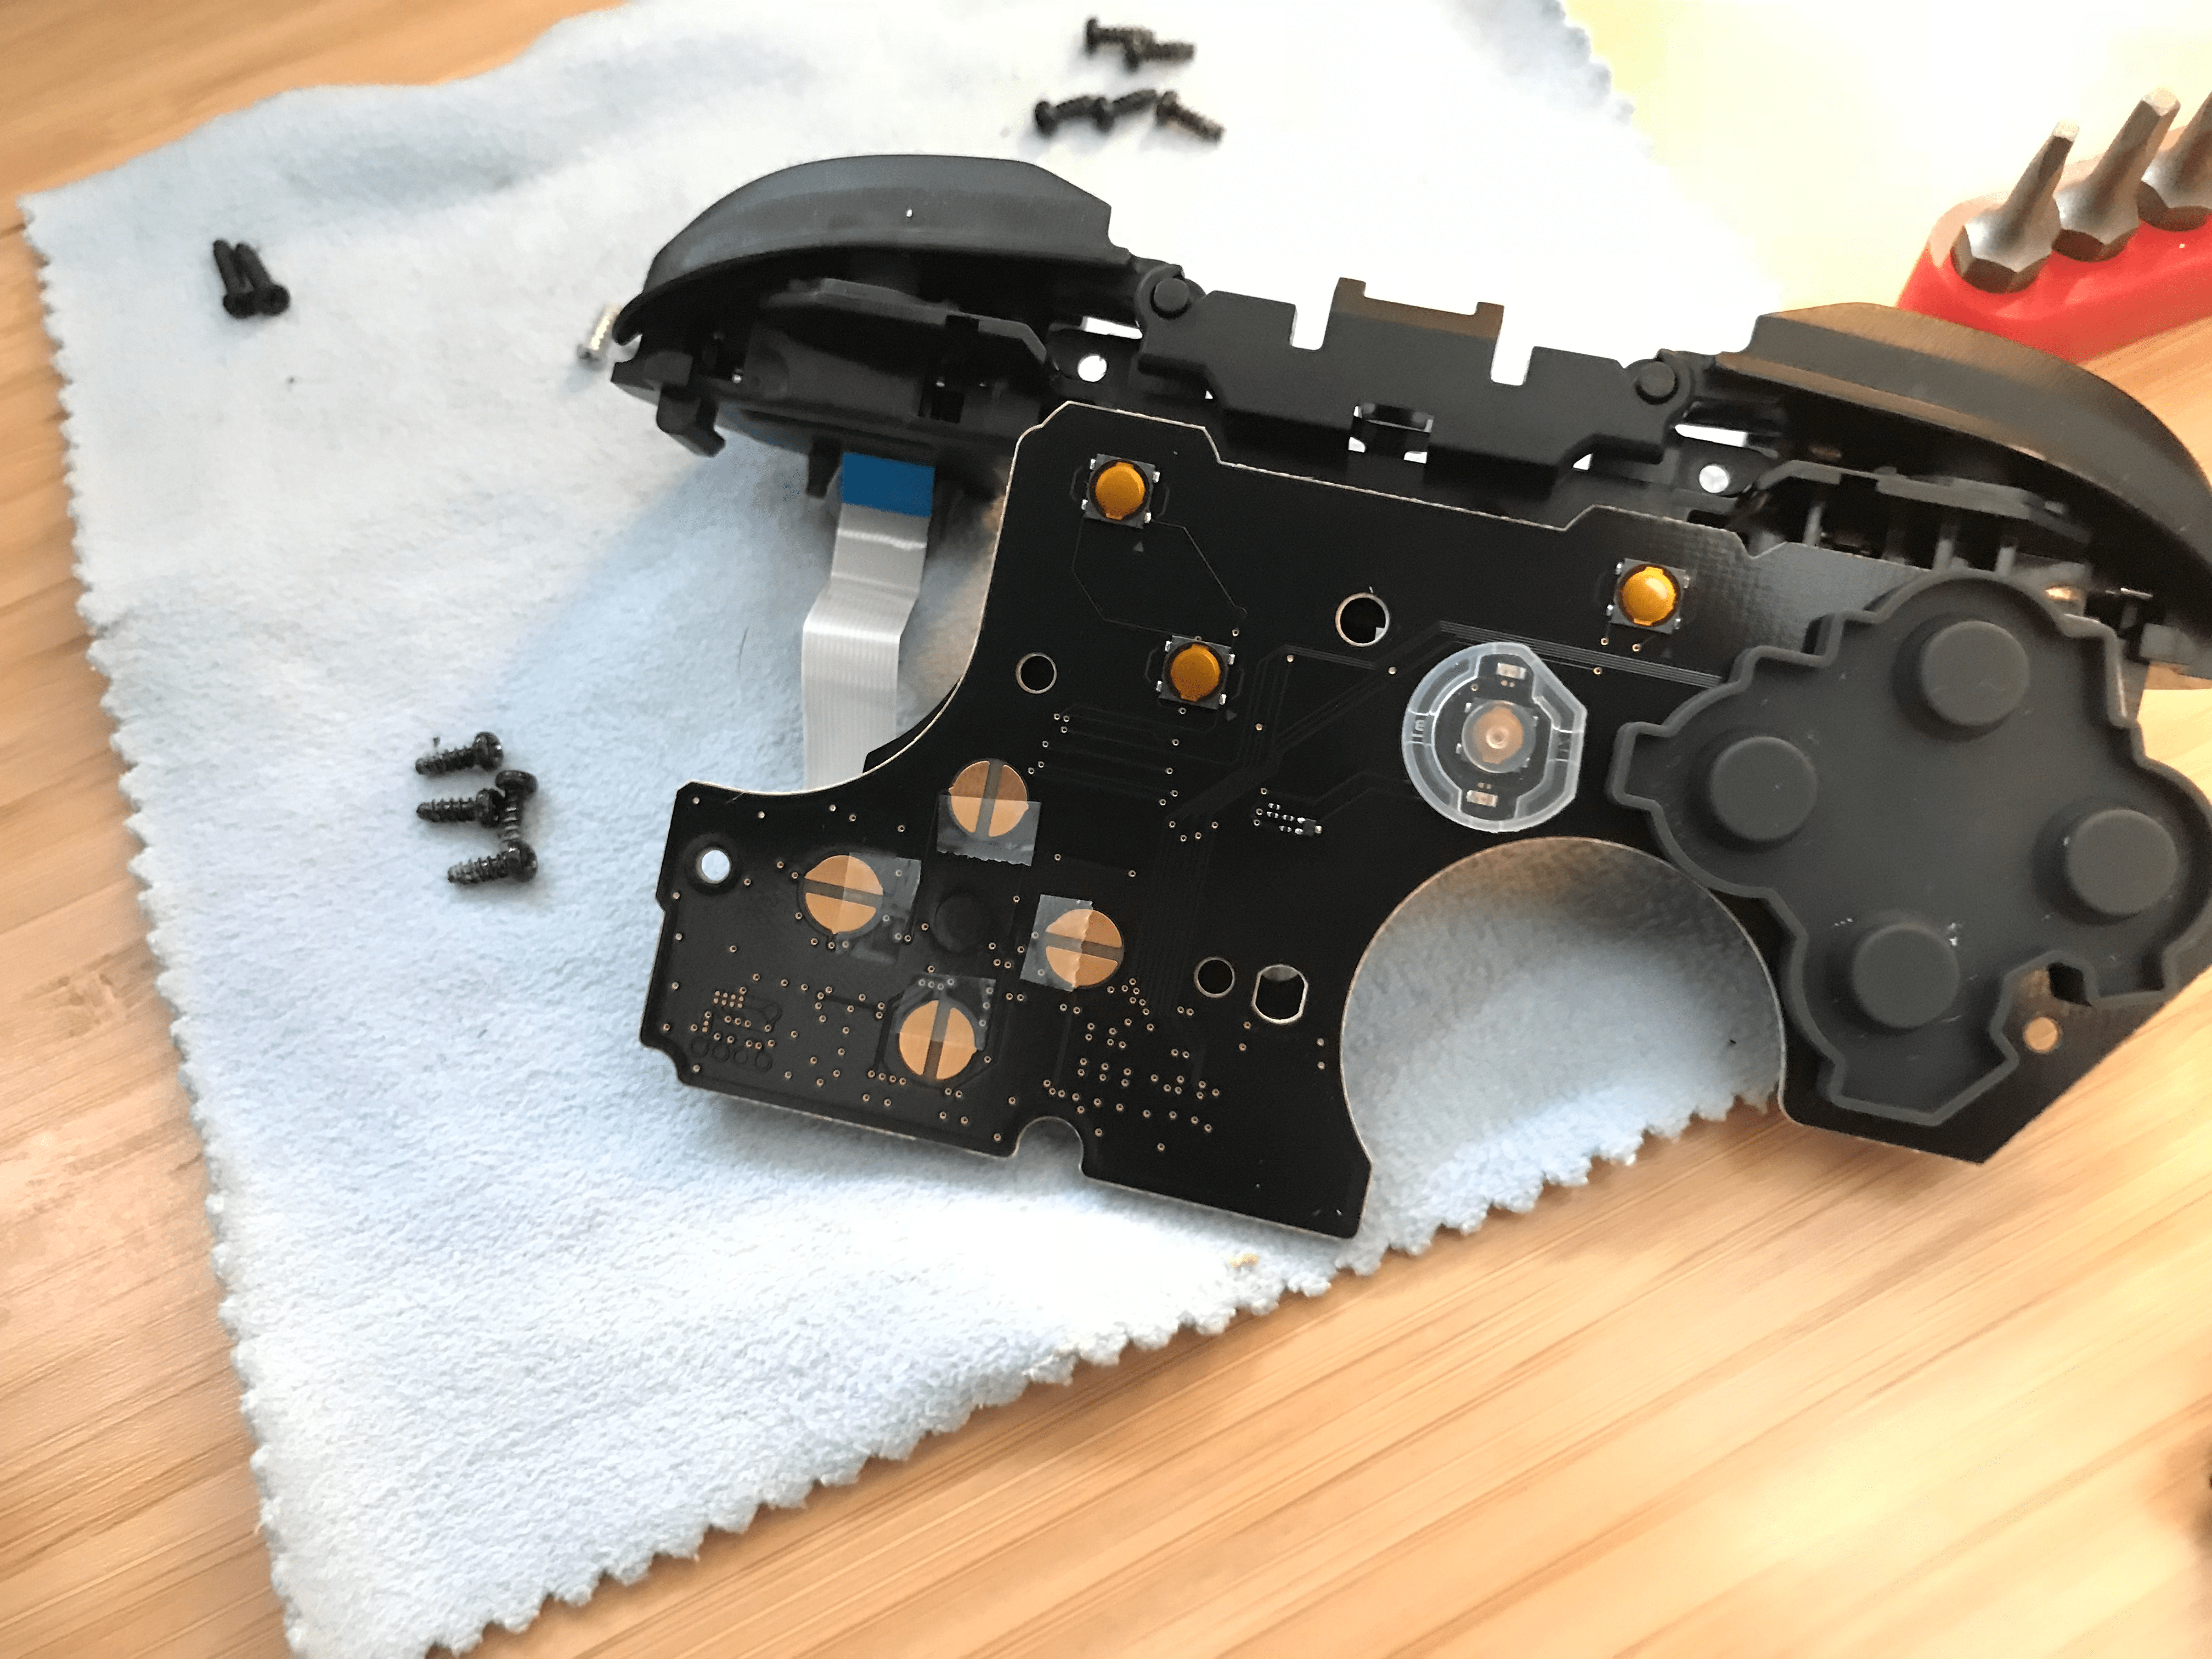
Unscrew the D-Pad sensor board from the top of the controller. (4 screws)
-
Apply tape to sensors and under D-Pad.
-
Reassemble.
If you’re thinking of trying this, I recommend following along with the video. The diciest part of the whole operation was disconnecting the ribbon cable that connects the controller’s two boards and links the buttons and sticks with the rest of the controller. (Note: I am not an electrical engineer and don’t know the terms for all of these things.)
With all the parts removed, it was time to apply the tape. I did it just as specified in the video: Four thin pieces of clear Scotch tape (or whatever brand you have lying around) over the outside half of the contacts, and a four-folded nub of tape placed in the center of the D-Pad cradle, to raise it up ever so slightly.
Some people say they get good results just by putting the four pieces of tape on the contacts with no extra folded tape under the D-Pad, but I took P-Switch’s word for it that raising the pad a bit would help.
Unfortunately, P-Switch’s video doesn’t show reassembly, and I ran into some trouble re-connecting the ribbon cable. The first time I reassembled the controller, it wouldn’t turn on at all. I took it apart and re-seated the ribbon cable, and the next time, it turned on, but the buttons were totally rearranged. The D-Pad was triggering face-button inputs, and other buttons did nothing at all.
I figured I must have seated the ribbon controller incorrectly, so I pulled it out, seated it again, and tested one last time… and it worked! Lesson learned: The ribbon cable connector has has a bunch of small contact points on the bottom, and those contact points need to precisely line up with the corresponding contact points on the board.
It’s been a couple of days since I took my Pro Controller apart, and the D-Pad is hugely improved. Here were my results when doing the same input test I did before I started:
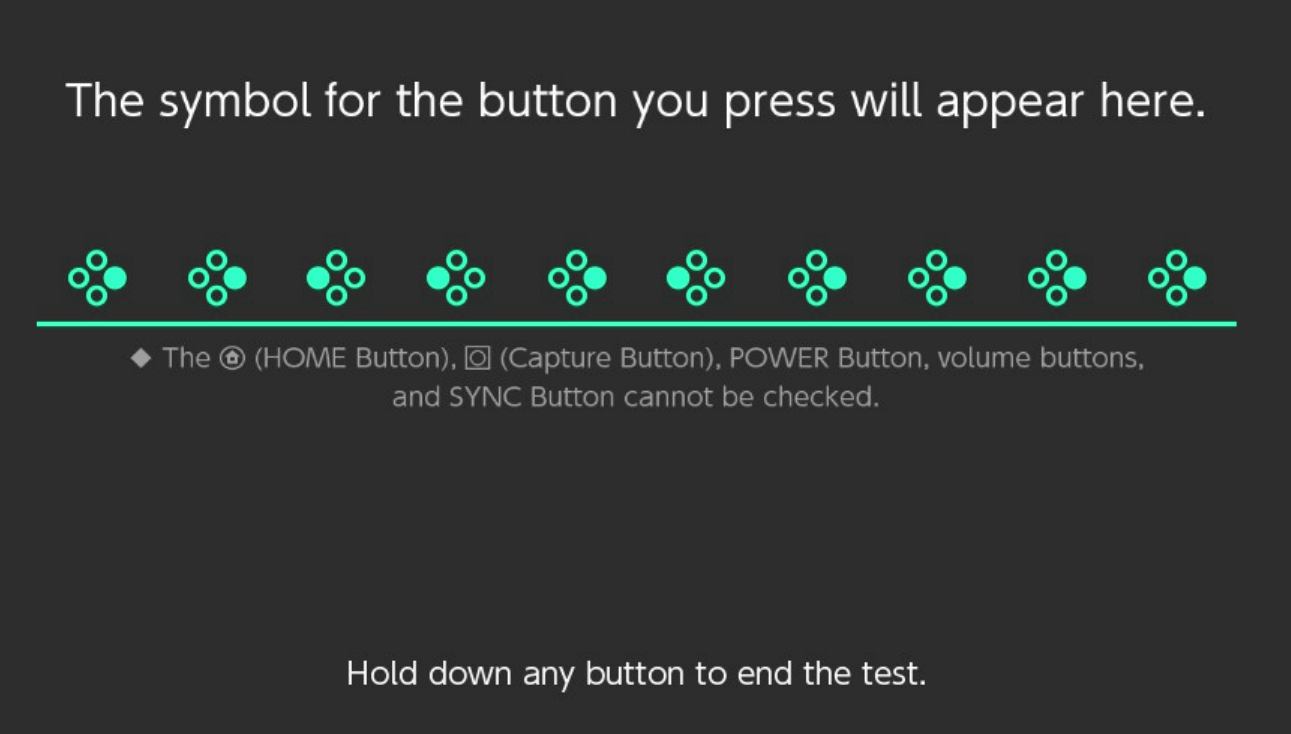
Perfect response across the board. I’ve noticed that the D-Pad is ever so slightly less responsive, so occasionally if I feather a light tap to the left or the right, the input won’t register. I can’t say whether that was happening before, but it’s not a huge deal to me.
I also gather that this modification can make some fighting game moves harder to pull off; I’m no Street Fighter expert but I was still able to get Ryu to do both a Hadouken and a Shoryuken in Street Fighter II Ultra. If you’re a big fighting game player and are considering trying this mod, bear that in mind.
For me, though, it’s been a great fix for platformers, particularly demanding ones like I’ve been playing. More than that, it was a fascinating challenge that, like the first time I built my own gaming PC, has greatly increased my confidence when it comes to taking apart and fixing my own electronics.
The mistakes I made re-seating the ribbon cable were actually the most enlightening part of the process, both because they reminded me once again that hardware failure can often be easily fixed, and because they demystified the question of what’s going on under the hood of a controller.
The most important thing is that I no longer am at a disadvantage when playing Hollow Knight on the big screen. Surely that means that now I’ll be able to beat The Radiance with no trouble, right?
… Right?
Comments
7 responses to “How To Fix Your Switch Pro Controller’s D-Pad”
I’ve definitely noticed this is a problem. Celeste can be a real pain to play.
Anecdotally, I’ve heard newer Pro-Controllers have the issue fixed, or at least improved. This may be true as one of my 2 controllers seems better than the other, but I haven’t put in any significant testing.
People said that the Splatoon one had it fixed, but there were still controllers that had the problem. They said the same of the Xenoblade one, and it still had the problem too. It widely varies from controller to controller, my Splatoon one (which was my third after a series of returns) has a PERFECT d-pad, it feels better than any other Switch pro d-pad I’ve used. But then my Xeno one, while ok and still manages to avoid the misdirection problems I’ve had before, still doesn’t quite feel as nice.
What we really need is a fix for the problem with the damn control sticks, I think that’s affected every pro controller I’ve had so far. Speaking of which I need to send the splats one back down for fixing.
My original Pro-Controller had a bad calibration issue with its control stick when I first got it. Link kept running off towers after I climbed to the top.
However, the in-system calibration tool was really good and basically I haven’t had a problem since.
Mine have had kind of the inverse problem, I hold the control stick all the way to the edge but then the sensor randomly wavers between there and zero. It’s just not consistent in whether it occurs or not, so calibrating can appear to fix it but then it’ll come right back a short time later.
@alexwalker The front page blurb cuts out
Yup, looking into it. Fresh bug that’s proving very annoying.
It is super annoying. I need to know things!