Welcome, new hunters. Let me guide you through your first few hours with Monster Hunter: World. Whether you’re a veteran wanting to know what’s changed or entirely new to the series, you’ll find these tips useful.
This post originally appeared in January. We updated it in February with some new and advanced tips, and are bumping it up again today because the PC version just came out.
If you played the beta, you might have found it overwhelming. I certainly did. The good news is that the full game does a much better job of introducing all the systems to you gradually over a period of hours, but it would still be a stretch to call Monster Hunter: World accessible. This advice will give you an edge before you start.
First, pick a weapon
Monster Hunter is really very simple: go out, kill things, make better equipment, kill bigger things. Still, parts of the game are needlessly complicated. The first thing you need to do is pick a weapon.
There are 14 to choose from – all of which have appeared in previous Monster Hunter games – and there are star ratings that show how easy they are for beginners to use. There are close-up weapons like big ol’ swords and axes, flashy weapons like the Insect Glaive (a sort of sharp pole you can vault with), and ranged Bowguns for shooting monsters from afar. Good beginner weapons are: Long Sword, Sword and Shield, Dual Swords, Light Bowgun.
You can go to your room to access the Training Ground, where on-screen prompts will help you learn your weapon’s combos. This is definitely worth doing at least once. After a bit of grounding, you can learn on the job. I’d also recommend watching YouTube videos to learn advanced combos, once you’re comfortable with a couple of different weapon techniques. The Training Ground doesn’t teach you everything.
Get better weapons and armour
Once you start killing monsters, you’ll want to go to the Workshop to make better gear out of their remains. There are complicated upgrade trees for weapons, but at the beginning, all you need to know is that all upgrades will help. Don’t agonize for ages trying to work out which one to pick. There is no point hoarding your upgrade spheres and monster materials, so just spend away.
Armour is more simple: there are no upgrade trees. You just craft the best armour you can from the monster parts you have. There are lots of stats to get to know, but for the early game, go for whatever has the biggest Defence number. Or, more importantly, whatever looks most fashionable. Monster Hunter armour can get very silly. Embrace it.
Eat a meal before every hunt – or during hunts
Meals eaten at the canteen run by the one-eyed cat give you boosts to health, attack, defence, and lots more. The meals get better as the game goes on, and you can complete optional quests to expand the ingredients on offer. Plus, the cooking animation is hilarious. You can also eat meals at the campfire at any campsite out in the field, or even cook for yourself using the BBQ Spit in your item pouch and some Raw Meat gathered from small monsters. Just press the button right after the music finishes and you’ll have a Well-Done Steak to restore your stamina.
Craft items
You’ll collect lots of plants, bugs, mushrooms and other stuff on your adventures. This can all be used to make useful items that can give you an edge in a fight, like power-enhancing potions or antidotes that cure ailments.
You can do this out in the field through the menus, or by standing next to your item box and using the Crafting List. The latter is easiest. There’s also an automatic crafting feature, which is helpfully turned on at the start. Whenever you pick up the ingredients for a potion or other common item, the game will auto-craft it for you.
Dung is really useful
This sounds ridiculous, but pick up dung whenever you see it. If you throw dung at a big monster, it will run away. This is massively useful when you’re hunting down a manageable beast and a much bigger one suddenly turns up and joins the party.
Look at the map
The map in Monster Hunter: World is your most useful tool. As you explore each new environment, it will fill up with icons that show you where gathering points are, where monsters are, where the camps are, and anything else you might need to know. Look at it often.
Enter your tent at camp
At camp, you can do anything you might need to do mid-quest. You can eat at the campfire, and you can enter your tent to change equipment, deposit stuff you’ve foraged, or craft items. It’s often worth coming back in the middle of an arduous fight to re-stock yourself.
Take time to explore
An hour or so into the game you will be allowed to go on Expeditions. This is Monster Hunter: World‘s free-roam mode. There are no objectives or time limits, and you can explore freely, avoiding or fighting creatures as you see fit. Definitely take the time to do this. It’s an invaluable way of getting to know the beautiful places that Monster Hunter: World sends you to, and they’re all full of secret nooks. I was still finding new places in the Ancient Forest, the first area, 20 hours into the game.
Track monsters
Out in the field, monsters leave traces: tracks, gouges, mucus, shed scales. Examining these traces builds up a better understanding of the monster. Your useful Scoutflies will then blaze a green trail towards it, allowing you to keep track. It will also be marked on your map.
Select the monster you want to follow on the map, and the Scoutflies will do the rest. It’s important to keep examining tracks throughout the game, even after you’ve fought a monster once. The more you examine, the more your Scoutflies level up, so eventually you’ll be able to pinpoint a creature’s exact location on the map without examining so much as a footprint.
Use your slinger
The slinger is a versatile tool that can be a crossbow or a grapple hook. You pick up ammo for it from the ground, like rocks, seeds, and moss. The slinger will equip whatever ammo you last picked up.
Generally it doesn’t do much damage to monsters, but it’s a useful tool for exploring the environment. Look around to see grappling points, hanging rocks that you can shoot and drop on a monster, or traps that you can spring by firing a rock at them, such as plants that ooze poison. You can also distract a monster by firing something at a wall, if you’re trying to sneak past it.
Sometimes red glowing things will drop onto the floor whilst you are fighting a monster. This is powerful slinger ammo, like Bombs and Stingers, so pick them up when you have a spare moment. They will usually stagger a monster.
Be prepared for hunts
Monster Hunter veterans will be delighted to know that you no longer need to fill up your inventory with breakable bug nets and pickaxes, fishing rods, or a BBQ spit. All of that stuff is always with you now and doesn’t take up space in your inventory. Monster parts, too, go straight back to base, so you’ll never kill a creature and then be unable to collect your rewards without dumping a bunch of mushrooms on the ground.
This means there’s much more space for traps, potions and gadgets in your item pouch. You should take potions and cooked meat on every single hunt. These restore your health and stamina. Always look in the blue supply box at the beginning of a quest, too: if there’s a particular item in there, like a flash bomb or a screamer pod, it means that it can be used against whatever you’re hunting.
Some wyverns can be stunned out of the sky by a flash bomb, for instance.
Mount monsters for extra fun
Leap from a high place and hit a monster with an attack, and there’s a chance you’ll mount it. Riding around on a monster while it tries to throw you off is one of Monster Hunter‘s most exciting pleasures, and it gives you a shot at a powerful finishing move if you can hold on long enough.
At the start, the game will show big, clear prompts telling you when to brace, when to attack, and when to move positions on a monster whilst you’re riding it. Later on these big prompts disappear, but you can still see them in the top right of the screen.
Cats are your friends
Your Palico is the cat-pal who accompanies you on every quest. You can equip the cat with weapons and armour, and they will also have a helpful gadget. Your cat starts off with Vigorwasp Spray, which summons healing insects during fights.
You can unlock different Palico gadgets later in the game. To do this, head out on an Expedition or Investigation into any of the maps, and look out for wild cats. They’re called Melynx and they leave doodles and other traces that you can track with your Scoutflies.
If you successfully track the Melynx back to their den, they will give you a special quest. Complete that and not only will you have a new Palico gadget to play with, you’ll occasionally get help from the Melynx whilst out on quests. They might trap monsters for you, or teach your Palico how to ride around on a smaller monster.
Use the net to capture all the small bugs and animals you see
I won’t spoil why, but get your net out whenever you see any wildlife. You’ll want to have a collection of them.
Visit your room to change your appearance
I didn’t visit my hunter’s room until about 10 hours in, whereupon I discovered that it’s where you access the Training Ground for practicing with new weapons. You can also customise how it looks, change your equipment or your Palico’s equipment, or just chill out. Your room also upgrades as you go through the game – once you’ve finished the story you basically get a palace.
To change your hairstyle or the colour of your armour, ask the housekeeper cat in your room. You can’t change your face yet, though.
Talk to characters at the base
Talk to everyone with a little exclamation point above their head. They will give you optional quests that usually unlock something useful.
Don’t turn off all the screen clutter at first
There is a lot of UI stuff on-screen obscuring your view of beautiful waterfalls and giant dragons trying to eat you. You might be tempted to turn it off. Don’t do that for at least five hours. The on-screen information is essential at the start, even though it’s not pretty.
Always pick up Bounties
This here is the Resource Centre. You will go here often; it’s where you pick up Bounties. These are easy goals (hunt one large monster, do two quests in the Ancient Forest, gather plants five times, that kind of thing) that you will passively complete while getting on with the game.
Every time you fulfil a Bounty you’ll get Armour Spheres, which upgrade your armour. They’re really useful. Make sure you go back to the Resource Center every few quests to make sure you have a full slate of Bounties.
Know the difference between quests and expeditions
Quests are time-limited missions with a fixed goal: hunt a monster, gather something, or kill a number of smaller creatures. They usually allow you 50 minutes and three deaths before you fail. There are Assigned quests, which further the story, and always involve hunting a big creature. Optional quests, which you pick up from characters back at base, unlock new ingredients for the canteen, new gadgets, and that kind of thing.
Expeditions are not time-limited – you just head out into one of the environments and explore. You can do whatever you like: hunt whatever big monster is hanging around, find new base camps, or gather plants, fish, and ores for crafting. Investigations are optional goals for your expeditions that offer better rewards than just tooling around. You pick these up from the Resource Center (see above).
Farm monsters
So, you’ve just conquered an Anjanath and now you want a full set of Anjanath armour. You can’t repeat story quests in Monster Hunter: World, so what do you do? Have a look at your Optional missions and see which ones send you out to hunt Anjanath.
Browse through the available Investigations at the Resource Centre, and you’ll definitely find one involving Anjanath. Or just go on an Expedition and find one yourself; this is the worst option, though, as you won’t get bonus rewards. Finally, you can fight any monster in the Arena, which you can access from the Gathering Hall at the top of the base.
How to capture monsters
Capturing monsters can give you better rewards than killing them, and can also shorten a fight by five minutes or so if you are struggling. Here’s how you do it. You can craft a Shock Trap from a Trap Tool (bought from the Provisions shop back at base) and a Thunderbug.
Combine Ivy and a Spider Web to craft a Net, then combine a Net and a Trap Tool to get a Pitfall Trap. You’ll also need Tranq Bombs: craft these from Sleep Herbs and Parashrooms. Any capture quest will give you some Tranq Bombs and a trap in the supply box, but it’s always useful to have a spare in case something goes wrong.
Monsters can only be trapped once they are weakened. You can tell a monster is in a bad way when they develop a limp, and retreat to their lairs to go to sleep. If you’ve fought a monster often enough, you will also see a skull icon next to them on the map when they’re trappable. Then, put down your trap, goad the beast into it, and throw down two tranq bombs near its head. Boom, it’s down.
Gadgets and mantles
Do not worry too much about gadgets and mantles at first. These useful things unlock as you work your way through the story and optional quests. One early-game ghillie mantle hides you from monsters, which is very useful. You’ll also pick up a health-giving gadget early in the game. More advanced versions of these tools lurk further down the quest lines. You can get familiarized with them later.
It’s very easy to play multiplayer – but monsters scale up
Just post a quest on the board and anyone can join, unless you make it a private quest. Beware though: monsters have WAY more HP when you’re hunting in a group. That extra HP will be the same whether you have two hunters or four in your party.
This makes two-person fights actually more challenging than hunting on your own, sometimes. The nightmare scenario is that you start out with four hunters and two or three of them drop out, leaving you struggling on your own against a monster with masses of HP left. A patch might address this and scale the monsters’ health to the number of players, but for now, be advised.
Advanced Tips for Monster Hunter: World
So, you’ve mastered a couple of weapons and you’re familiar with a whole roster of different beasts. Maybe you’ve finished Monster Hunter: World‘s story and are embarking upon adventures in High Rank. These tips are geared towards High Rank hunters.
What is High Rank and how does it work?
Monster Hunter: World‘s main story will take you through most of the game’s beasts as you solve the mystery of the Elder Dragon, Zorah Magdaros. Once it’s over, you enter High Rank. In these quests, all the monsters are significantly powered up.
You might have bested Anjanath many times before, but how he will kill you in one or two powerful hits. More excitingly, there’s a gradual drip-feed of new, even more powerful creatures to face off against.
High Rank is less structured. There are fewer Assigned Quests, so you’ll spend more time on Investigations or Optional Quests, farming materials to upgrade your weapons and armour. This means it’s not like your usual New Game+ mode: you don’t have to do everything you’ve already done again.
If there’s a monster you hate, you don’t have to fight them. There are still occasional story-style quests with cutscenes, but mostly you get to choose your own way through High Rank, hunting whatever you like.
Eventually, you will exhaust all the Assigned Quests in High Rank and see the credits roll. Then you’re into the endgame, where you can keep raising your Hunter Rank. Some of the game’s monsters don’t appear until HR50. Basically, you can keep playing Monster Hunter for as long as you want.
How to raise your Hunter Rank
Once you’ve done all the Assigned Quests, your Hunter Rank will jump about 20 levels. After that it will just rise gradually as you play. Capturing seems to yield more XP than killing, but I have been unable to confirm this.
First, focus on upgrading your armour and weapons
The first thing you need to do when you enter High Rank is get better weapons and armour, FAST. Your super-upgraded Rathian armour just isn’t going to cut it any more. The Zorah Magdaros armour is relatively easy to farm: search for SOS Flare quests via the Quest Board and join in other people’s games, and you’ll get High Rank rewards for what is a time-consuming but very easy quest.
Otherwise, just look at what’s available in the Workshop and focus on quickly crafting whatever you can scramble together from smaller, less challenging monsters that won’t kill you in one hit.
Consult your field guide to learn monster weaknesses
Monsters are weak to different elements: Water, Ice, Fire, Thunder and, uh, Dragon. You’ll probably have picked up on this during low-rank quests, but now it becomes very important. Consult your Field Guide: you’ve hunted enough creatures now to have filled it with useful information.
Try to match your weapon to the monster’s weakness, and your armour to the monster’s elemental strength. You’ll want Fire resistance armour for an Anjanath or Rathalos, for instance, but a Water or Ice weapon.
A brief guide to skills
There are quite a few things that you can safely ignore all the way through Low Rank. Now you’re here in High Rank, you need to learn about skills. These are essentially gameplay mods. They are very nerdy.
Every piece of armour comes with different skill values. Wear bits of armour with the same skills, and your skill will level up.
Check what skills a piece of armour provides by pressing the center button on the PS4 pad in the Workshop. Some are self-explanatory, like Attack Boost, Defence Boost, Fire Attack, etc. Others are not. Here is a rundown of some of some useful skills and what they do:
Earplugs – makes you immune to monster roars, so you can keep fighting instead of cowering
Bludgeoner – raises Attack as your weapon loses sharpness. I love this skill because I’m always stubbornly thwacking away with a Switch Axe
Divine Blessing – this is EXTREMELY useful and has a chance to reduce the damage you take by up to 50%
Agitator – makes you more powerful when monsters are in rage mode
Botanist – gathering skill that helps you collect more plants, herbs etc.
Detector – gathering skill that shows gathering locations on the map
Intimidator – small monsters won’t aggro you
Partbreaker – makes it easier to destroy monster parts/sever tails
Speed Sharpening – significantly speeds up weapon sharpening
You can also unlock skills by equipping Charms and Decorations, which can be earned as quest rewards or forged at the workshop. You will notice that High Rank armour comes in alpha and beta versions. One has space for Decorations; the other has two baked-in skills.
How to maximise rewards from hunts
To maximise the rewards you get from a mission you can capture rather than kill, break as many different parts of the monster as possible, or sever the tail if it can be severed. This gives you an extra carve reward. (You can check whether a tail can be cut off in the Monster Field Guide.)
Also consider the Arena, which pits you against monsters with pre-set armour and weapons and offers very nice rewards. You can access the Arena from the Gathering Hub, right at the top of the base.
Melding
You’ll notice a new face in the base camp once High Rank unlocks: a chap with a big ol’ pot who will offer to ‘meld’ items for you. What the hell does this do? Essentially, it allows you to exchange items you don’t need for ones you want. You can meld some high-value monster parts, like Plates, in exchange for other rare items. Or you can just cash in some potions for a Barrel Bomb.
Lots of melding requires “prints” – e.g., a Silver Wyverian Print. These mysterious items drop as rewards from event quests. Sometimes you can find them out in the wilds if you talk to non-player characters you encounter.
Palico Safaris and the Argosy Trade Ship: good ways to get rare items
Sometimes, a merchant captain will arrive in the base and offer a random selection of items to buy in exchange for the points that you passively gather from completing quests. Always buy whatever he’s got. Some items can only be obtained this way.
From your room, or from the research base above the Coral Highlands, you can also send Palicoes that you’ve met on your travels out on safaris. This also costs points, and they will come home with monster parts and other rare rewards. You can send out a new safari after every three or four quests.
In the endgame, grinding for monster parts gets harder
There comes a point in High Rank where in order to craft the absolute best decorations, armour or whatever else you might like, you need the rarest, most annoying monster drops: Gems or Plates. This has traditionally been the point where I’ve tapped out of previous Monster Hunter games.
Once you’ve seen and fought every monster after 100+ hours, what’s the point in fighting one 15 times in the hopes of getting a rare drop? It’s not for me.
There will probably come a point where High Rank gets boring for you. It might be after you’ve finally done all the Assigned Quests, and the credits roll. Or it might be once you finally get a coveted armour set. There is no shame in this. Tap out whenever you like. Once you’ve gotten into High Rank you’ve experienced the best of Monster Hunter, in my opinion, and really tested your skills.
Plus, Capcom is sure to add more monsters and quests in a few months, and possibly for years. It will be easy to dip in and out.
Check below for readers’ tips for Monster Hunter: World – and feel free to add your own.
Comments
48 responses to “Tips For Playing Monster Hunter: World”
No? Forge amour based on skill sets, and only forge complete sets until you understand skills enough to mix sets. I’m aware skills have changed for World, but surely not so much as to make defense suddenly more important. Most attacks that will three-shot you at 100 defense will probably still three-shot you at 200 defense, there’s a reason MH’s unofficial catch-phrase is ‘don’t get hit, hit it till it dies’, and teaching new players to tank is not the way to go.
I’ve yet to play World, and have tried to stay pretty blind on it, but I struggle to see such a departure from one of the core mechanics of the game.
Perfectly reasonable tip for new players who have yet to learn the skills and will be instantly staggered by the range of stats, items, abilities etc
No use specialising until you understand the mechanics.
The blacksmith also states a similar tip in the early game.
Stronger weapon if you can’t kill something and stronger armor if it keeps killing you.
The fist obvious marker of stronger being ATK and DEF respectively.
Best part is the initial sets can easily be crafted after only a couple of missions and the tutorials do a good but tedious job of setting you up as you go.
And if you can’t craft a stronger weapon or armor until you beat the monster that’s blocking you from getting better materials… git gud, scrub.
I’m really enjoying the game, but some of the mechanics are incredibly frustrating.
Granted, the number of stats in MH can be overwhelming. But ‘get higher defense/attack if you’re stuck’ is not a tip that is unique or helpful to MH, similar to the point made by schizzle below about the map, items and NPCs. It’s generally a universal truth.
The real tip with armour is, as I said, learn which skills are useful and forge armour based on those skills. For example, forging a set with Attack Up Small and only 100 defense will serve a player better than one with Meat Lover with 200 defense.
Does that serve the player better after 5 hours, or 5 days? This is targeting people new to the franchise – its going to be the first MH experience for many – and for someone new to the game, “when in doubt, Defense is a good option” is solid advice.
Later, when those basics are down, “lower defence but with beneficial ability is better than pure defence” is the nuance people need, but not when they’re learning the game. In the first few hours, its a lot more info they need.
What you’re saying is right, but its more intermediate than beginner advice. Evidenced by your comment “learn which skills are useful” – the article is advice for advancing while they are learning which skills are useful, not after.
@grunt and @namiwakiru both.
Okay, I’ll concede. I stand by skills being more important but fair enough. I remember starting Tri as my first MH experience and being totally on lost on everything. If the tutorials lead you into the game better now then perhaps it encourages players to discover skills naturally.
Defense Up isn’t an entirely useless skill itself, after all.
Nobody is arguing that, specialising is the still the end game.
I do wish I could say it leads you well, it’s throws a lot at you at each step, hence why such simple tips can give somebody a little more confidence to push on.
It’s bloody awesome though.
Yes it was a funny comment but to be fair they are still relevant and helpful points for new players……
Overwhelming is an understatement, even for experienced players.
I missed most of the resource alerts in the first mission because I was being taught how to use the item bar and grappling hook thing, I missed NPC’s with information because the game was pushing me forward while trying to team me up.
Even the start of the game is a long tutorial where you don’t have access to any options, menus, inventory or weapons, so by the time you get in your frothing at the bit to chose your gear and actually kill something.
The first crafting and upgrade missions are given when you only have one set or armor starting weapons and you are never given a single opportunity to explore a single aspect, always 3 or 4 things on the go.
Fact is this is a new MH, with a lot of changes and tweaks to old familiar mechanics, a ton of new features and shit load of tutorials that are given in quick and constant concession.
I have no problem admitting that I need to go and read many of the tutorials again.
You seem to be think that these are pro tips, they are tips for folks who are new and will undoubtedly get bogged down by these exact points.
“Look at map, craft items, talk to NPCs” Do these pro tips extend to other games or just this?
I have noticed many of these “tips for playing X” are basic core mechanics like: do the tutorial, look at the map, follow the quest marker, kill the bad guys, collect the loot that drops, don’t die, save the game.
“Save the game” is not necessarily a bad tip, though, and not entirely intuitive.
If you invite a friend to join your game, they’ll be prompted to join… but when they do, it won’t automatically save their game or offer them the opportunity to save their game. They have to already know to save their game manually first, THEN accept the invite.
If they see a prompt to join, then join, they lose all unsaved progress. Which includes the last hunt they just completed. Learned that one the hard way.
I’ve been really struggling with playing multiplayer with my girlfriend. Basically, we want to play as much as possible together, but from what i’ve read online we can’t play story missions together until you basically get to the end boss (at which point, either she has to sit idly by waiting for me to get there, or is playing it herself and is also at the boss, so why would she join me?). Is this right? Surely we’re missing something?
I’ve also noticed that you can’t seem to launch into expeditions together. Is that right? That makes sense as the mode that would be perfect for playing together.
It took us 5 hours of play before we managed to start a side quest together as a team yesterday. That can’t be the “easy” multiplayer experience every media outlet is fawning over, right???
that doesnt sound right…
once we got through the introduction quest you can kick off multiplayer.
create an online session – you will get a code ‘HZJ5434NaVh’ sort of thing.
give it to your wife and get her to join online session
once you are in the HQ – you cant see each other, but one has to post a quest, and the other party member is notified there is an active quest.
then go to the handler or the quest board and accept
it will throw you into missions together and then expeditions once its finished where you can explore together.
each of you need to be at the same level though – you cant do a level 6 quest and invite her if she hasnt reached that far in the game – you can go back and help her though – or level together.
Its a little convoluted but there are heaps of guides. Took me and the wife about 30 mins to work it out proper
We got the side quests working but assignments (story missions i think?) didn’t want to play ball.
No, you can play them, you both have to watch first the cinematics on assignment.
After that you can usually shoot the SOS flare and your partner can join.
Or you exit the quest, and restart it and you will see now the quest preparation says 1/4.
Again, BOTH of you have to watch the cinematics before you can join each other and you should be in the same session – create a squad for that 🙂
I appreciate the help but that answer is unacceptable in 2018.
Yeah, I’m in the same boat as @geometrics. Playing side-by-side with my GF, the game is really fucking determined to split us up when it comes to advancing the story. We can queue up some quests together just fine, but when it comes to expeditions in a new area or assignment quests to unlock more of the game, each of us has to start our own quests. One of us can’t start it then invite the other. You can’t even start it then fire off an SOS beacon and try to get your partner to join you through the SOS system, because you can’t join SOS beacons for story quests you haven’t done yourself, yet.
The only way we found to get around the system is to see all the cutscenes for a story mission, fail it, then queue together. And both have to have failed it, too.
You can’t jump into each others’ games and then advance the game together. You have to unlock content solo, then grind the content together. You can’t even hop into an expedition co-op, you have to join a quest together, then either abort it/fail it/complete it, then go to the expedition together after. THEN you can play together in expedition.
Whoever designed these systems clearly intended to cause duos as much grief as possible with the absence of any kind of ‘party’ system to allow people to play together for sustained periods and not just bite-sized individual hunts.
I think it’s based on classic Monster Hunter where you play the story at home and the co-op on the train. I wish I could force every game designer to sit down and play LEGO Star Wars. Press a button, appear, smash stuff, leave and the world keeps turning. That’s the goal. An incredibly streamlined non-apocalyptic co-op solution.
Or Halo 2 or 3, where on the menu, you just press the x button and it brings up a list of your friends that are playing and allows you to join them easily and drop easily. Its amazing how backwards things have gone.
For all their sins, Destiny and The Division (who did it arguably even better) should be praised for the frictionless way they let you play with friends. Playing with strangers might be frustrating, but if I had to pick one or the other, it’s a no brainer.
forgot to add – no, you cant do expeditions together – they are single player story progression.
you can free world roam at the end of quests though
Yes you can, you need to shoot an SOS flare and you can do expeditions together.
Just be aware if following this advice, @mucktard, that SOS flares bypass Online Session restrictions, so there’s every chance someone responding to an SOS will jump into your session before whoever you’re trying to play with. Your friend may be presented with a tonne of options even if they try to filter to match your session, meaning several refreshes before they can find you. (Knowledge gained through painful experience trying to partner up with my GF in an expedition.)
The ‘easier’ (relatively speaking – it’s still a fucking pain in the ass) way to ensure you get into an expedition with someone is to queue together for a quest, then when the quest is completed, return to camp instead of base. Haven’t tried this with failing/abandoning, but I assume that could be a quicker way.
Capcom really doesn’t want you to easily expedition with friends.
Your Palico does basically no damage, so grab it a weapon with a status affect for maximum usefulness. Paralysis, sleep, and poison will do a lot more for you than the tiny damage it does.
This is the best advice.
As a heavy bowgun-user, I am very grateful for my Pal’s efforts in drawing aggro, though. Also, marvellous health-bomb dispensers they are!
Yep. I’ve never switched out the vigorwasp delivery ability on my Palico because it’s way too useful.
Here’s another tip: Skip the PS4 release and come back 18 months from now when an enhanced version is out on the Switch.
Or the PC release, with even more improved graphics!
(No-one will be waiting for the Switch version if they want a good-looking version, and load-times on the PS4 Pro are already pretty tiresome… can’t imagine how many coffees you’d have to make in a sustained Switch session.)
Portability over slightly tuned up graphics. Every time.
This won’t run well enough on the Switch, unfortunately.
It barely hits 30fps as is on a standard Xbox One.
Dude I own a switch… but seriously ‘enhanced on switch’ over the ps4? Cmon, put down the crackpipe lol
Capcom have said multiple times that World won’t come to Switch.
More likely, depending on how well MHGU does when it launches later this month, they’ll make a tailored, World-like game for the hardware.
Is there ever anything that points you toward them? I only discovered them because, about 25-30 hours in, a friend asked if I’d done any investigations, and I’d never seen any come up at the mission board – it was always greyed out. When I eventually found these guys, I lost about 4k research points to deliveries, and discovered that I had about 175 investigations available. Such an awkward system… I was starting to wonder if I’d missed an RP sink, tho, as I seemed to be gaining them faster than I could spend them.
There’s a bunch of exclamation points early on that kind of draw you to these things, which then pop up tutorials… but I’ve never skipped any of them, so I don’t know if those eventually disappear.
Edit: Also, completing quests for the botanist to upgrade the gardening is a great RP-sink.
I visited every exclamation point I saw (or pretty sure I did)… never saw one by the resource centre. When I went looking for the NPCs that would let me register bounties and investigations (around the last LR/first HR mission), there was nothing beckoning me to those guys, so either it never showed up, or they gave up trying to get my attention by that point.
I did skip the first few gather missions (was way too preoccupied looking for materials for my weapon and gear to go hunting shrooms) which might be what triggers them? Dunno…
I could have sworn an early mission sent me to the Resource Center. I must have done something to activate the questline.
Did you collect the 20 shrooms? That’s the only early gathering quest I skipped over… I would’ve thought at least they’d give a “!” marker if you have deliveries to hand in… even the vendors get a marker when they get new stock in.
I assume I did. I move at a snails pace because I pcik up everything and do every quest.
That could be the common factor. I did the shrooms quest, too. It looks like the quests the base NPCs give you are tied to improving functionality of the base, rather than just the story assignments. I had to do some optional quests in order to improve the gardening box and canteen in various ways.
One of the early story quests introduces you to it. I know because I did it this afternoon.
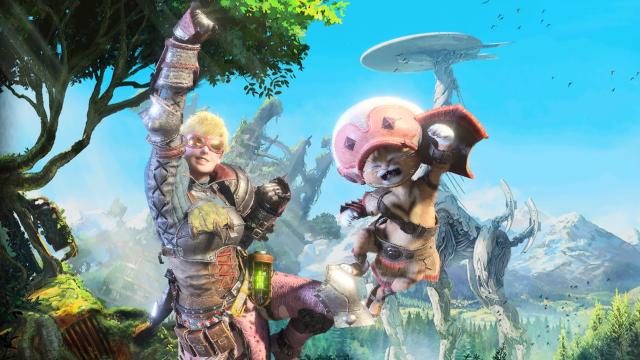
I haven’t played this game and don’t really know much about it so I may be missing something here, but…. isn’t the background of that image at the top of the article from Horizon Zero Dawn?
Oh good, not just me. I wasn’t sure if being able to kill a tallwalker was a preorder bonus or something.
Could still be an official image. EB had a pre-order bonus for PS4 to allow you to play as Aloy, so maybe it was promotional material from that?
That’s not a pre-order bonus. It’s part of the game. You get a cute watcher outfit and armour that makes you look like Aloy. The event rotates in every few weeks on PS4.
Yeah it’s one of the unlockable guild card backgrounds on the PS4 version. Not sure if it’s on the PC as I haven’t unlocked many guild card backgrounds yet.
The only thing your character looks like it will be fighting is the “Patriarchy”.
I hear the PC port is terrible, and the mouse controls are wrecked (with deadzone and acceleration issues)…
I can’t even imagine playing MHW with mouse and keyboard. It just feels so much more right on controller.