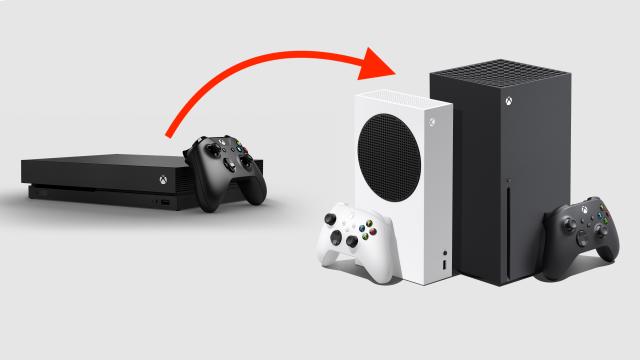
Making the leap from one console generation to the next is always a fraught proposition. You’re moving on from years of tangible memories — beloved games, hard-earned save data — that, historically, haven’t been so easy to preserve. Thankfully, if you’re migrating from an Xbox One to an Xbox Series S or X, the process is painless.
As we noted in our review, these two new machines aren’t so much a clean break from the Xbox One as they are a natural evolution. Thousands of games that are playable on the Xbox One will be playable on the Xbox Series X and S. The user interface is identical. You’d need to look with purpose to discern the difference between controllers. All of the machines start with “X.” It’s hard to think of an instance where a new generation of gaming consoles has ever felt less generational.
That’s not a bad thing. What this means for you is that porting your stuff between your old console and its more powerful successor is easier than ever. Here’s how to do it…
…with an internet connection.
If you’re able to connect your console to the internet, the process is a piece of cake. All of the games digitally associated with your account can be found in the “My games and apps” app, which might appear empty at first. Scroll down to “Full library” and click on “all owned games.” You’ll see, well, all of your owned games. Just queue up some downloads for the ones you want to play and you’ll be good to go. (For best results, hook your console up with a wired connection.)
Your save data should come along too, so long as you’ve connected to Xbox Live. Even the free version of the service automatically (and immediately) stores your saves to the cloud whenever you connect to the internet. That way, you can sign in on any Xbox and pick up playing exactly where you left off, no need to juggle devices or uploads or whatnot. (If you’ve ever seen a “Syncing data for…” loading screen, you’ve seen this process at work.) Just make sure to connect your Xbox One to the internet one last time before you put it out to pasture.
…by using external storage.
Of course, you don’t need me to tell you that games are bigger now than ever. Anyone with slow download speeds or a data cap (or both) won’t be able to just download an Xbox One’s worth of games on a whim. That’s where an external drive comes in handy. Microsoft says you can plug an existing USB 3.1 drive into your Xbox Series X or S and instantly play any Xbox One games you’ve stored on it. For what it’s worth, I was able to get things working on a drive with USB 3.0.
When you first plug in your drive, you’ll be prompted to format it to store games. (I tested this with a standard 1TB Western Digital Elements external drive. Your process might differ slightly, depending on what you use.) Doing so will make it so you can only store games, short of another reformatting, but hey, games take up more digital real estate than anything else. It’s a wise move. You’ll also be given the option to rename your drive.
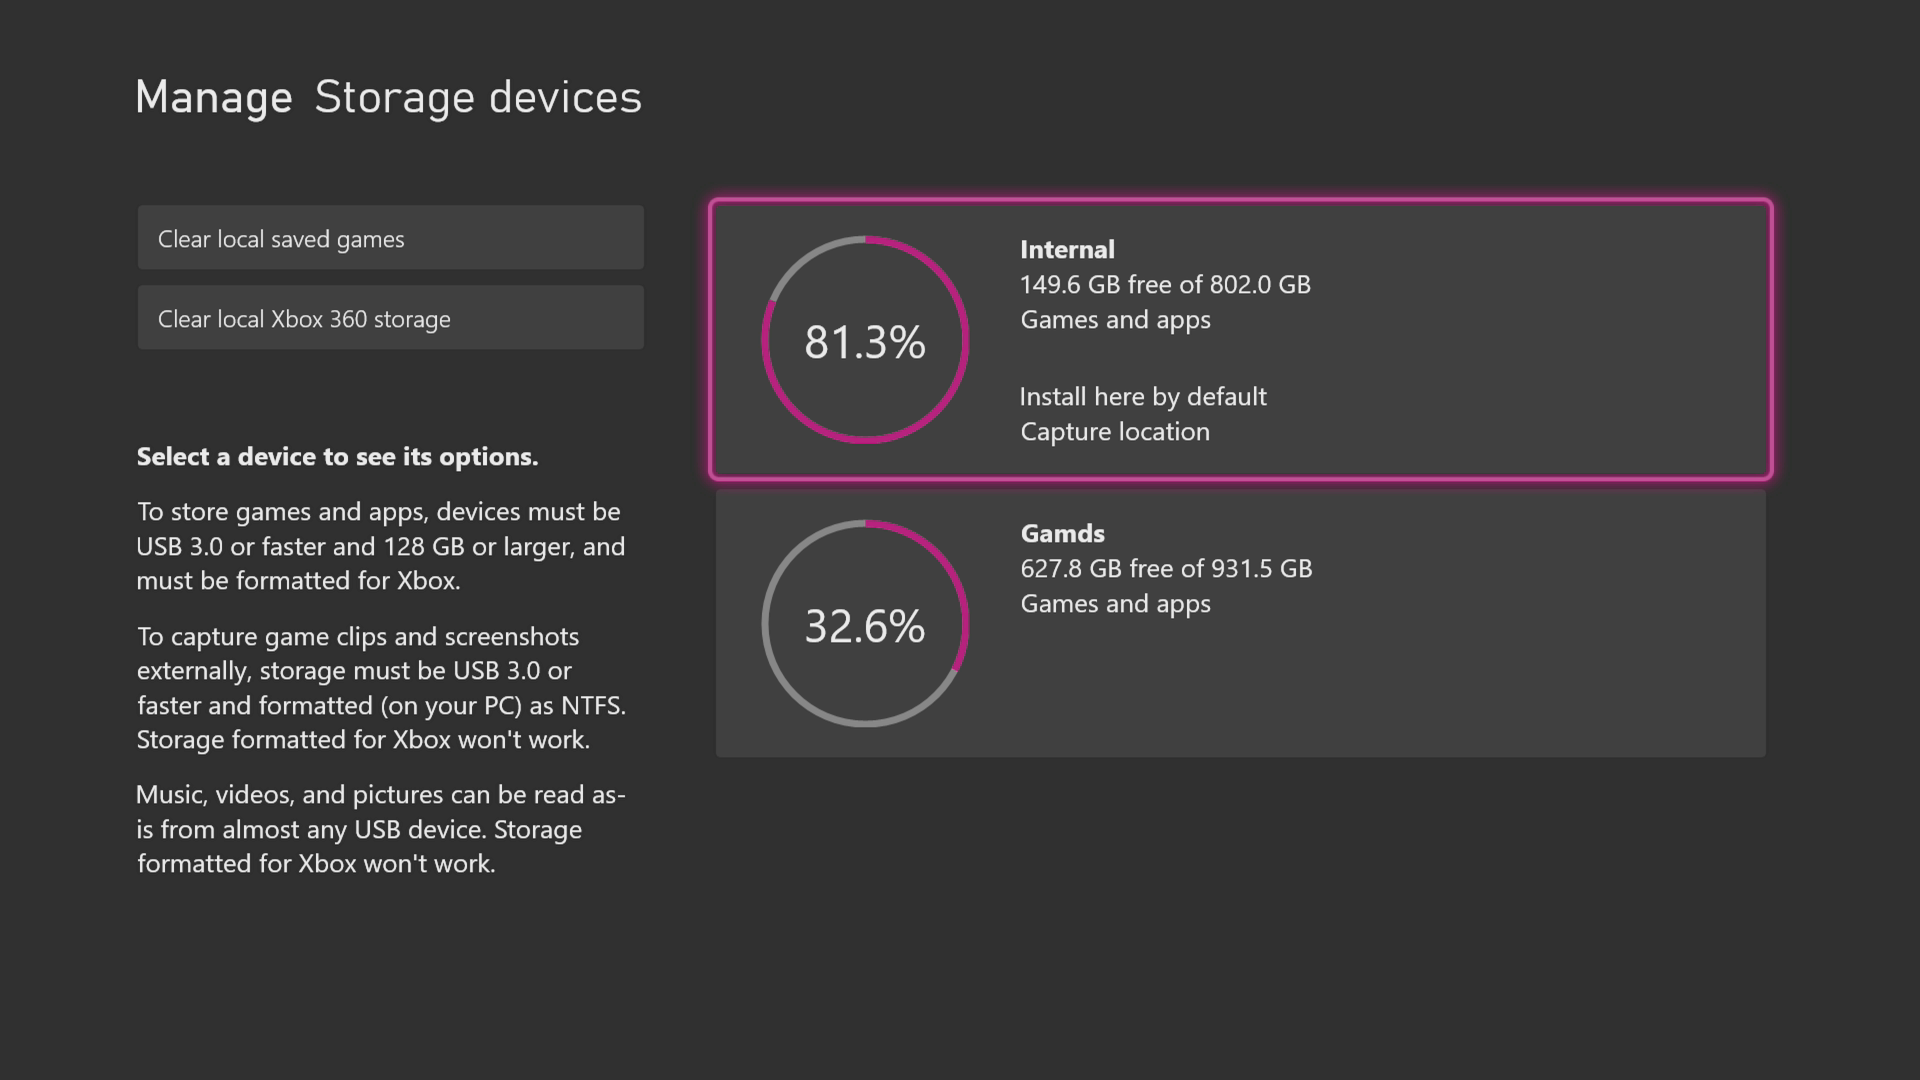
Once the drive is named and formatted, open up your settings, head to the “System” menu, and click on “Storage.” You should see two options: “Internal” and — if you, like me, don’t have the patience to deal with the Xbox’s keyboard — “Gamds.” Click on “Internal,” and go to “move or copy.” That should pull up a list of all the games on your Xbox One’s hard drive. Select the games you want to transfer and hit either “move selected” (which will delete them from your Xbox One) or “copy selected” (which won’t).
After that, just plug the drive into your Xbox Series X or S. When you next go to your “my games and apps,” you should see all of your games — both those stored internally and those stored on an external device — bundled together. You can copy or move games from external to internal storage by following the steps outlined above in reverse, but you might want to hold off. Though you can play Xbox One games from an external drive, you won’t be able to do so with next-gen versions of those games. Those fancier upgrades make use of the console’s SSD and, as a result, need to be stored either internally or on Microsoft’s proprietary $349 expansion card. Best to keep your Xbox One games on the external drive. That’ll save precious space on your console for the shinier next-gen versions (and, eventually, next-gen exclusives).
Unfortunately, to store your captures, you’ll either need to reformat your drive — so it can no longer hold games — or dish out for a second one. As far as I can tell, there’s no way to copy captures onto a USB device, even if it’s properly formatted for media storage. You can only store new captures there. If you want to look at your old screenshots on your new Xbox, you’ll need an internet connection. If you’re connected, you can view your captures by hitting the Xbox guide button, hitting the back button (the one with two overlapping rectangles), and scrolling down to “Show all captures.” Just filter by “On Xbox Live” and you’ll see everything you captured on your Xbox One — assuming you didn’t fiddle with the console’s default capture settings, which automatically upload your screens and clips to Xbox Live.
…over a local network.
If you don’t have an external drive, you can also copy games over a local network. It’s no panacea. Some games can’t be copied, but the system won’t even list them, so you don’t have to worry about accidentally trying to copy something that won’t work.
First, make sure both of your consoles are turned on and connected to the internet. Then, on both machines, open up your settings, go to the “System” menu, click on “backup and transfer,” scroll down to “network transfer,” and make sure the only option there is checked off.
Once that’s squared away on both machines, go back to your Xbox Series X. Under the “network transfer” menu, you should see a list of Xbox consoles that are on your local network and allow for local network transfers. If this is your first time doing such a transfer, and you followed the above steps to the letter, you’ll see just one. Click on it. You’ll see a list of all the games downloaded to your Xbox One — absent, of course, those games that aren’t transferable. Select the ones you want to transfer, and hit “copy selected.” Those who do have an external storage device plugged in will be prompted whether or not they want to copy games to the internal drive or to an external one.
…via the disc drive.
Just pop your Xbox One discs in the old-fashioned way. Heads up: This totally ingenious lifehack only works if you’re using an Xbox Series X. Microsoft says that disc-based games won’t work with the Series S.
Leave a Reply