Like any other Monster Hunter mainline title, Monster Hunter Rise is a big game. It’s the easiest Monster Hunter to get into by far, but there’s still a ton of content, weaponry, moves, mechanics and surprises to discover. So if you’re just jumping into Kamura Village or Monster Hunter for the first time, here’s some helpful tips to get you started.
You don’t need previous Monster Hunter experience to get going.

As successful as Monster Hunter World was, the series is still pretty new to a lot of people. So the important thing to spell out is that Rise is structured really well for beginners. The initial solo campaign, particularly the one, two and three star hunts, are easy enough to do that you can get used to basic attack patterns without getting blitzed in a couple of hits.
You’ll get a tutorial prompt basically any time something new is introduced outside of combat. So if you unlock a new skill, get introduced to Rampage quests the first time, or get offered something else, Rise will throw up a box for you. What it doesn’t do, however, is provide any especially good tutorials when it comes to the basics of hunting. So for that…
Make sure you spend some time at the training arena.

You’ll probably end up doing some rudimentary hunter training in the arena, where you’ll be taught the rough outline of how and when to capture a monster. But what the game doesn’t outwardly do is tell you much about the fundamentals of taking a monster down, or what the most efficient path is for the weapon you have.
Eventually, you’ll want to have a rough gameplan in your head for every monster. But when you’re just starting out, the best thing to do is to get a couple of combos under your belt purely for maximising damage. The training arena is great for that, because it gives you very clear, obvious instructions on what your combos are and the rough windows you have to execute them.
You should also spend some time in the training arena getting used to the silkbind attacks and moves. Every weapon will have at least two, although depending on the weapon it might be one attack and one evade. Whatever your suite of silkbind tools is, you should absolutely spend time at the training arena just to get accustomed to their range. Many of the silkbind attacks can be quite short, and some of them can take a bit of getting used to. The light bowgun’s Fanning Vault, for instance, works as a basic aerial evade. But you can also land an attack mid-air, provided you’re comfortable with the timing.
Monster Hunter Rise will also unlock new switch skills for you as you progress through the campaign and hub missions. These will completely change out the flow of how you attack monsters, so every time that option comes up, it’s good to spend a couple of minutes in the arena messing around with it all.
Do all the ‘expedition’ quests when they’re available.

When you’re introduced to a new region for the first time, that region will also become available in the Expedition mode. Like Monster Hunter World, expeditions don’t have a time limit and you’re not required to hunt anything if you don’t want to.
But what’s really important is the information you get from running around. When you jump into a new area, the mini-map will be completely greyed out. That means you won’t know where the monsters are, or where precisely they’ve moved to. (Also, if you clear out an area on a quest but end up failing the quest, like what can happen when you’re first introduced to the Lava Caverns, all that exploring you did before will be completely wiped out.)
Even more importantly, however, just doing a simple runthrough of the maps will give you an idea of where all the Spiribirds are. You’ll want to run along and grab those before big boss fights, because they provide attack, defence, stamina and health boosts that last the entirety of the hunt. Their location doesn’t change. And because every level in Rise is smaller than Monster Hunter World‘s combined map, you’ll only need a couple of minutes to get the boosts you need. You’ll also get a better sense of where the spare wirebugs are, which are absolute lifesavers especially if your only good silkbind attack requires two wirebugs.

Outside of fights, this is also the best way to find the things you really need: berries and nuts for crafting extra ammo along the way, spiders and nets that can be crucial for traps and capturing monsters, and more. You’ll be able to get some of these through the Buddy Plaza when you start sending the Meowcenaries and your buddies on various expeditions, but sometimes you’ll need to find it in the wild yourself.
Hold the scavenge button down instead of pressing it three times.
Monster Hunter World did this as well, and it never made any sense. When you down an enemy, you’ll get a prompt to press A to collect chest plates/items/claws/whatever gear that can then be fashioned into weapons and armor.
But don’t press A. Hold the button down instead, and you won’t have to hit the button multiple times.
Don’t ZL to drift, use ZL to go real fast.

It turns out that palamutes learnt a trick or two from Sonic. If you tap ZL while holding down the run button (R), your palamute will begin drifting for a few seconds. Whether you want to drift around a corner or not, you’ll get a massive burst of speed once that animation finishes.
The burst you get is significant enough that, honestly, you should be exploiting it wherever possible. It’s also very handy in chasing down monsters as they go to flee, because the speed boost is faster than the run speed of any monster. If the monster flies away, well, you can’t do much about that.
Wait for the music to stop playing before pulling meat off the spit.

This won’t be new to other Monster Hunter fans, but in Capcom’s world, meat that’s cooked to shit apparently gives you the best stamina. It’s a travesty, but if you want the biggest boost, pull the meat off the spit by hitting B when the music stops playing.
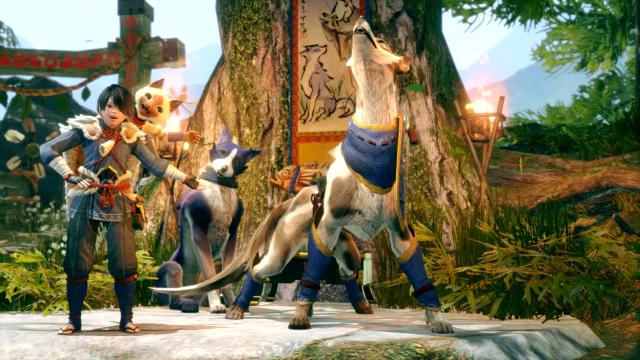
Don’t be shy on the buddies — recruit as many as you can.

While you might want to keep your initial palico and palamute for as long as possible, they definitely deserve friends. And in the Buddy Plaza, you can send those friends off on various gathering quests, training and hunting missions where they can gather crucial ingredients for you.
The important thing is that they’ll generally find more stuff and have better success the higher level they are. Fortunately, the buddy plaza largely relies on Kamura Points for sending buddies out on expeditions. In your first 20 hours of the game, you shouldn’t need to use Kamura Points for anything — you’ll have enough zenny and resources to buy everything. So stock up on the buddies and put them to work ASAP.
Look for the fortune owl whenever it comes up.

There’s a ton to find and discover in Monster Hunter Rise‘s 5 maps. But when you come across the special fortune owl, you’ll get a little prompt on the bottom-left of your UI that something special is near.
The Fortune Owl won’t appear on your map, but always get it if you can. It literally doubles the amount of money you make from a particular quest, which is especially handy considering…
Don’t forget to save up 60,000 zenny for the armour and power charms.

Occasionally the merchants in the main part of the village and the gathering hubs will have a sale, and when they do that’s a good chance to get Armorcharm and Powercharm. They’re returning items from Monster Hunter World and they are absolutely worth grinding the zenny out for.
Both items will boost your armour and attack simply by holding them in your item pouch. You could also upgrade both charms into Armortalons and Powertalons in Monster Hunter World, and Rise is no different. The only trick is the cash: it’ll cost you 60,000 to grab both items. The upgraded talons would also stack with the base Powercharm/Armorcharm too, providing a massive boost to your raw damage output. It doesn’t matter what build you’re going for, just make sure you save up for both these items along the way.
Start melding charms as soon as you can.

Perhaps the only real complication with Rise‘s accessibility is that it gives you a false sense of security. You face tank a few bosses, you get used to having plenty of time to dodge and then … suddenly monsters are just making massive leaps that you can’t avoid with a single dodge. Or you’re getting swamped by massive AOE attacks with enormous debuffs that take all your energy to avoid — forget about dealing damage.
A key part of the proper Monster Hunter experience — when you get into high rank missions and tougher bosses beyond Magnamalo — is properly equipping yourself for each monster you’ll face. You can face tank most of the first 15 or 20, but later on you’ll have to properly account for their elemental attacks and debuffs.
So one way to handle that is to have the right talismans. Once you get about 20 hours in, the merchants will be able to “meld” talismans for a small amount of Kamura Points. These talismans can have any skill you want, so if you don’t have a good amount of fire or poison resistance with your current kit, you can get them to fashion a talisman to help counteract that.

Some talismans and equipment will also unlock skills that aren’t available any other way. A real useful one is Leap of Faith, a returning Monster Hunter ability. Leap of Faith can be performed in any direction in Rise too, according to the description:
Allows you to do a dive-evade when facing towards large monsters, and extends the dive-evade distance.
Monster Hunter World had a weird thing where Leap of Faith only worked if you were running away from monsters with your weapon sheathed, and only exclusive bits of equipment unlocked the full ability. So Rise is more forgiving in that aspect. And it’s a cool ability to have, if only because it gives you a dodge that has a brief amount of invulnerability — which is super handy for enemies that divebomb, or if you’re stuck with low-mobility weapons like the heavy bowgun.
Don’t. Overlook. The. Dango.

There’s a lot of dango options from the off, and it can be easy to lose focus of how useful they can be. Dango might not also trigger — without using a dango ticket, there’s always a slight chance you won’t get any of the extra benefits.
But for the most part, you can always take something good with you on the road. Your player doesn’t level up, for instance, but your palicos and palamutes do — so if you have the chance to boost their XP, always do it. Buddies can bring you out of sleep, stun, drop crucial heals, and add other support bonuses in a fight that only get vastly better as they level up.
Similarly, you can use dango to boost your money at the end of a quest, make it easier to attract Spiribirds, and more. It doesn’t hurt to also use some of the dango that reduce damage taken or give you a one-time revive for the toughest fights, but for the most part you’ll get the most benefit by concentrating on extra zenny and XP boosts for your partners.
Dig into the menus so you know what parts of the monster to attack.

Once you’ve met a monster for the first time, you can dig through their full stats in the menus. This is crucial because Monster Hunter breaks down how much damage each weapon will do to every part of a monster. Blunt objects do better against the head of a creature, but if a lot of that monster’s attacks are front-on, you might find chances to attack the head difficult to come by.
The menus will also provide advice on debuffs the creatures impose, just in case you forget. Magnamalo’s hellfire blight, for instance, can be dismissed with a wiredash or rolling five times. The menu also provides a Magnamalo counter by targeting parts of its body that are lit up with hellfire.
There’s also info on their weaknesses to various elements, what materials they drop and the different drop rates for capturing vs slaying monsters. So far, the main bonus you can get from a hunt is from severing a wing, tail, limb or some other object — most of the drop rates between capturing and slaying are within a few per cent of each other. (Rathalos has a 31 per cent chance of dropping a Rathalos shell when dying, but only 30 per cent if captured. The drop rate for Rathalos webbing is 27 per cent when captured, however, compared to 23 per cent when slain.)
Customise your radial bar before going out on a quest.
If you hit the menu option before a quest, you can dive into Radial Menu Settings and customise everything you want in the radial menu. It takes a little bit of getting used to, but accessing your traps, potions and accessories is much faster than using the regular item bar.
There’s also an added benefit: to use the item bar you have to sheathe your weapon first, then activate the item. Radial bar options will trigger straight away, which can save you a bit of a hassle if you’ve just copped a huge attack and need to heal like, right now.
Don’t ignore the side quests!

Various Monster Hunter Rise NPCs will give you quests — and Fugen the Elder will ask you directly to help others out once you progress far enough through the campaign. They’re worth doing, if only because everyone will give you something that undoubtedly comes in handy later.
Some side quests unlock extra weapons, armour and designs for your palamutes and palicos. Others will provide new dango options, if you’re getting quests from Yomogi, while Rondine will provide side quests that enable new submarines (unlocking new slots for buddies to go and trade for crucial ingredients).
These are all worth doing at some stage, and you track all the most important ones through the “Requests” option under “Quests” after hitting the + button. Many of the quests that unlock new weapon designs can actually be done in advance, so long as you capture a monster instead of killing it, so keep that in mind.
Enable gyro controls.

Given the importance of targeting certain parts of monsters, it helps if you can, y’know, actually target them properly. The gyro controls in Monster Hunter Rise help with that massively, but they’re not enabled by default and the game doesn’t prompt you to turn them on when you use a bowgun/bow for the first time.
So to do that, just head into the options and then the “Gyroscope” menu. You can customise the sensitivity individually for handheld and docked gameplay too, and whether you want gyro controls enabled when you’re not aiming. (Pro tip: I found it easier with that turned off, as you can use the Joy-Con controls/Pro Controller to run around normally, and then gyro only enables when you want to shoot.)
Monster Hunter Rise is out for the Switch on March 26, and in 2022 for PC. You can read our full review here.
Leave a Reply