The more time I spend with Valve’s Steam Deck, the more I’m fascinated by it. While it’s obviously rad for the incredibly rich selection of games it plays, I’ve found it’s actually a really solid mini-PC for work, creation, and just everyday PC-related tasks, so today I’ll show you how to get started using your Deck as a powerful little PC in its own right.
Don’t worry, none of this involves installing weird software, arcane Linux witchery, or using another OS. While SteamOS has some room for improvement, Valve’s initial offering is very impressive, making for a fun, experimental little computer that’s great for taking a first taste of Linux. It’s cool to also have that in a device that plays AAA games. And indie games. And weird art games. And it’s also a possible peek into the future of PC gaming itself. Valve seems to be all-in on Linux, so maybe it’s a good idea to start learning on this thing.
Let’s see what it has to offer.
Getting In And Out Of Desktop Mode
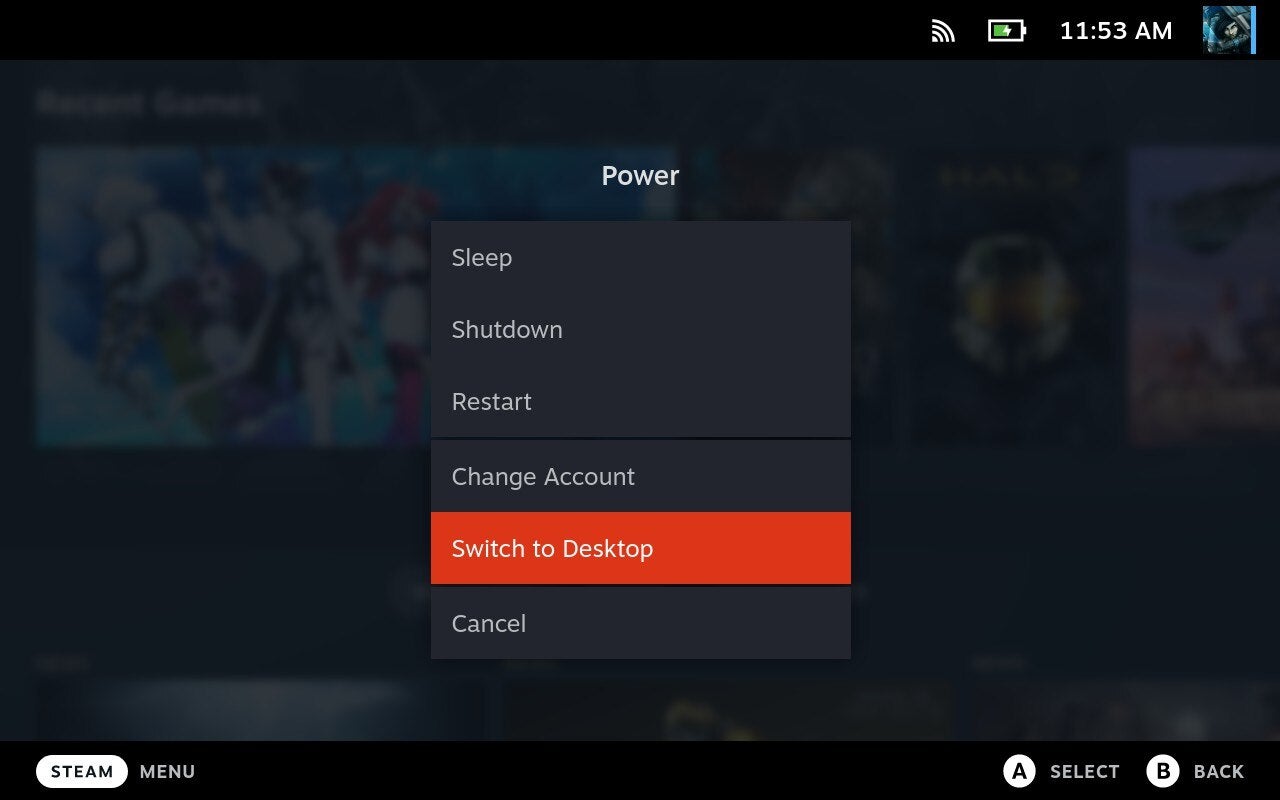
Accessing the Deck’s full-featured Linux “Desktop Mode” — which is what many users call its “desktop” functionality — is easy: After booting into the default Gaming Mode, just hold the power button and select “Switch to Desktop” and a few short loading screens later you’ll be in. You can’t launch directly into this mode when powering up the device, which is a shame, but switching is quick.
From Gaming Mode, you can also access Desktop Mode by hitting the Steam button (or the touchscreen equivalent on the lower left-hand corner), navigating to “Power,” and selecting “Switch to Desktop”.
If you want to jump back to Gaming Mode, simply reboot.
Welcome To Linux, Expect A Few Hiccups
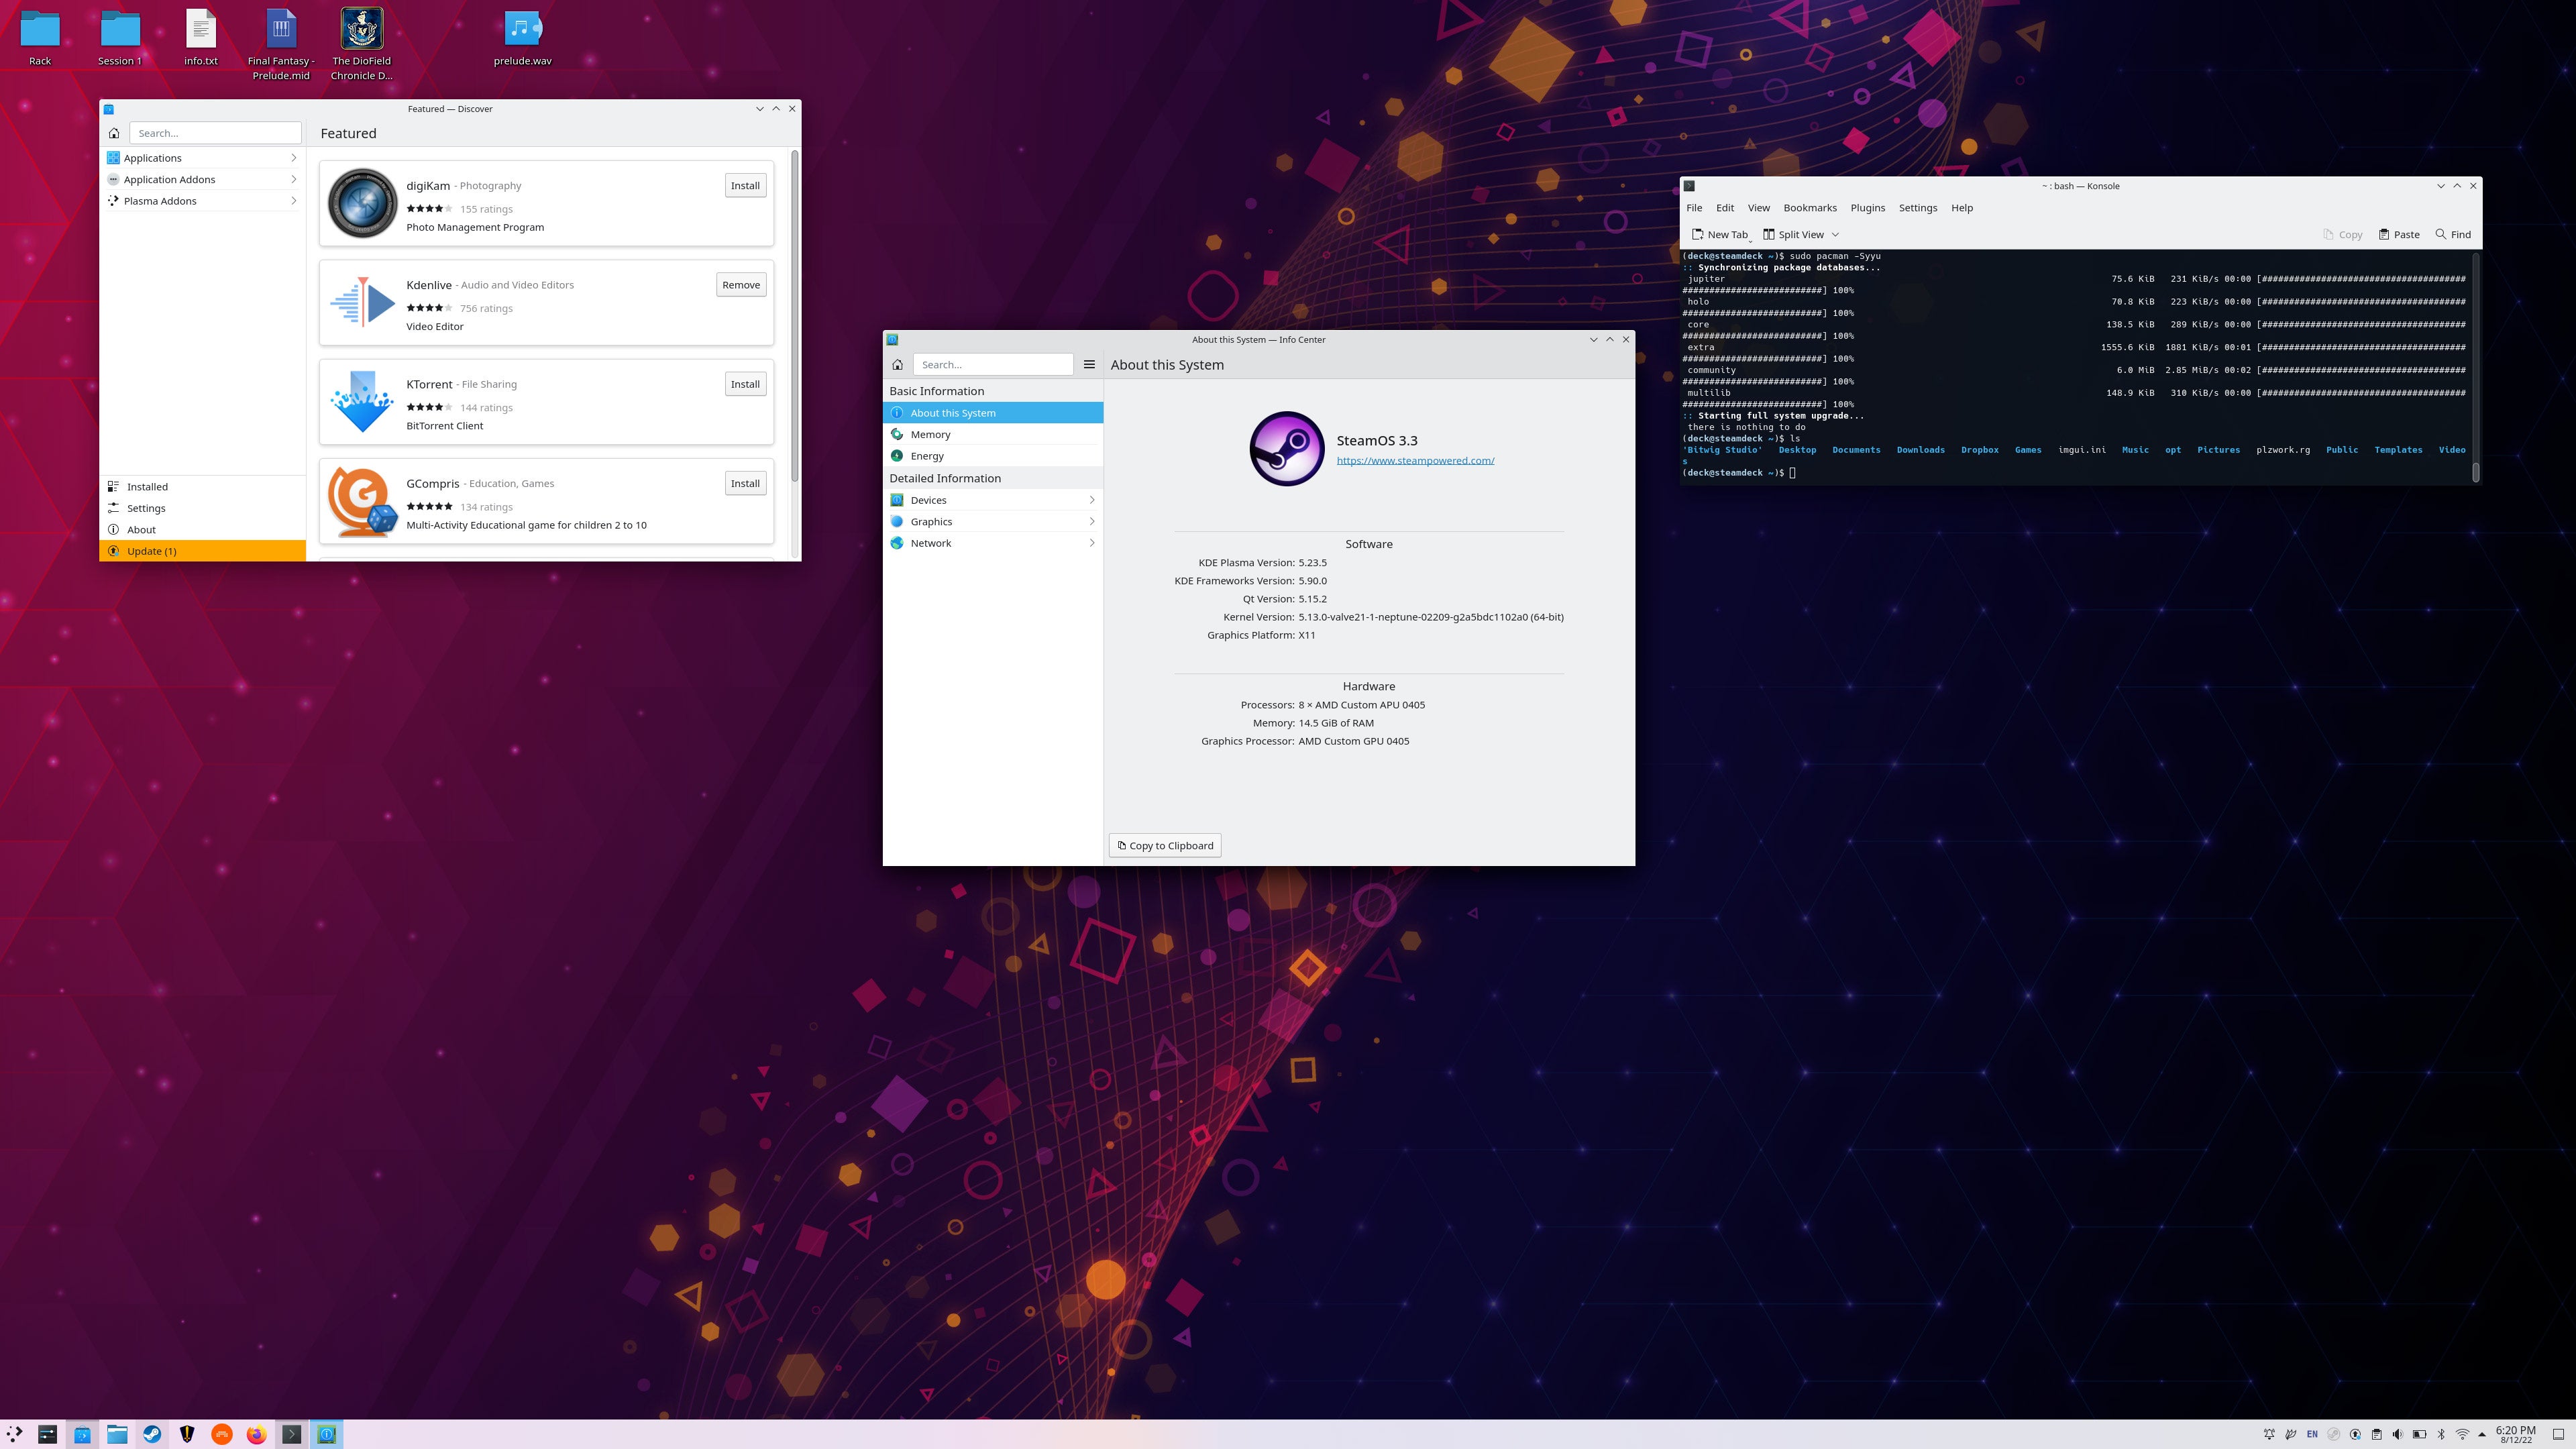
Steam Deck runs on SteamOS, which is Valve’s spin on a Linux-based OS. For those outside the dominion of the penguin, Linux presents a compelling alternative to the likes of Microsoft’s Windows and Apple’s MacOS. It’s excellent, and has an endless variety of use cases; desktop computing is just one.
No, we’re not entering the year of the Linux desktop (yet). But the last decade has seen incredible advances in there nonetheless, bringing us some very reliable and functional operating systems. Some even feature style and character. SteamOS’s Desktop Mode is kind of a greatest-hits of different developments in this sphere of computing. Most of the time it looks and performs like Windows: There’s a recognisable file management system, it comes with Firefox for web browsing, and you can run Steam and play games in Desktop Mode just as you would on a PC.
But you should still expect some…Linuxisms. For example, installing apps isn’t as straightforward. It’s best to use SteamOS’s “Discover” app store for finding and installing apps. Beyond that it’ll be hit or miss, and you’ll likely need to learn some Linux tips and tricks.
Obsidian, for example, is a fantastic (the best, even) note-taking app you can download from the internet, but the website will only give you an “Appimage” for Linux. We can skip the details of what that means, but know that it’s not a simple .exe or .msi. Installing it this way leads to a strange icon in the taskbar, and can leave the app tricky to launch. Obsidian is also in the app store, however, and installing it that way guarantees it’ll show up like any other app.
In general, using SteamOS in Desktop Mode won’t be too different from switching to a smartphone OS you’re not as familiar with. Things will be in different places; certain features will work in surprising ways. Discovering these differences is often the fun of learning a new OS, but sometimes a Linux desktop can behave in ways you’re not yet used to. Fortunately, SteamOS includes a lot of modern OS comforts to deal with common problems.
Valve has included an auto-launching “this program isn’t responding” prompt to deal with stubborn, unresponsive apps, for example. The System Monitor will also allow you to kill frozen programs just as Task Manager does in Windows. You can find that in the Deck’s equivalent of the Start Menu.
But don’t expect a buggy OS where apps are crashing left and right. SteamOS is one of the most stable Linux desktop environments I’ve tried in a long time. You’re far less likely to burn down the install by doing something you didn’t know you weren’t supposed to in the Terminal — a common enough Linux accident that’s worryingly easy to do even in a very popular and user-friendly Linux distribution like Ubuntu.
If you’re ok getting your hands a little dirty with learning a new OS’s quirks, you’ll be fine. That said, there are a few items you should set up immediately. Like, don’t use the Deck as a desktop computer until you do these things.
Set Steam To Launch On Startup
Having Steam running while in Desktop Mode is absolutely essential, but by default, Steam does not launch alongside Desktop Mode. Valve should actually change this.
If we’re going to get the most out of the Steam Deck as a computer, then we need to make sure that Desktop Mode works as efficiently as it can without requiring an external monitor or a physical mouse and keyboard.
That’s where running Steam comes in. Steam, the app, provides you the ability to bring up a virtual keyboard, move the mouse around with the touchpads, and activate other useful SteamOS commands. If you don’t have any peripherals attached and Steam is closed, the Steam Deck is just a tablet with a touchscreen — one that’s not as accurate as your smartphone’s.
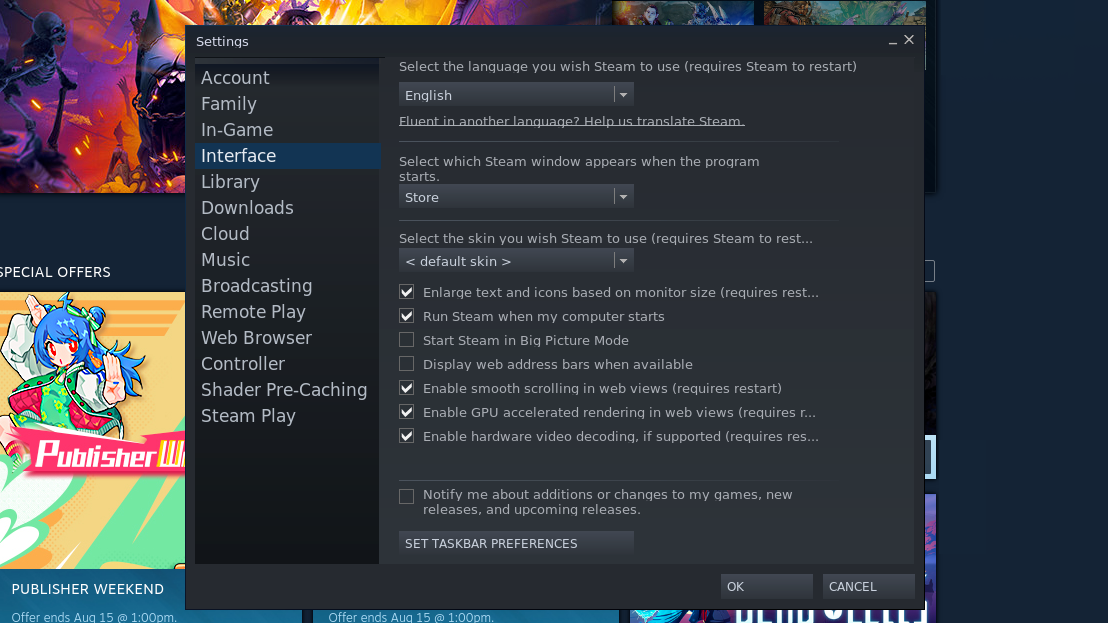
You can set this in Steam itself. Enter Desktop Mode, launch Steam, then navigate to Steam’s settings. In “Interface,” check “Run Steam when my computer starts.” While you’re there, uncheck the box at the bottom labelled “Notify me about additions or changes to my games, new releases, and upcoming releases.” That’ll shut off the Steam app’s annoying store deals pop-up. If you didn’t know how to do that yet, you’re welcome.
You can also make Desktop Mode apps accessible through the Deck’s main Game Mode interface (the one that looks similar to Steam’s “Big Picture”). Simply right-click on an app you want to show up in your Steam library and select “Add to Steam.” Some programs won’t launch this way, while others might have some interface issues, so you’re likely to go through a bit of trial and error from app to app. Any apps you add to Steam Deck’s Gaming Mode this way will show up under “Non-Steam Games” in your library.
Set The Displays Appropriately
If you connect an external display to the Steam Deck in Gaming Mode, it will switch over automatically. It takes a second longer than it probably should, but it’s pretty seamless. This isn’t the case on Desktop Mode, however. Setting up your displays here can be a little tricky at first. Fortunately, that’s a setting away from being fixed.
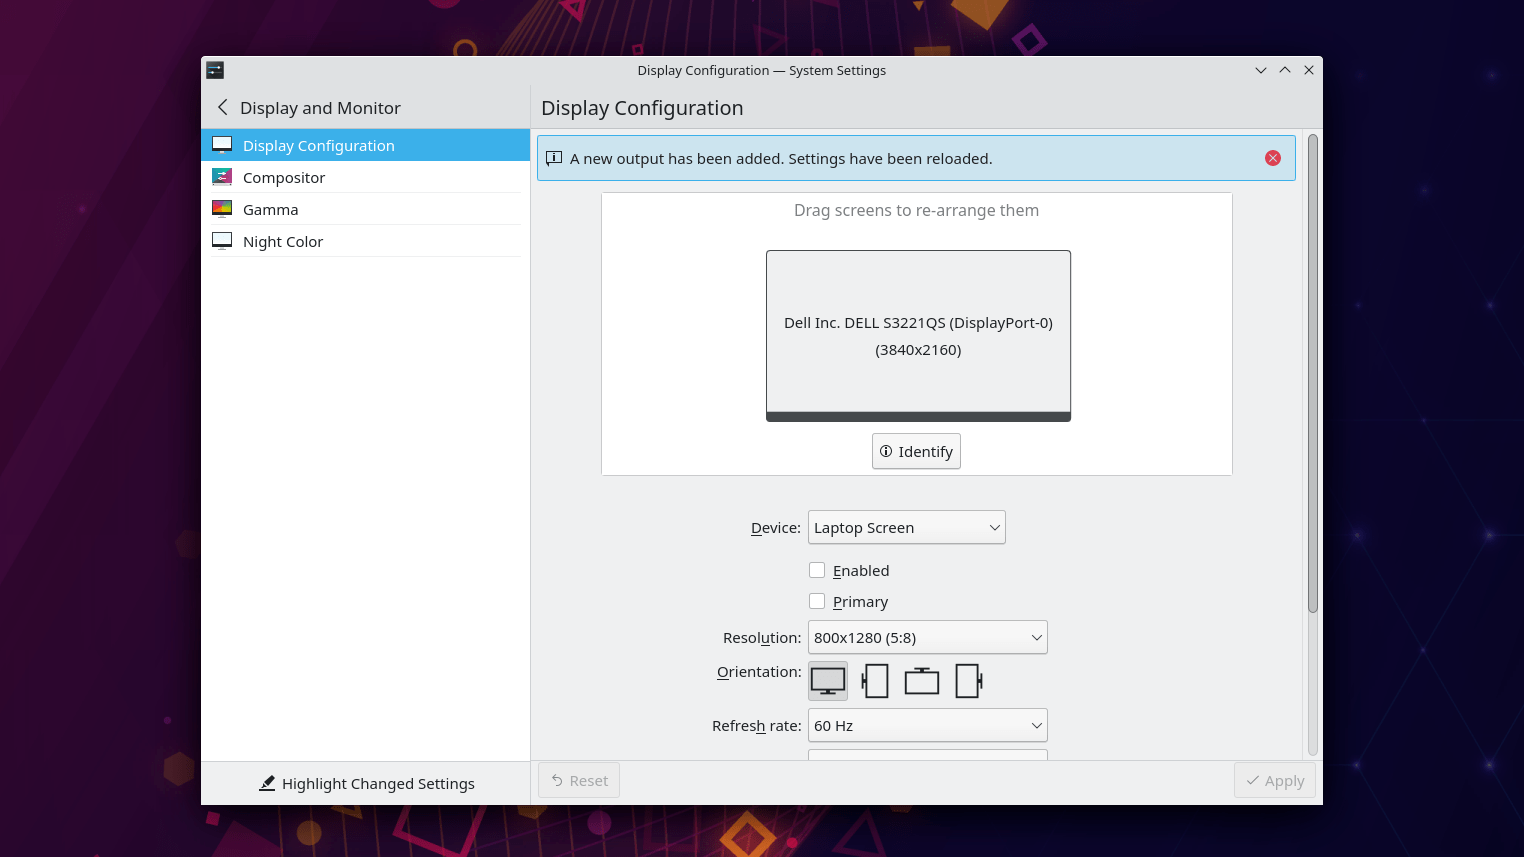
In Desktop Mode, the Steam Deck will default to its own little screen as primary and will use your external monitor as a secondary display. In System Settings, you’ll find it refers to its own display as a “Laptop Screen” (aww, it thinks it’s a computer!).
If you want to use your external screen as the main display, complete with the actual main desktop and taskbar, set your external screen to “Primary”. You might also want to consider unchecking “Enabled” for the Laptop Screen, as this will give the smaller screen a break by shutting it off.
Have some patience when connecting and fiddling with display settings. Desktop Mode seems to get confused easily and might flip back and forth between both screens before stopping on one. This is typically just a quirk of setting it up. Once you’re up and running, your selected screen should stay put while in use. And if you switch back to Gaming Mode while an external monitor is plugged in, usually that external monitor becomes the main, and only, display.
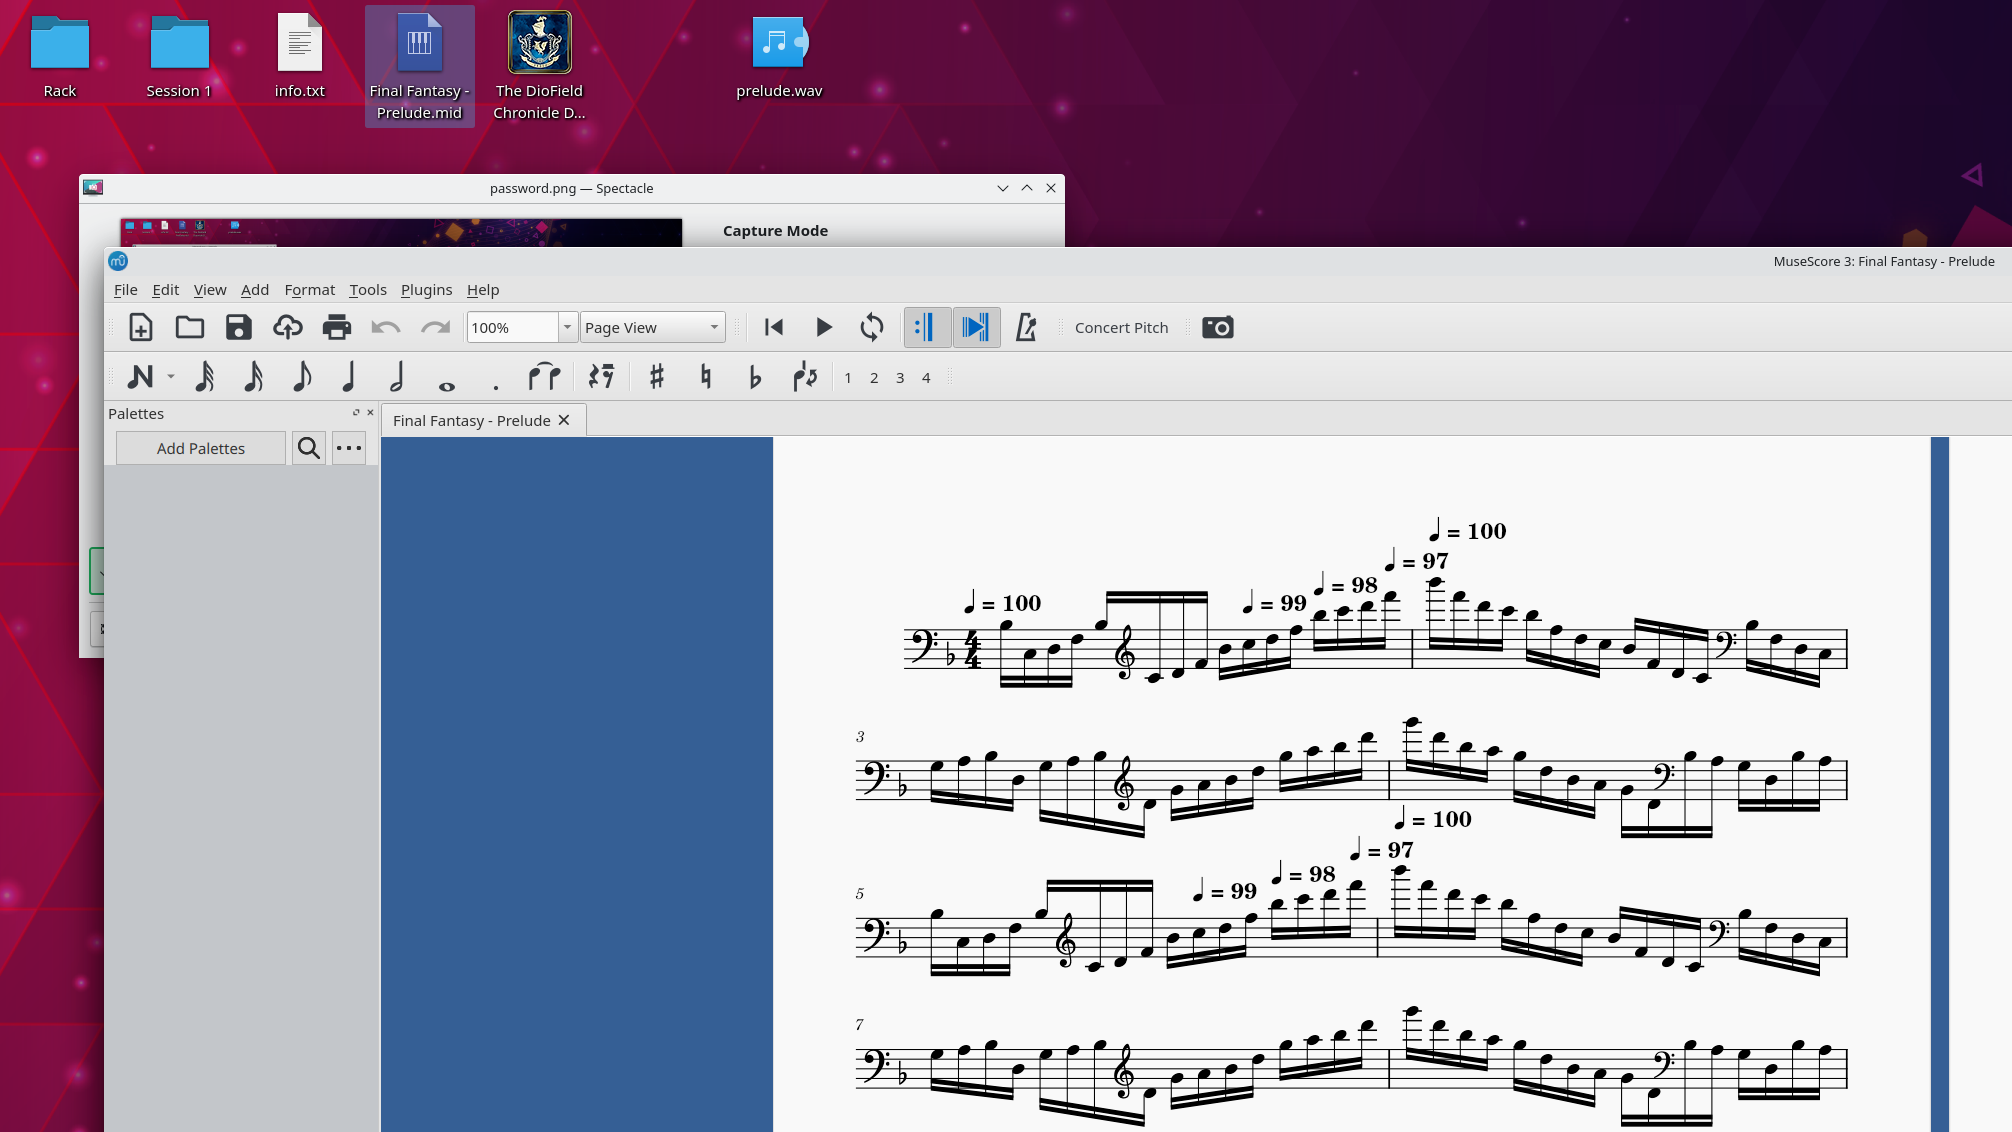
Set A User Password
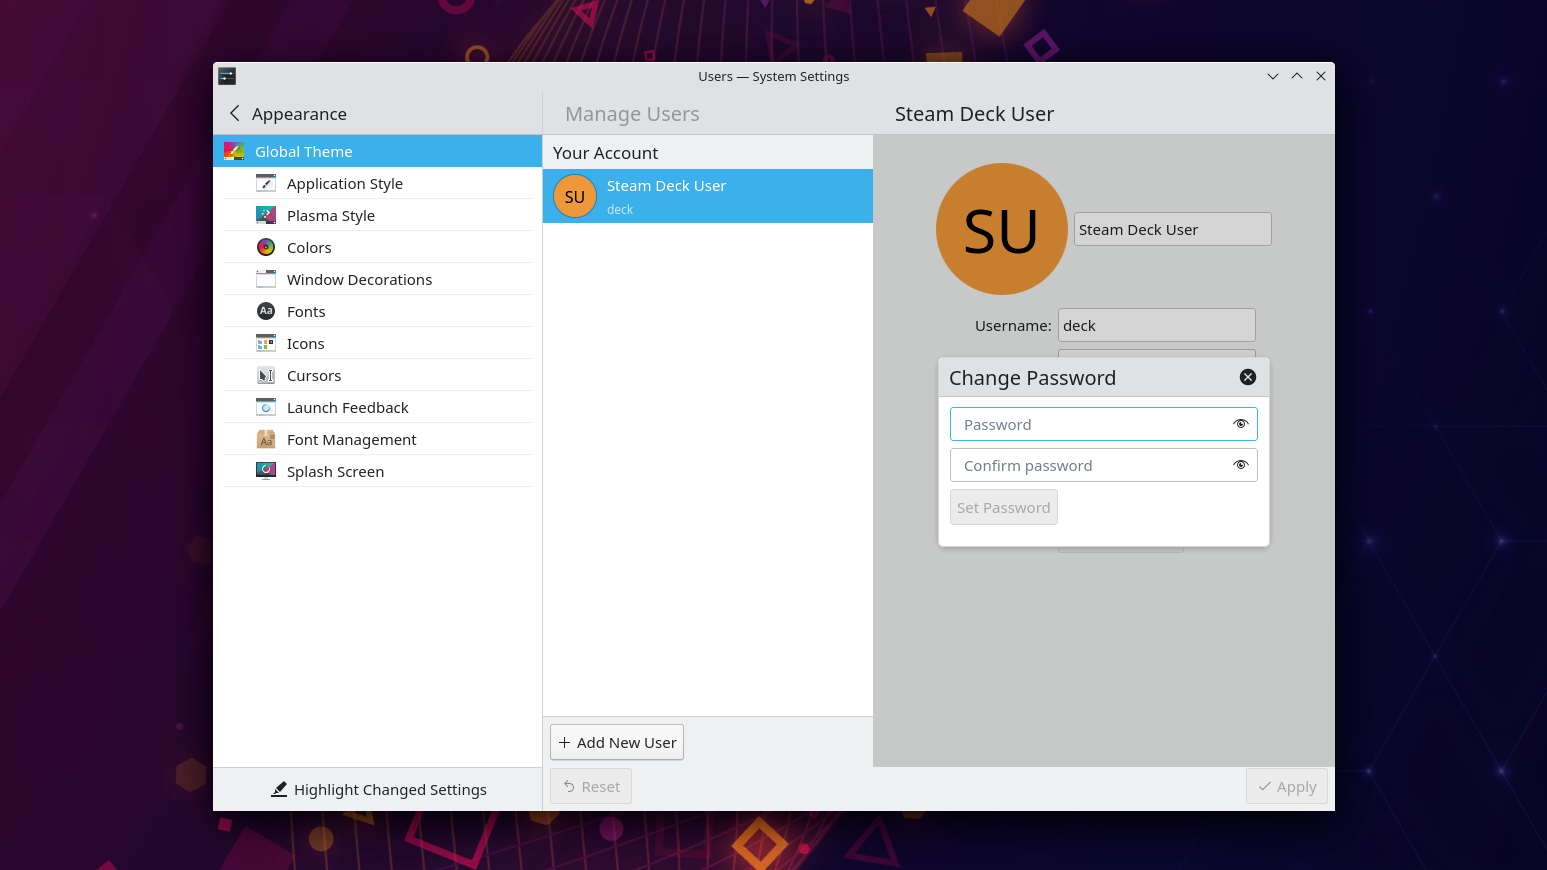
Steam Deck’s Desktop Mode doesn’t have a password by default. If you’re planning on using this device as a computer, you should change that. Search for “System Settings” in the “Start Menu” and under “Personalisation” > “Users,” you’ll find the ability to edit your account information, including the option to set a password.
You’ll use this password in “Konsole,” SteamOS’s equivalent of a basic Linux “Terminal.” Even if you won’t be doing any Terminal work, a password is a pretty wise thing to set up. Just don’t forget it. (And while we’re at, it’s the Year of our Lord 2022, so you do use a password manager, right?)
Cover, Not Auto-Hide: The Essential “Taskbar” Setting
Steam Deck’s Desktop Mode has a Windows-like “taskbar” running along the bottom that shows you the various apps you have open. There’s a tray of options in the bottom right-hand corner with a clock, as well as a menu reminiscent of a Windows Start Menu on the left. The taskbar has one mission-critical setting that’s remarkably easy to miss.
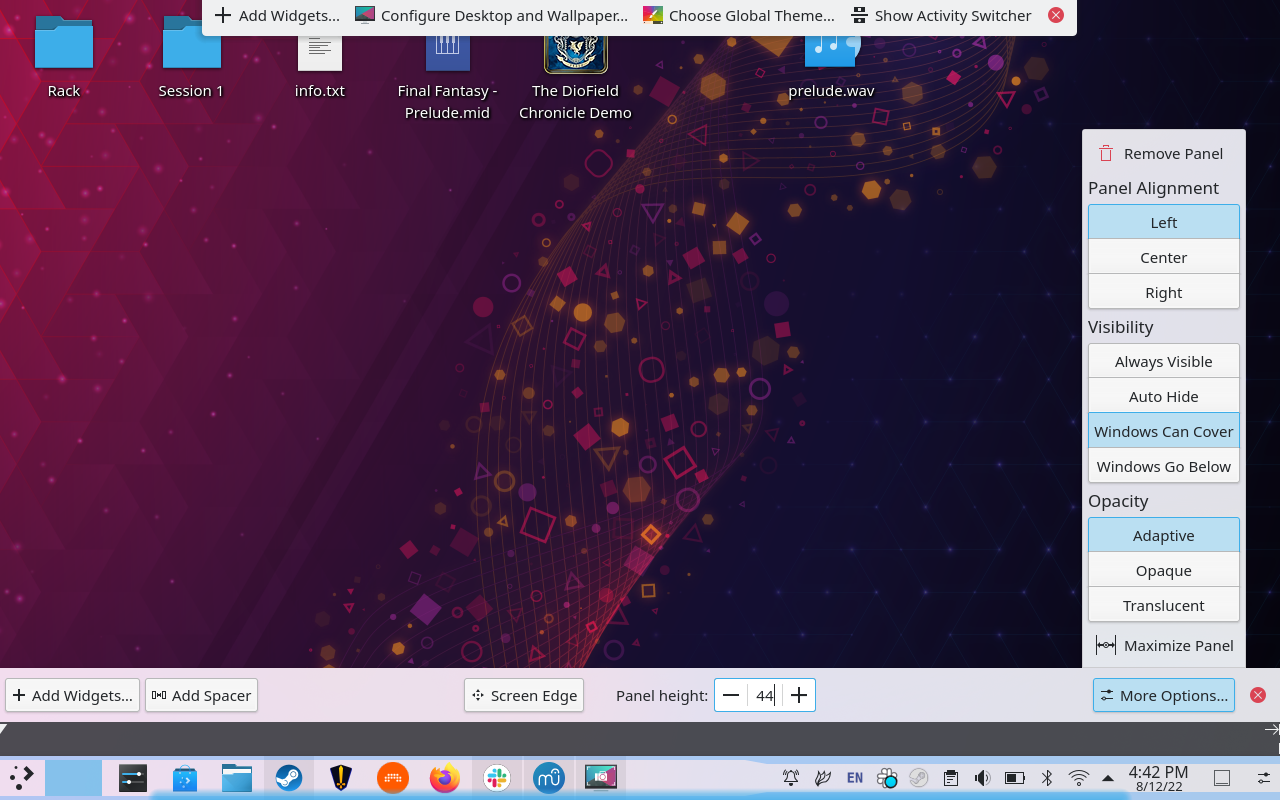
Right-clicking on the taskbar will reveal an option titled “Enter Edit Mode.” Here you can thoroughly customise its appearance and add widgets, etc. But it’s essential to navigate to the right part of the screen in Edit Mode and under “More Options,” enable “Windows Can Cover” in the Visibility section.
This lets you make the most out of the Steam Deck’s small screen by allowing apps to expand over the “taskbar.” You might be tempted to select “auto-hide,” but if you don’t have a mouse and keyboard connected and Steam ends up crashing or doesn’t start up when entering Desktop Mode, well, you’ll have no “taskbar” on the desktop as it auto-hides, and you won’t be able to launch the main menu with the touchscreen. This essentially leaves SteamOS in a broken state until you physically plug in a mouse or keyboard.
Letting app windows cover the “taskbar” guarantees that the critical options it provides are always accessible when you minimise or move a full-screened app window, regardless of what input methods are connected or activated.
Get Some Essential Peripherals
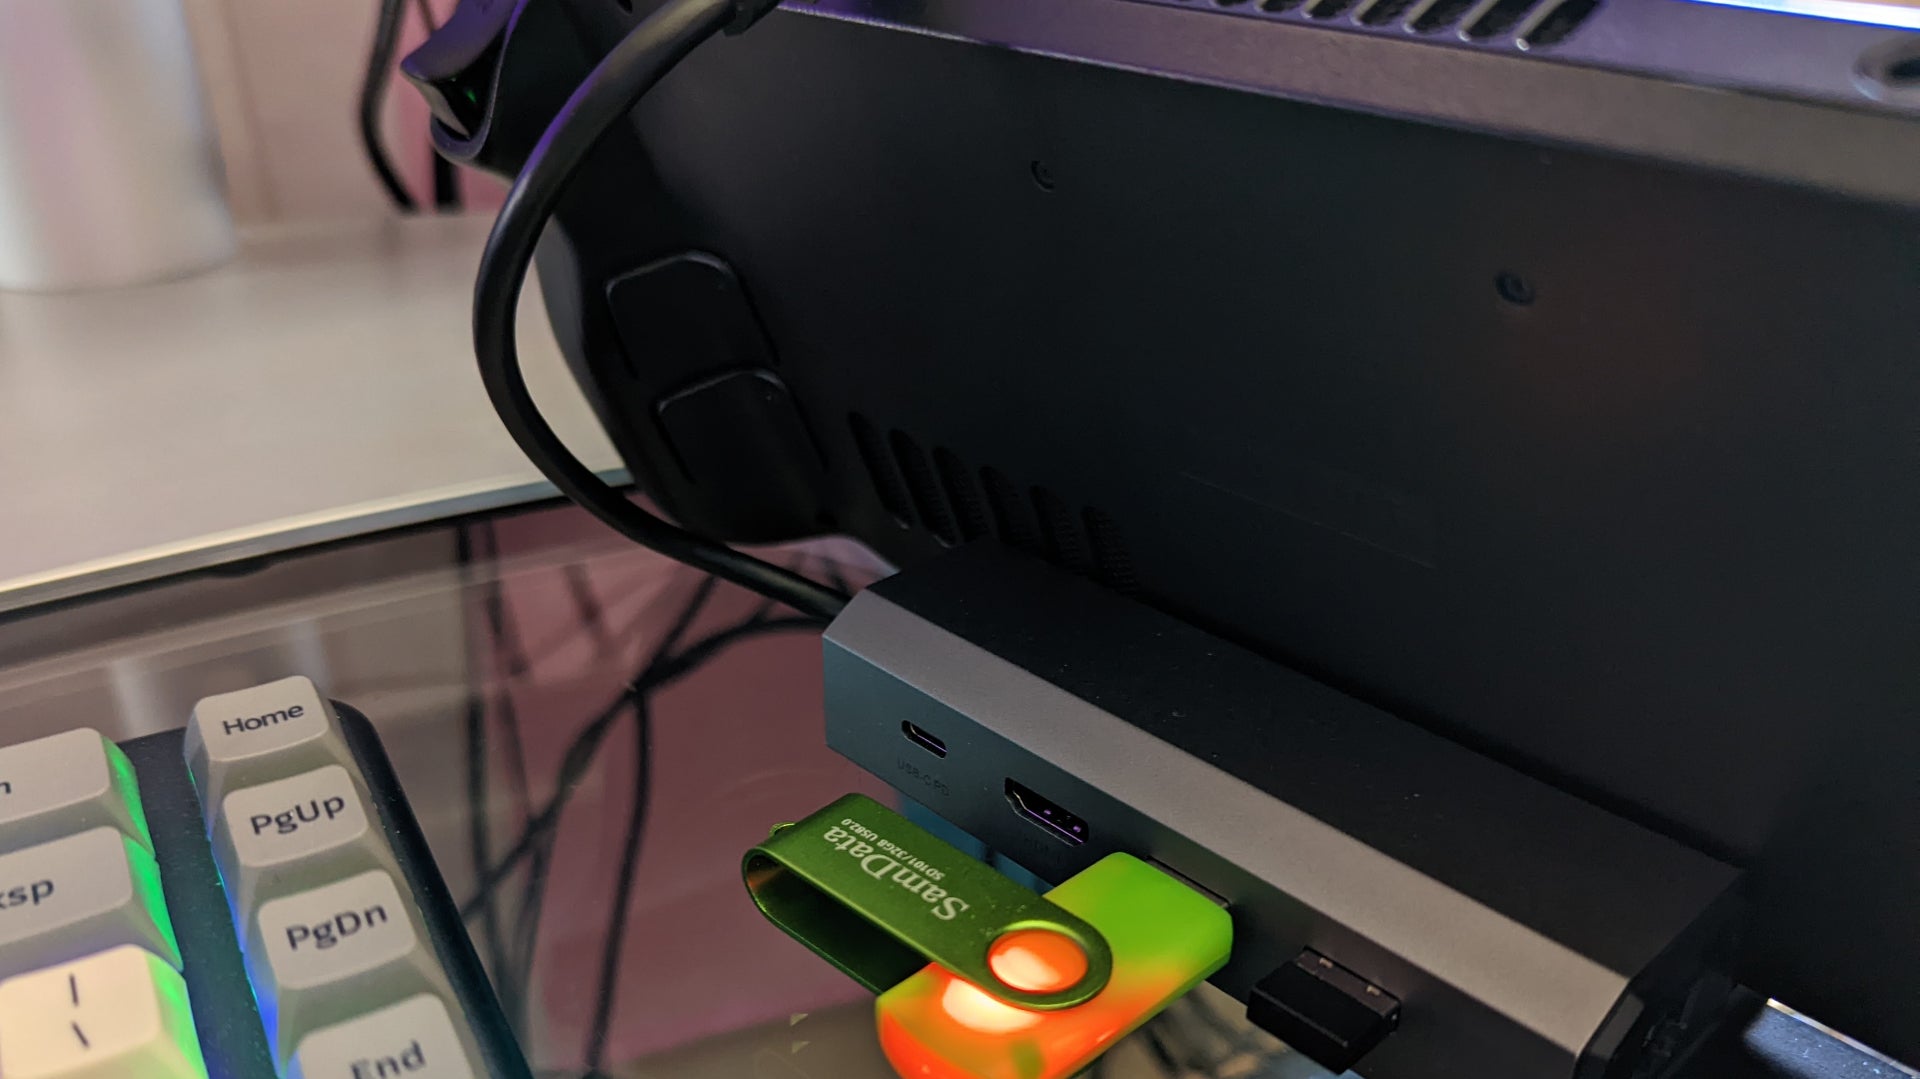
Perhaps taking design inspiration from Apple, the Steam Deck has just a single USB-C port, forcing you to work around this constraint for all your connectivity needs. The Steam Deck is still quite young and doesn’t have a whole bunch of peripheral options available yet. For reasons I’ll explain, you may wish to opt for a comprehensive USB hub over a sleeker (or more home-theatre friendly) custom dock. (If you’re really ambitious with peripherals, you might need to find a hub that plugs into the wall and has its own power.)
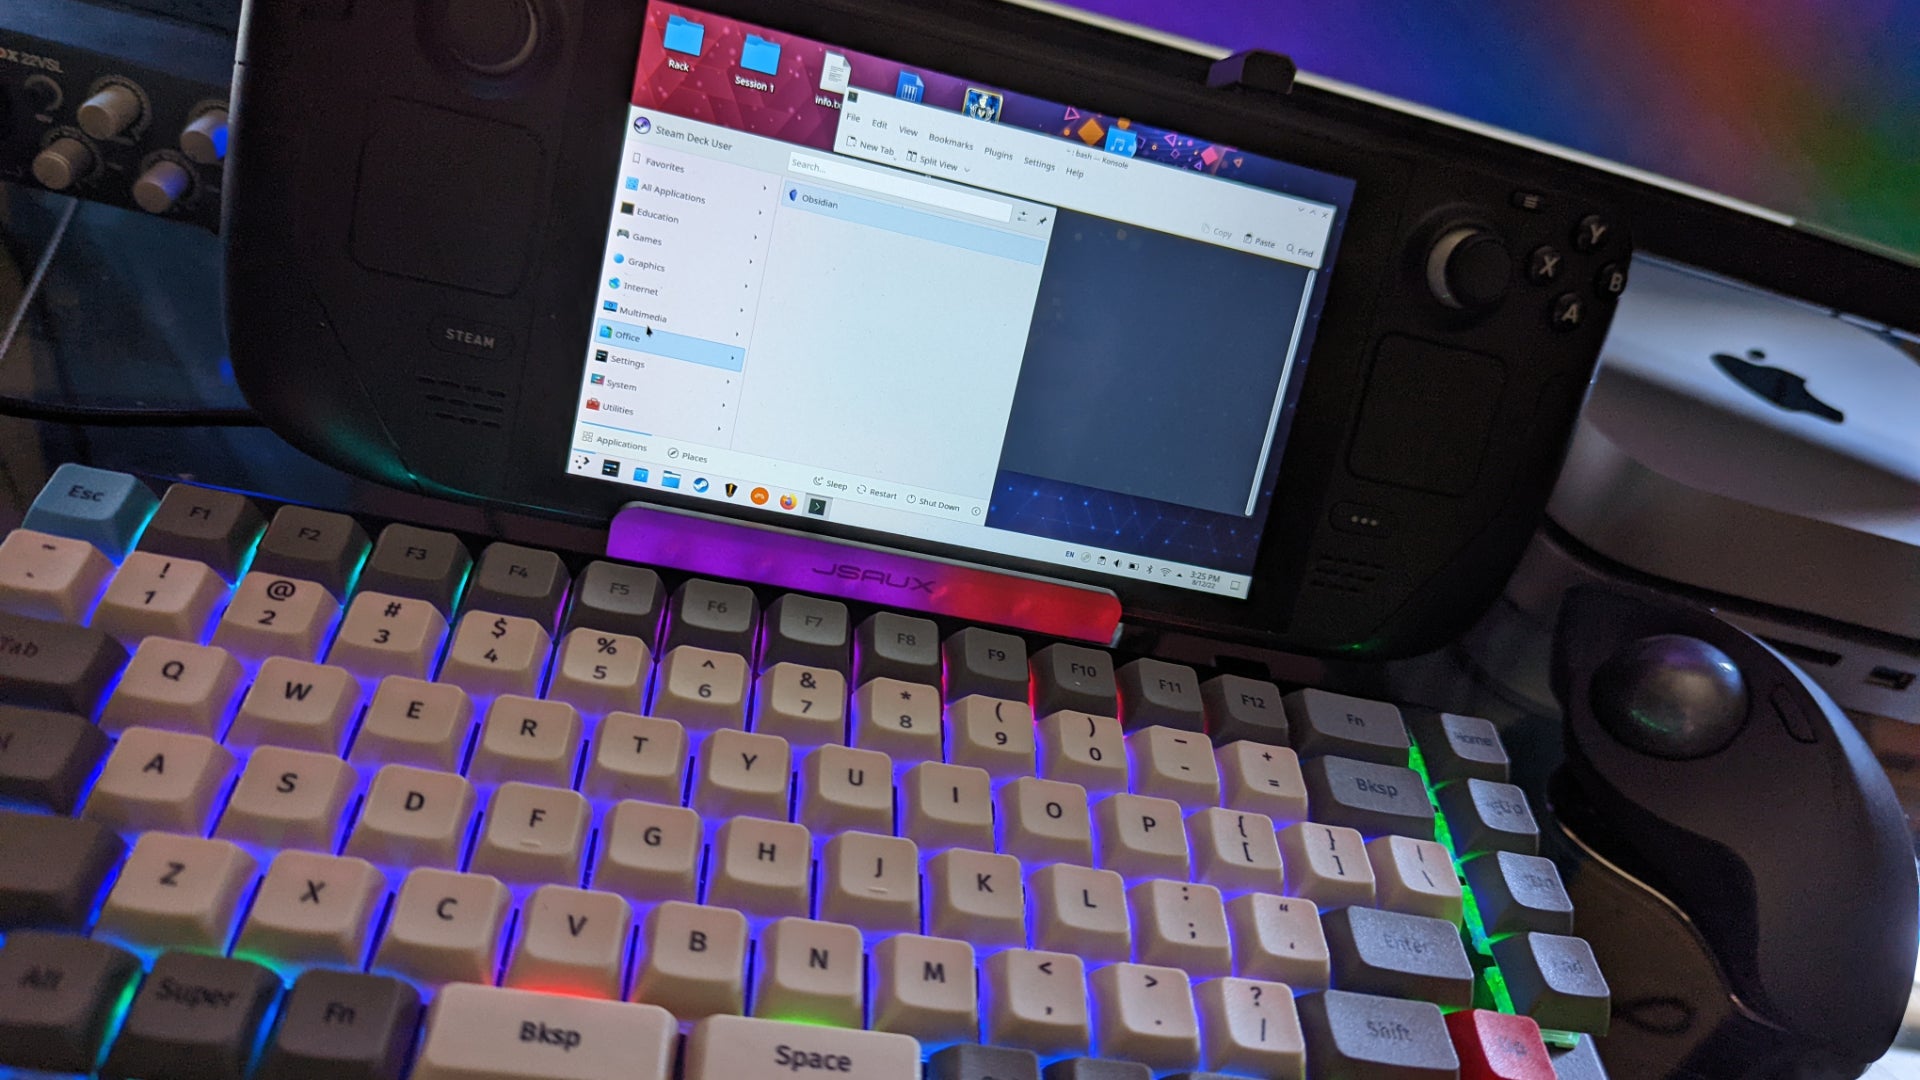
I’m currently using the Jsaux Steam Deck dock and, well, it’s fine. It holds the Deck and provides two USB-A 2.0 ports (gross), an Ethernet port, an HDMI out, and power in. A right-angle USB-C cable plugs into the top of the device and sends everything through there.
Docks, like the upcoming one from Valve itself, are very much a “set it and forget it” device. For computing uses, however, you may find yourself needing to pick the device up from time to time, so having everything anchored down to a single spot is just a little too inconvenient. I’ve found that the Steam Deck just needs to be picked up sometimes, especially when used without an external monitor. And a Nintendo Switch-like dock kind of interferes with that.
If the dock life’s not for you, a USB-C hub with a ton of great ports can do the trick, perhaps alongside a structural dock that is useful if you still want to stand the Deck up. Otherwise the Deck can lay flat well enough, provided you don’t obstruct its heat vents.
Moving on to input, you’ll likely want a keyboard with a small footprint. Any tenkeyless or 75%/60% layouts will probably do fine. You may also want to consider a keyboard that has extra USB ports for a mouse, freeing up the USB hub or dock’s limited ports for other uses.
I recommend a trackball over a traditional mouse. You might be computing in some cramped spaces with the Steam Deck, and not needing to drag a physical mouse around can make life much easier.
You should also keep an audio cable around to connect the headphone jack to speakers; the Deck has a 1/8-inch output jack. This will come in handy if you’re having issues getting audio out of the device over USB-C for whatever reason.
Finally, consider getting a good set of Bluetooth headphones. Bluetooth connections are pretty reliable on the Deck (especially in Game Mode) though there can be a touch of audio latency if you’re using more performance-intensive applications.
With a set of headphones, a hub or dock, small keyboard, and trackball or mouse, you can hole up in a corner at a coffee shop or library and use the Deck like you would a laptop. People may want to talk to you about this setup, but you’ve no time for them; you’re living in the future.
Embrace Light Mode
Hang on, you vampires. Yes, I too have giant blackout curtains and am surrounded by screens typically featuring user interfaces set to dark mode. When using the Steam Deck’s small screen, though, you might want to switch to light mode, as it really improves visibility and readability. With light mode, I find myself squinting at the screen far less often, and I can even get away with lower brightness settings for the most part.
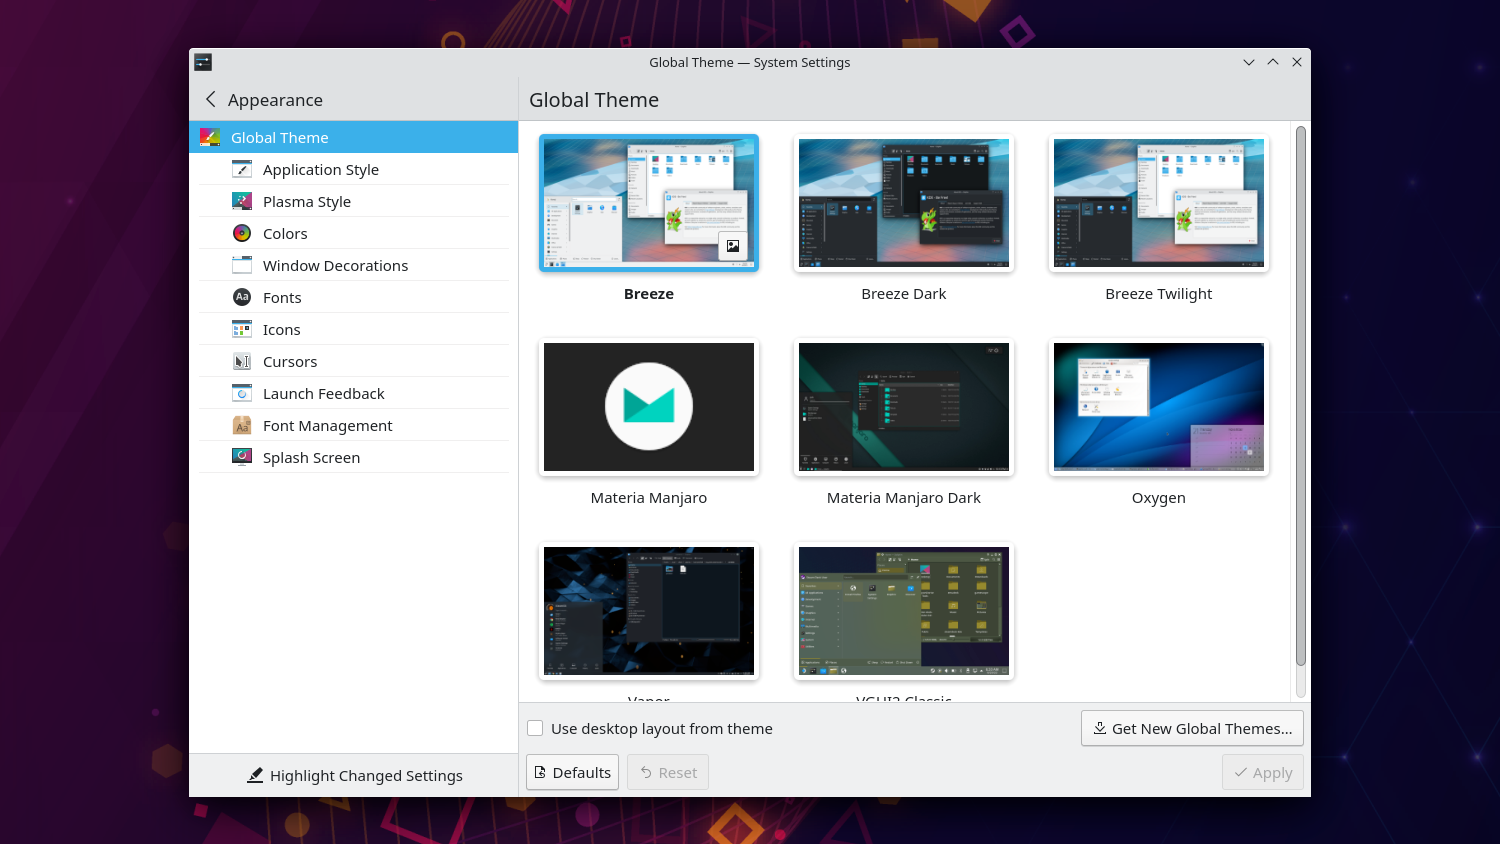
You can find this option in the System Settings: Just search for “Themes” and navigate to the “Global Theme” setting. Here you can try “Breeze” or “Breeze Twilight” as some pretty good light-mode options. You can also download some new themes from the app store…but remember when I said to expect some “Linuxisms?” Yeah, right now, at least for me, themes appears to be a bit buggy. They won’t crash or anything, but display elements don’t seem to always render or behave correctly.
Have A Backup Plan (Just In Case)
I’m kind of surprised I haven’t completely broken SteamOS yet; Compared to more typical LInux distributions, Valve’s operating system seems to have a few extra guardrails that prevent inadvertent software destruction. Still, I’d expect it’s easier to accidentally break this OS than a Windows or a Mac installation. As is the case with computing in general, have a good backup plan for your data, but also plan to have a backup of SteamOS itself should events take an unexpected turn.
Fortunately, Valve provides some pretty straightforward documentation on recovering the Deck. It seems a good idea to get a compatible USB drive and dedicate it to storing a copy of the OS should you find yourself needing recovery in a place where you can’t create a bootable disk from another computer.
Don’t Temper Expectations, Set Effective Use-Cases Instead
So once you have the right peripherals and you’ve made all the software tweaks to maximise the Deck’s desktop efficiency, what’s next?
This is where the fun begins (sorry). First, the Steam Deck’s Desktop Mode does basic computing without worry. Email, IM, web browsing (watch the tab count though), playing music, watching videos, text editing…it’s all here.
One of the most immediate benefits of the Deck’s Desktop Mode, however, is that it’s a great opportunity to start using Linux. Given how many games are playable on the Deck through the Proton compatibility layer, it’s not so farfetched to see a future when a gaming PC running Linux alone will satisfy most needs. The Deck offers a way to start planning for that exodus. Fire up a few Linux tutorials and gain some familiarity with using the Terminal (called Konsole on the Deck), package managers, sudo commands, all of it. As a PC replacement (or complement) the Deck offers a ton of computing capability in an amazingly tiny package.
Out in the wild, folks are using the Deck to program code and play around with music production. Other brave souls are finding workflows to develop games directly on the device too. But if those are beyond your computing needs or interests, the Deck could serve easily as a lightweight computing device for daily productivity tasks and it doesn’t take up much space. And if you can find an art program you like that runs on Linux, drawing tablets aren’t too hard to set up, with some being just plug-and-play.
There are also a variety of great productivity and multimedia apps that run on SteamOS’s Desktop Mode without much issue. For music, I highly recommend Bitwig; it can be challenging to learn, but it’s a genuine piece of music creation software. VCV Rack 2 is also a great piece of music software that runs well, but as it’s a simulated modular synthesiser, it requires a whole other set of knowledge to even use effectively. Also, that program will introduce you to the confusing world of audio on Linux and you might easily crash the program by selecting the wrong audio driver. The learning process can be fun though.
Other great programs include KdenLive for video editing, Krita for art, and even Blender for 3D stuff. SteamOS’s Discover app is very well populated, so you’re very likely to find apps that fit your needs.
The Steam Deck’s software and hardware will only improve over time. But I know that moving forward, my interests in the device as a portable computer are starting to edge out my need to run Cyberpunk 2077 while waiting for a bus.
Desktop Mode is so versatile and usable that I could very plausibly see a future in which the Deck is my go-to portable computing device, which just so happens to also be great at playing games. Sure, I may have to carry around a few more peripherals than I would a laptop, but I think that’s kind of a “feature,” if you will, of what you can do with it.
The Steam Deck is, in the playful sense of the word, a “hacking console” as much as it is a “gaming console,” the sort of fun Linux-project box I’ve been wanting for years now. I’m excited to see what else we can accomplish on this wonderfully open and flexible device. What do you plan to do with yours?
Leave a Reply