As winter comes to Animal Crossing: New Horizons, you might notice some changes to your town. Snow now falls on a regular basis, the air is filled with catchable snowflakes and the ground is a crunchy, snow-covered delight.
Winter brings brand new activities to the game as well as unique recipes only available through shooting down balloons or creating the perfect snowboy.
How to get Snowboys on your Animal Crossing: New Horizons island
Snowboys appear as two loose snow balls somewhere on your Animal Crossing island during winter. They spawn only once your town is completely covered in snow, which happens in mid-June for the Southern Hemisphere and mid-December for the Northern Hemisphere.

You will need to have some clear space on your island for the two snowboy balls to spawn.
On islands crowded with terraforming or furniture, creating a snowboy will be difficult. You may need to clear some space to build your perfect boy.
Once you have enough space and your town is filled with snow, you should spawn two unique snowballs daily.
How to build the perfect Animal Crossing: New Horizons Snowboy

To build the perfect snowboy, you’ll need to locate both snowballs on your island. If you’ve cleared an open space on your island you can get both snowballs to spawn opposite each other. While this isn’t essential, it does make building your snowboy much easier.
First, you’ll need to approach a snowball and kick it across the snow. This will make the snowball grow bigger and eventually, you’ll be able to grab hold and roll it.
If you accidentally destroy a snowball, simply enter a building and it’ll respawn elsewhere. Other dangers include the dastardly dung beetle.

This unique critter will grab onto your snowballs and move them around, possibly ruining your perfect snowboy plans. Make sure to net them before they can destroy your chances.
Each snowball needs to be rolled to a different size to make up the head and body of the snowboy.
The best thing to do is roll your snowballs close together so you can approximate the size you need.

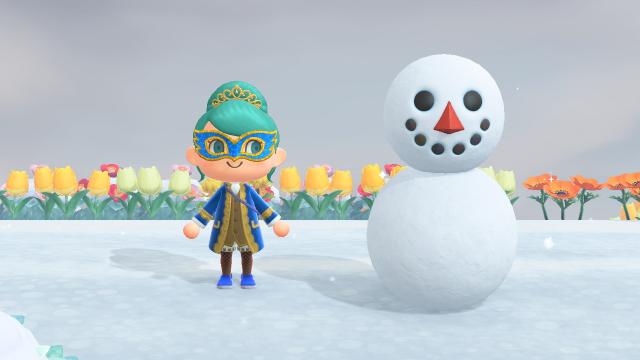
The perfect snowboy has a balanced head and body, so make sure your snowballs are in proportion. The head should be slightly smaller than the body, but not too small. While it can be hard to estimate, the head should be about 3/4 the size of the body.
Once you’re happy with the proportions, grab the ‘head’ snowball and push it onto the ‘body’ snowball. If you’ve done it right, the snowboy should inform you that it’s perfect and award you with a Large Snowflake and a new winter-themed DIY recipe for your efforts.
Snowboy Rewards
Snowboys will last four days in your town before melting away. Every day after being built, a snowboy will reward you with an additional Large Snowflake when you chat to them.
For every perfect Snowboy you build, you’ll receive a new winter DIY recipe. These include:
- Frozen Arch
- Frozen Bed
- Frozen Chair
- Frozen Counter
- Frozen Partition
- Frozen Pillar
- Frozen Sculpture
- Frozen Table
- Frozen Tree
- Frozen-Treat Set
- Ice Flooring
- Ice Wall
- Ice Wand
- Snowperson Head
- Three-Tiered Snowperson
There’s plenty of recipes to collect and you’ll need to perfect your snowboy creation technique to grab them all.
For those who may have lapsed from their Animal Crossing: New Horizons adventures, snowboys are the perfect (and very cute) reason to jump back in.
Leave a Reply