Final Fantasy VII Rebirth certainly has no shortage of mini-games. Like the original RPG in 1997, Rebirth has well over a dozen different kinds, some of which are a bit easier to understand than others. Gears and Gambits, a mini-game you’ll need to win in to finish the Cosmo Canyon Protorelic arc, is perhaps one of the most challenging, as it requires you to build a team of robots and deploy them against evil Flans.
For starters, Gears and Gambits has a confusing HUD. And the burden of needing to learn what is essentially an entire strategy game unto itself while moving through a deeply emotional narrative arc isn’t easy. In my case, the whiplash between shedding tears during cutscenes and then “oh god, I need to pay attention to real-time strategy?” was…a lot. If you’re struggling with Gears and Gambits, then these tips should help you out. Take it slow, learn the rules of the game, and you’ll win. Patience is perhaps the most important tip I can provide here.
Gears and Gambits 101: The basics
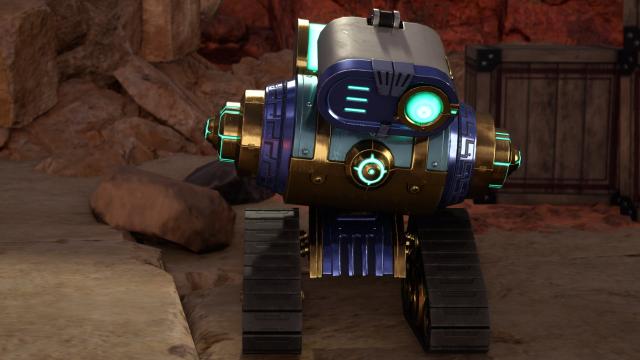
Gears and Gambits is very similar to Fort Condor, the minigame introduced in FF7 Remake’s Intergrade expansion and reappearing in Rebirth’s Junon-area protorelic quests. In Gears and Gambits, you deploy robots to both attack a main enemy and defend bases. You’ll configure their abilities prior to the game, but the robots will largely act of their own accord. In general, you’re trying to get your robots to advance to the center of the map to attack and defeat the main boss while also fighting smaller enemies and defending the three crystal “bases” from which your robots will spawn.
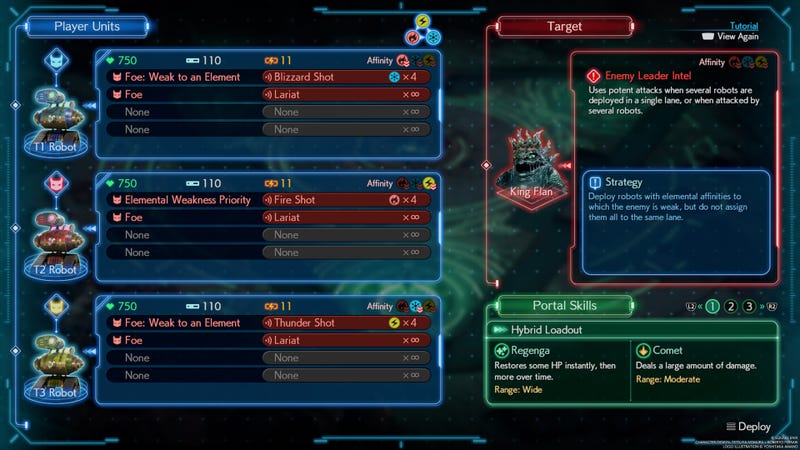
During the game, you’ll get three robot models to spec out and build, referred to as robots T1, T2, and T3. Each robot has five commands you can configure prior to the match, ranging from attacks and how they prioritize them, to commands to heal themselves and allies.
You’ll be able to deploy as many of these robots as you can based on how much your battery meter in the lower-left-hand side of the screen is filled up. Which commands you’ve configured for your robots ahead of time will influence how soon you can deploy each model.
You will also have two Portal Skills which can be attacks, healing spells, or buffs to help your robots out. You can use one of each during a game and can deploy them whenever you want.
Gears and Gambits 102: Understanding elemental damage and HUD indicators
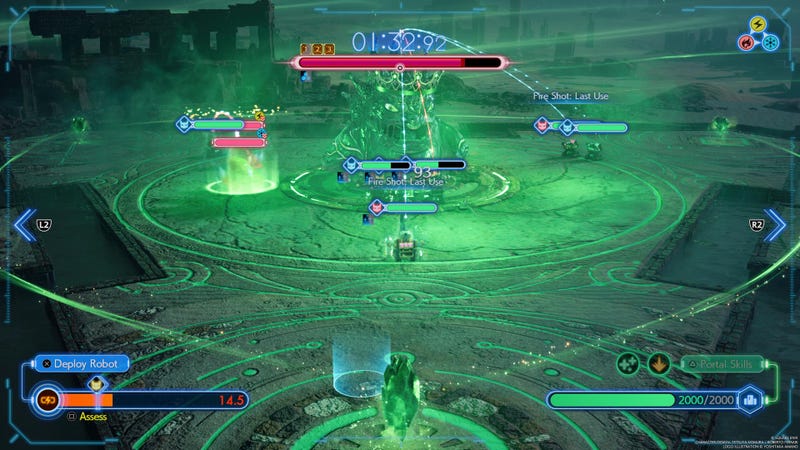
Gears and Gambits has a triangle of elemental strengths and weaknesses that’s similar to Fort Condor’s Defense-Ranged-Vanguard dynamic. Fire is effective against Ice. Ice is effective against Lightning. Lightning is effective against Fire. That’s pretty straightforward, but there are a few things that make reading Gears and Gambits’ HUD icons a little confusing.
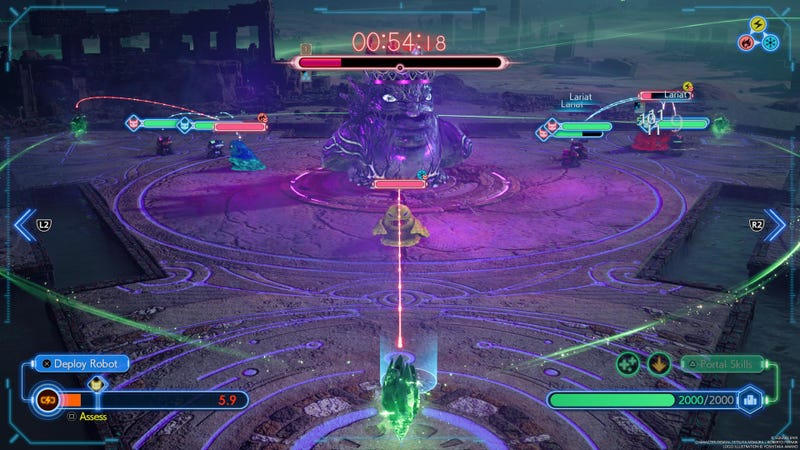
As enemies spawn and advance toward your bases, you’ll notice a health bar and elemental sign above each enemy’s head. This is where things can get confusing, as you might at first assume that the elemental sign above an enemy reflects their elemental alignment. This is not the case: Elemental signs above enemies’ heads indicate their weakness, so you should deploy robots against these enemies which can make attacks that match that elemental alignment.
Gears and Gambits does another thing that’s not very helpful: It assigns the robot types different colors. T1 is blue; T2 is red; and T3 is yellow. While that may match the elemental signs, it doesn’t mean that T1 will always cast Blizzard, or that T2 will cast Fire. Make sure you check which abilities your robots have before and during the game.
When deploying a robot, you’ll see a HUD menu on the right side that includes its name, health, cost, and elemental affinity across the top row. The affinity indicator will tell you what this robot is weak against, not what kind of elemental attack they’ll deal. Under this bar you’ll see five entries for their available commands, which they’ll cycle through in order from top to bottom. You’ll want to look on the right side of each command to see which kind of elemental attack the robot can deal. Select the one that matches the elemental sign on top of an enemy in order to damage it effectively.
Gears and Gambits 103: How to configure your robots correctly
You can choose pre-made configurations for each of your three robots at the start of each game by hitting square (this is not available in Hard Mode). I think it’s best to start with these, as Gears and Gambits is just way too confusing at first to take on the burden of assigning commands you may not even be familiar with yet.
Getting through the first three out of four matches of Gears and Gambits is very doable with the pre-made option. You may want to edit them a little for the third one, but if you pay attention to what’s going on during the game, you should be okay. The fourth game is where things really get tough.
Configuring the robots for victory wasn’t easy, and I ran into a lot of trial and error. In the end, this was the configuration that saw me through the final match:
T1 Robot:
- Elemental Weakness Priority = Blizzard Shot
- Ally: HP ≤ 50% – Cure Multishot
- Self – Haste Field
- Foe – Lariat
- Self: Modify HP & Cost – HP +150
T2 Robot:
- Elemental Weakness Priority = Fire Shot
- Ally = Bravery Multishot
- Foe = Lariat
- Self: Modify HP & Cost = HP +300 | Cost +15
- Self: Modify HP & Cost = Cost -20
T3 Robot:
- Elemental Weakness Priority = Thunder Shot
- Self = Nullemental Field
- Airborne Foe Priority = Gravity Shot
- Foe = Lariat
- Self: Modify HP & Cost = Cost -40 | HP-200
Portal Skills:
- Regenga
- Comet
I preferred to match the colors of the robot with the kind of attack they would spit out, as this way I could easily choose the blue robot to attack with Blizzard, red with Fire, and yellow with Thunder. Gears and Gambits is a pretty complex game though, and there’s a fair degree of randomness in how the robots and enemies interact with each other, so you may (and probably will) need to tweak the loadout that worked for me.
My overall philosophy was to have the robots attack the smaller enemies as soon as possible. That way, if a number of them were ganging up on one of my bases, I could deploy robots that would handle them swiftly—and who would then go on to attack the main boss in the center of the map. I then prioritized buffs like Haste and Nullemental Field as well as Cure Multishot and Bravery Multishot to keep the robots healed and outputting more damage. I hung onto Regenga as one of my Portal Skills to bail me out of a bad situation, and relied on Comet to accelerate the damage on the main boss once they were sufficiently surrounded by robots.
This strategy might differ from yours. But I want to stress that doing well in Gears and Gambits amounts to more than just having the right loadout. You need to have a plan in mind, with choices that should hopefully follow that plan, thus taking you to victory. I found Gears and Gambits harder than Fort Condor at first, and more demanding of my attention during the match.
Though Gears and Gambits can feel overwhelming and burdensome at first, I did come to like it toward the end. I also found it worth pushing through, as the narrative payoff of the Cosmo Canyon Protorelics was far and away one of the most memorable moments in the game—especially if you’re a fan of the original FF7 and 2020’s Remake.

I heartily recommend putting up with what might at first feel like a very cumbersome and inconvenient mini-game for what is otherwise an essential story in this remake saga of FF7.
Leave a Reply