
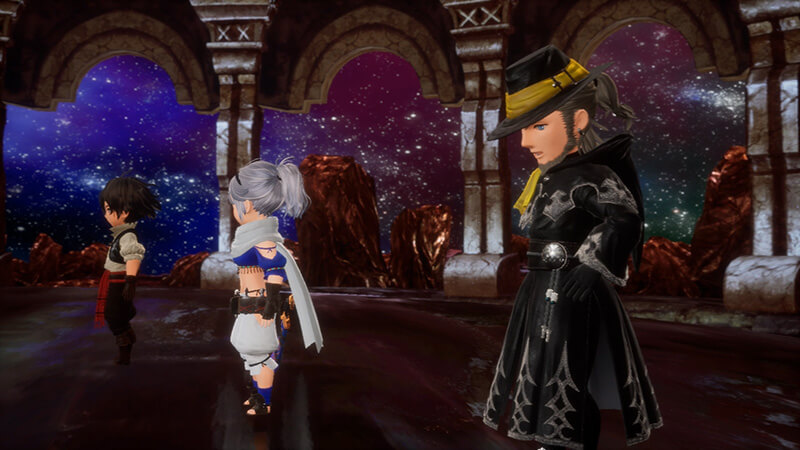
Bravely Default 2, out now for Nintendo Switch, is both a lot like and not at all like many other JRPGs you’ve played. For starters, combat is defined by the Brave/Default system, which allows you to shake up the turn order in battles for strategic gain. But the main big wrinkle is the job system.
Sure, you’ve no doubt played an RPG with a job system. (See: Final Fantasy Tactics, Final Fantasy XII, probably some other games that don’t start with Final.) It works much the same in Bravely Default 2, where you assign various roles to characters in your party which will change their stats, moves, and ideal equipment. Anyone can equip any job but some handle certain roles better than others: nothing terribly new there. Yet Bravely Default 2’s job system can quickly become overwhelming.
As Ethan noted in his impressions of the game, Bravely Default 2 often puts you in awkward positions where you’ll have to overhaul your job assignments. Often in games like this you stick to one job for a while. In Bravely Default 2, however, your mage might be a Black Mage one battle, a Red Mage the next, a Beastmaster the next, and a Pictomancer after that, before doing a stint as a Spiritmaster for a tough boss fight and then reverting to Black Mage duties once you return to the rinse-wash-repeat motions of moving down cannon fodder.
And this is to say nothing of sub-jobs. Yes, each character can rock two jobs — a main job and a sub-job — at once. Every job has 12 levels. At every level, you’ll unlock a new ability for that job. You can only use the active (grey) abilities for any equipped main or sub-jobs. Passive (green) abilities, once unlocked for a character, can be assigned regardless of that character’s current job. Beyond that, each job has two “specialties,” or perks. The first is generally helpful but not much to write home about. The second, which unlocks when you max out a job, is often a game-changer. You’ll only earn job points — basically, experience points that level up the character’s job but not their overall level — for whatever role is currently set as the main job. The main job dictates whatever that character’s special ability (think: ultimate) is.
Each of your heroes has different inclinations, too. Seth — also known as The Walking Plot Device — is a well-rounded character who can take well enough to any job but is best at physical roles. Gloria and Elvis are a bit slower and have lower physical stats, thus excelling in magical roles. Adelle is a bruiser, has staggering HP and attack, and can kick the crap out of anyone if you assign her physical jobs. But, again, any character can equip any job. And there are a lot of jobs.

All of this leaves the door open for some serious optimisation. To save you some trial and error, here are some character job builds I found very useful myself over the course of 40-plus hours playing this sprawling RPG. I’ve found these main/sub-job combos, which you should have access to by the end of the game’s tremendous third chapter, to be the most broadly useful for the wide variety of situations Bravely Default 2 sticks you in. Give them a spin.
Seth
Dragoon/Monk: Few moves in the game are better than Pressure Point, an ability that unlocks when you get a Monk to level 11. For one battle point, or BP, you’ll unleash an attack that can easily dish out 2,000 or more damage. Better yet, it’ll cut right through any enemy’s Default, so you won’t see any damage reduction from attacking an enemy in that state. Monks can also unlock a passive ability that boosts their damage by 80 per cent if they don’t equip any weapons.
The catch is that Monks are fairly slow, so assigning it to Seth as a main job will cut into his naturally high speed. It’s better to keep the Monk as a sub-job — allowing him to still use Monk attacks — and assign him a main job that prioritises speed. Really, any speedy job will do the trick. I just prefer Dragoon, since it has a high attack stat and quickly unlocks a fairly powerful electric move. The Thief job is fast, too, but once you level it up all the way, it’ll make it so any moves that use BP (which recharges every turn) will use MP (which does not) instead. Worse, you can’t disable that, and Pressure Point consumes a significant amount of MP. Essentially, going with Thief as your main limits the limitless potential of Pressure Point.
You can make this build even more unstoppable by equipping the Sub-Job BP Saver ability (gained at Pictomancer level nine) which makes it so any moves affiliated with a sub-job won’t use any BP. Equip that ability, set Monk as Seth’s sub-job, and you’ll be able to use Pressure Point four times in a row, which is usually enough to wipe out an entire battlefield of rank-and-file enemies.
Gloria
Red Mage/White Mage: Gloria is peerless as a healer, so you’ll want to assign her a healing-focused job. Definitely focus on levelling up her White Mage all the way, as doing so will unlock Curaga, the most potent healing spell in the game, and Arise, which will fully revive any down-and-out party member. Then put White Mage in the sub-job role.
When a Red Mage is fully leveled up they’ll unlock the Chainspell perk, which makes it so every spell you cast is cast twice, back-to-back, for no cost to MP. In the middle of a tough boss fight, when your entire team is hanging on by a thread, the option to cast Curaga twice in a row at no extra cost to your MP or BP is a godsend.
Hunter/Freelancer: Gloria is best when set up as a healer, but, if you’re feeling confident — to the point where, screw it, you don’t need a healer, you’ll just use potions — you can give her a set of jobs that will send her damage output into the stratosphere. Hunters learn a series of moves that are particularly effective against specific enemy types. (The Bug Slayer move is great against bugs, the Aquatic Slayer against fish and stuff, Plant Slayer against impossible burgers, and so on). When maxed out, Hunters deal bonus damage with all of those moves, and also deal more damage with bows.
Freelancers, meanwhile, will eventually unlock an attack called Body Slam, which deals more damage dependent on how much equipment they’re carrying. Bows tend to be heavier than other gear. Gloria starts out with a bow. You can probably do the maths.
Elvis
Red Mage/Beastmaster: High-level spells tend to burn MP. At level 10, a Beastmaster will unlock the MP Saver ability, which reduces the costs of spells by 20 per cent. With that ability equipped, Disaster — a comically powerful Red Mage move that costs 100 MP — suddenly becomes more viable. (That ability also makes it easier to spam the three high-level Black Mage spells: Firaga, Blizzaga, and Thundaga.)
I initially gave the Beastmaster job a test drive purely to unlock the MP Saver ability. Turns out, Beastmasters are extremely fun — and pretty good, too, particularly as a sub-job.
A Beastmaster can use a move to capture any weakened monster, Pokémon-style, and then release it on later enemies in the form of an overpowered single-use move. Yes, it’s as tedious as it sounds — unless you’ve unlocked the Beast Whisperer ability (at level 11). Equip that, and you’ll automatically capture one out of every three monsters Elvis defeats, whether or not you have Beastmaster equipped as a main or sub-job. (Note: You can only release those monsters when you have Beastmaster equipped.)
Spiritmaster/Black Mage: These two jobs have similar stats, so you could swap the order with little negative effect, but Spiritmaster offers a high magic defence, which could mean the difference between life and death for Elvis. Plus, Spiritmaster gives you access to a special ability that can heal up your entire team in one go, which is invaluable in a pinch.
Adelle
Vanguard/Swordmaster: Vanguard pairs well with plenty of jobs (the area-of-effect attacks you get with Berserker are a good pairing for the attack boost you get with Vanguard) but few top the Swordmaster class. By making Adelle a Vanguard, you’ll boost her already-high attack, defence, and HP. Enemies also tend to go after Vanguards more than other jobs.
Swordmasters, meanwhile, can set up a stance where they automatically counter any direct attack. You can also unlock an ability that has a 50 per cent chance of stacking a second counter. By assigning Swordmaster as the sub-job to Adelle’s Vanguard main job, you’ll take full advantage of both the Vanguard aggro and stat bonuses plus the Swordmaster counter prowess, essentially turning her into an electric fence that’s also somehow a magnet.
Bravely Default 2, like any JRPG, is all about preference and playstyle. These combos have proven reliable for me, and I’m sure they’ll serve you just as well. But there are also a ton of other job combos, and one of the more brilliant facets of this game is that you can swap between them on the fly. Take advantage of that. Test-drive every job to see what you like — and please do let me know if you stumble upon any god-tier matchups.
Leave a Reply