We’re about a month away from the release of The Legend of Zelda: Tears of the Kingdom, so this is your official reminder to make sure you’ve got enough storage available in your Nintendo Switch for its estimated 18.2GB file size. The last thing you want to do before starting arguably the biggest release of 2023 is to play a round of everyone’s favourite game: proper data management.
If you’re sick of having to pick and choose which game files you want to hang onto and which ones you want to delete so you can make room for new titles, then installing a micro SD card is the easiest way to bump up your storage capacity. The good news is that there are plenty of great micro SDs that will massively increase your Nintendo Switch‘s internal storage space for a pretty reasonable price.
Here’s how you can increase your Nintendo Switch‘s internal storage and give yourself a bit of wiggle room.
How much storage does the Nintendo Switch have?

While the Switch may be Nintendo’s flagship console, its storage capacity doesn’t feel very next-gen. There are a lot of things we love about the Switch and the updated OLED Model, but having such a piddly amount of internal memory isn’t one of them.
The standard Nintendo Switch and the Lite console both only have 32GB of internal storage, which, if you’re a fairly avid gamer, probably won’t last you all that long. While the Nintendo Switch OLED Model had its internal storage bumped up to 64GB, it’s not really a major improvement.
Just to circle back to Tears of the Kingdom for a moment – if you do download the game, it’ll eat up roughly 55 per cent of the standard Switch’s storage, and 28 per cent of the OLED Model’s.
What micro SD cards are supported by the Switch?
According to Nintendo, the various Switch models will only support the following types of micro SD cards:
- micro SD (up to 2GB)
- micro SDHC (4GB to 32GB)
- micro SDXC (64GB and above)
The Switch only supports read speeds up to 95MB/s, so while you can go out and buy an incredibly fast micro SD, it’ll be capped. With that in mind, we’ve selected a few micro SD options that’ll give you plenty of space to play around with, which all have read speeds over 100MB/s.
The best memory cards for the Nintendo Switch

Micro SD cards with at least 256GB
We’d recommend grabbing a micro SD with at least 256GB of storage. Even if you don’t think you’ll come close to capping 256GB, it’s better to have it and not need it than to need it and not have it. However, if you want to keep the cost down and you aren’t someone with a massive library, a 128GB micro SD should keep you covered.
Here’s what we recommend:
- SanDisk Ultra Micro SDXC (128GB) – now $16.29 (usually $39)
- SanDisk Ultra Micro SDXC (256GB) – now $31.99 (usually $79)
- Samsung Evo Plus Micro SDXC (128GB) – now $21.98 (usually $30)
- Samsung Evo Plus Micro SDXC (256GB) – now $30.99 (usually $50)
Micro SD cards with at least 512GB
512GB of extra memory is a huge amount of storage space for a Nintendo Switch and should keep you well-covered. If you still happen to find yourself frequently capping your Nintendo Switch’s storage, even after you upgrade it with all that extra space, then we don’t think any size of micro SD card can really help you.
- SanDisk Ultra Micro SDXC (512GB) – now $64.90 (usually $159)
- Samsung Evo Plus Micro SDXC (512GB) – now $63.89 (usually $99)
For the brand loyalist
If you’re someone who likes all of their Switch accessories to match, SanDisk has an official collab Nintendo.
- SanDisk x Switch Micro SDXC (128GB) – now $33.36 (usually $59)
- SanDisk x Switch Micro SDXC (256GB) – now $52 (usually $79)
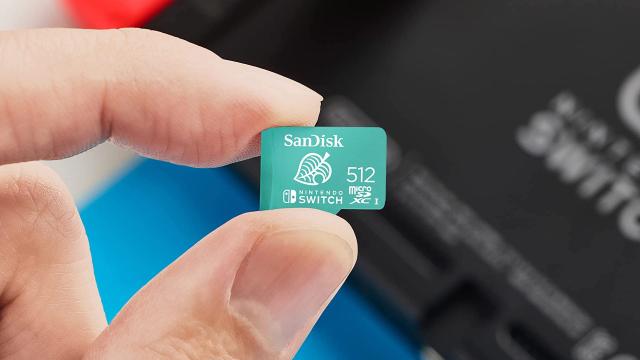
- SanDisk x Switch Micro SDXC (512GB) – now $85.88 (usually $179)
How to increase your Nintendo Switch’s storage
So you’ve bought yourself a micro SD, now what? Thankfully, upgrading your Switch’s storage is incredibly easy to do.
Here’s how you can boost the memory of the standard Nintendo Switch and OLED model by installing a micro SD card:
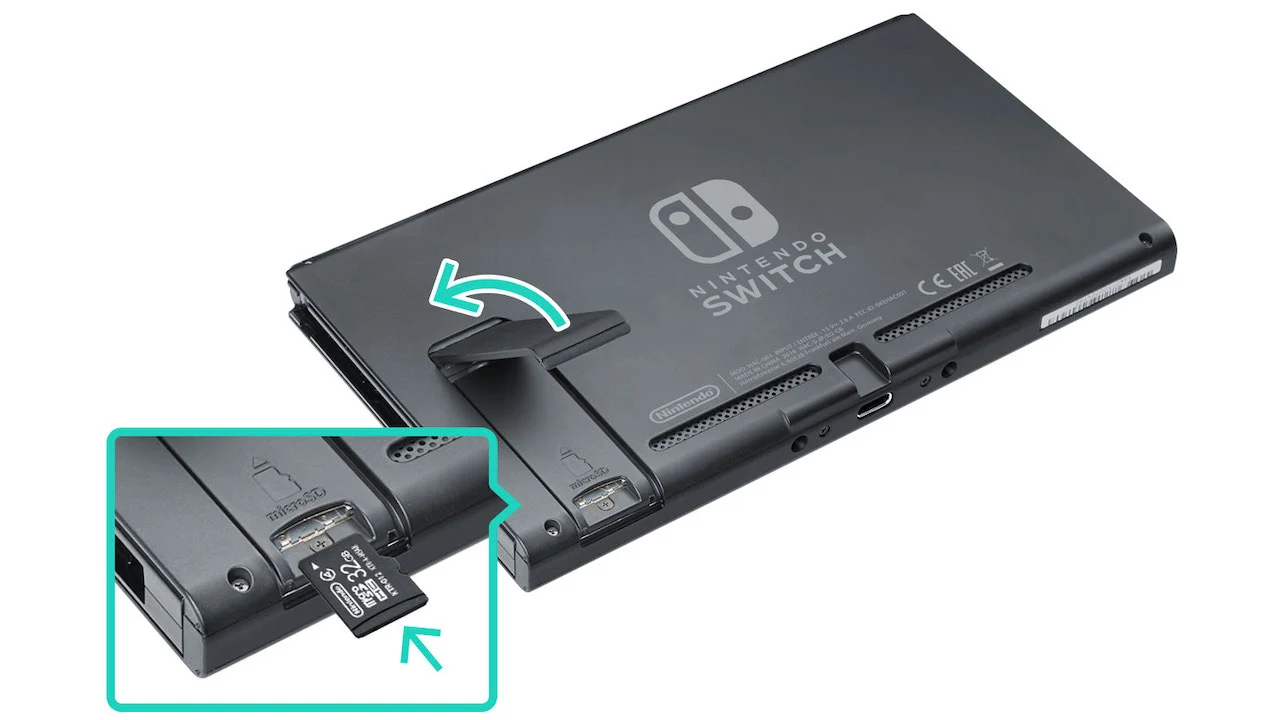
- Make sure your Switch is totally powered down and then remove it from the dock.
- Flip up the console’s stand and look for a tiny slot. Once you find it, pop your micro SD into it.
- With your micro SD inserted, turn your Switch on and head to the system settings.
- Head to the Data Management menu, select “Move Data Between System / Micro SD Card”, and then select the prompt to move data from the Nintendo Switch’s internal storage to the memory card.
- With the micro SD installed, you’ll now be able to select the games that you want to move onto it.
If you’re updating the Switch Lite, you follow a lot of the same steps as the standard and OLED Model. The only major difference is that the micro SD card slot is located on the back, bottom edge of the Switch Lite, opposite the game card slot.
This article has been updated since its original publication.
Leave a Reply